Follow our official account and reply with “entry materials” to obtain a comprehensive tutorial from beginner to advanced on microcontroller programming.
Our development board will guide you through the basics, and we will help you soar.
Written by | Wuji (WeChat: 2777492857)
The full text is approximately6352 words, and reading will take about10 minutes.
Have you ever had this experience?
You just joined a company, excitedly opened the project code, ready to dive in, only to find:
Variable names are a, b, tmp, function names are func1, process, and the parameter list is a jumbled mess, leaving you clueless about what is being passed in.
Macro definitions and constants are scattered throughout the file, making it necessary to search the entire file just to change a parameter.
The same logic is sometimes implemented using if else, sometimes with switch case, and occasionally with goto.
The indentation of code blocks is inconsistent, with curly braces sometimes at the end of a line and sometimes on a new line, leading to random style switches.
The worst part is, where are the comments? Oh, found one, a lonely line // Initialization standing there, telling you that this line of code is for initialization, which you already knew, but it lacks any specific information about what it initializes or why it is initialized.
You stare wide-eyed, feeling like you are not reading code but solving a mystery left by a predecessor. You curse inwardly: whose masterpiece is this? Are they testing my intelligence or my patience?
Don’t pretend, I know you understand. In fact, you might be scratching your head, wondering if your own code looks like this to others.
We have all encountered or created such situations to some extent.
Don’t underestimate these small habits and issues in coding. They accumulate like a snowball, growing larger and larger, and may eventually crush the entire project.
When your code is hard to read, debugging efficiency, maintenance costs, stability, and more can all explode.
This is like parking; as an experienced driver, I always make it convenient for others, which ultimately makes it convenient for myself.
Similarly, standardized programming is not just about making the code look good; it is about improving efficiency, reducing costs, ensuring quality, and promoting collaboration, ultimately leading to better products and a better version of yourself.
Through this article, you will learn:
• A set of effective C language programming standards for microcontrollers.
• Understanding why these standards are crucial.
• Mastering the secrets to writing clear, readable, and maintainable code.
• Learning how to showcase your professionalism through code, making your colleagues impressed during code reviews and genuinely praise you!
Buckle up, let’s get started!
1. Naming Conventions
Names are the identity cards of code. Good naming allows you to see the intent of the code at a glance, while poor naming drives you crazy.
1.1 Variable Names: Use descriptive English words or abbreviations that reflect the variable’s purpose and type. Use camelCase or snake_case consistently within the team. Local variables can have shorter names, while global and static variables should have longer names with prefixes.
○Example:int sensor_value; (snake_case) or int sensorValue; (camelCase)
○Avoid:int val;, int tmp;
1.2 Constants (Macro Definitions #define or const): All uppercase, with words separated by underscores. Reflect the meaning of the constant.
○Example:#define MAX_BUFFER_SIZE 256, const int MOTOR_SPEED_HIGH = 1000;
○Avoid:#define SIZE 256, const int highSpeed = 1000;
1.3 Function Names: Use verbs or verb-object phrases that reflect the function’s purpose. Use camelCase or snake_case consistently with variable naming style.
○Example:void init_system(void); or void initSystem(void);, int read_sensor_data(void); or int readSensorData(void);
○Avoid:void init();, int getData();, void process();
1.4 Enumeration Types (enum) and Structure Types (struct): Use meaningful names, typically capitalized or with specific prefixes (e.g., e_, s_). Enumeration members should be all uppercase, with words separated by underscores.
○Example:typedef enum { STATE_IDLE, STATE_RUNNING, STATE_ERROR } e_system_state;
○Example:typedef struct { uint16_t voltage; uint16_t current; } s_sensor_data;
Many people may, like me, struggle with English. If every detail is followed, it can be time-consuming, and just completing tasks on time is already a challenge.
In the past, I completely understood you, as I did the same. Who has the energy to manage so much?
However, with the help of AI, it can be done in minutes. You can write a preliminary version and then let AI optimize variable names, constants, and function names according to naming rules, greatly improving efficiency and standardization.
2. Code Formatting
Neat formatting can significantly enhance code readability.
Indentation: Use spaces for indentation; tabs are not recommended (as tabs display different widths in different editors). Typically, use 4 spaces for one level of indentation and enforce consistency within the team.
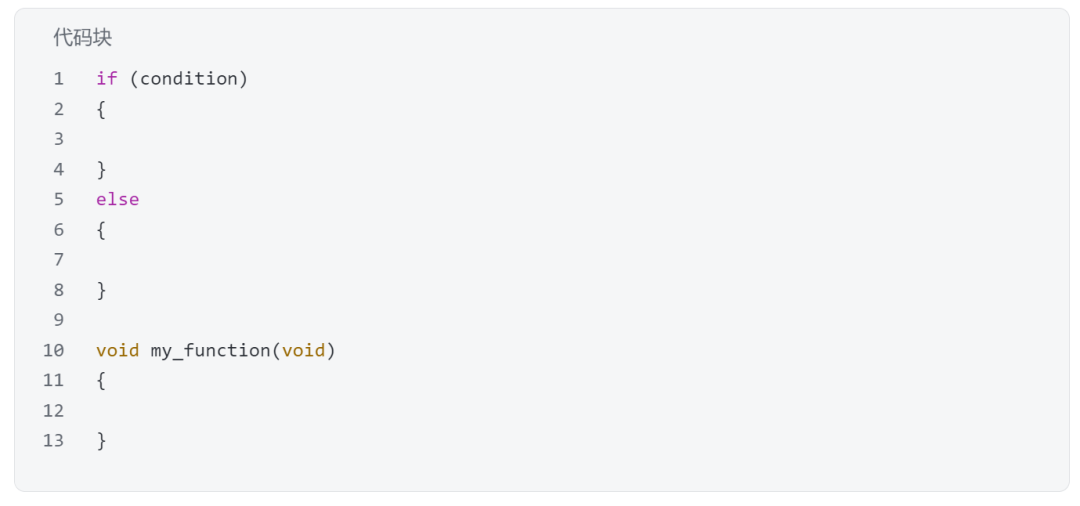
Curly Braces {}: Use the Allman style, meaning the left curly brace { is placed on a new line, aligned with the corresponding keyword (such as if, for, while, function names). The right curly brace } should also occupy a line by itself, aligned with the left curly brace.
○Example:
Blank Lines: Use blank lines to separate different logical blocks, function definitions, variable declarations, etc., to enhance the structure and readability of the code.
Spaces: Add spaces around operators, after commas, and after type casts, for example, a = b + c;, func(arg1, arg2);, (uint8_t)value;.
3. Comments: The Guide to Code
Good comments are not about quantity but about appropriateness, clearly explaining the “why” and “what” of the code, rather than simply reiterating “how” it is done.
•File Header Comments: Include the file name, author, creation date, version information, and a brief description of the file’s functionality.
•Function Header Comments: Explain the function’s purpose, parameters (name, meaning, value range), return values (meaning, possible values), potential side effects, and any considerations when calling the function.
•Key Code Block Comments: For complex logic, clever implementations, potential pitfalls, or operations closely related to hardware, add explanatory comments.
•Constant and Macro Comments: Explain their purpose and meaning.
•Avoid: Meaningless comments, such as i++; // i increments by 1.
•Code Example:
/* * File Name: sensor_module.h * Author: Wuji Microcontroller Programming * Creation Date: 2025-4-21 * Version: 1.0 * Description: Provides functions and definitions related to interaction with the sensor module. * Mainly includes sensor initialization, data reading, and status retrieval functions. */#ifndef __SENSOR_MODULE_H__ // Prevents the header file from being included multiple times#define __SENSOR_MODULE_H__#include <stdint.h> // Includes standard integer type definitions/* * @brief Defines the enumeration type for sensor data status */typedef enum{ SENSOR_STATUS_OK = 0, // Sensor is working normally SENSOR_STATUS_ERROR_INIT, // Sensor initialization failed SENSOR_STATUS_ERROR_READ // Sensor data reading failed // More statuses can be added as needed} e_sensor_status;/* * @brief Defines the structure for raw sensor data */typedef struct{ uint16_t raw_value; // Raw ADC value or other raw data from the sensor // More fields can be added based on sensor type} s_sensor_raw_data;/* * @brief Defines the structure for processed sensor data */typedef struct{ float processed_value; // For example, the value converted to an actual physical quantity // More fields can be added as needed} s_sensor_processed_data;/* * @brief Initializes the sensor module * @param None * @return e_sensor_status: Initialization result status * @retval SENSOR_STATUS_OK: Initialization successful * @retval SENSOR_STATUS_ERROR_INIT: Initialization failed */e_sensor_status sensor_init(void);/* * @brief Reads raw data from the sensor * @param raw_data_ptr: Pointer to the structure for storing raw data * @return e_sensor_status: Data reading result status * @retval SENSOR_STATUS_OK: Reading successful * @retval SENSOR_STATUS_ERROR_READ: Reading failed */e_sensor_status sensor_read_raw_data(s_sensor_raw_data *raw_data_ptr);/* * @brief Processes raw sensor data and converts it to usable values * @param raw_data: Structure of raw sensor data * @param processed_data_ptr: Pointer to the structure for storing processed data * @return e_sensor_status: Data processing result status (usually processing does not involve hardware, always succeeds, but still returns to maintain interface consistency) * @retval SENSOR_STATUS_OK: Processing successful */e_sensor_status sensor_process_data(const s_sensor_raw_data *raw_data, s_sensor_processed_data *processed_data_ptr);/* * @brief Gets the current status of the sensor module * @param None * @return e_sensor_status: Current operational status of the sensor module */e_sensor_status sensor_get_status(void);#endif // __SENSOR_MODULE_H__/* * File Name: sensor_module.c * Author: Wuji Microcontroller Programming * Creation Date: 2025-4-21 * Version: 1.0 * Description: Implementation file for the sensor module. Includes hardware initialization, data acquisition, and processing logic. */#include "sensor_module.h" // Includes the corresponding header file#include "hardware_abstraction.h" // Assume this is a header file for abstracting hardware operations#include <stdio.h> // Example requires printf, actual microcontroller may not need it// Global variable: stores the current status of the sensor module, using g_ prefix for globalstatic e_sensor_status g_current_sensor_status = SENSOR_STATUS_ERROR_INIT;/* * @brief Initializes the sensor module * @param None * @return e_sensor_status: Initialization result status * @retval SENSOR_STATUS_OK: Initialization successful * @retval SENSOR_STATUS_ERROR_INIT: Initialization failed * * @note This function configures the GPIO, ADC channels, and other hardware resources related to the sensor. * If hardware configuration fails, it returns an error status. */e_sensor_status sensor_init(void){ e_sensor_status status = SENSOR_STATUS_ERROR_INIT; // TODO: Call hardware abstraction layer functions to initialize sensor hardware // Assume here that HAL library or lower-level driver functions are called if (HAL_Sensor_Init() == HAL_OK) { // After successful hardware initialization, set module status to OK g_current_sensor_status = SENSOR_STATUS_OK; status = SENSOR_STATUS_OK; // Important code block comment: After initialization, perform a self-test on the sensor to ensure it is working properly if (HAL_Sensor_SelfTest() != HAL_OK) { g_current_sensor_status = SENSOR_STATUS_ERROR_INIT; // Self-test failed, update status status = SENSOR_STATUS_ERROR_INIT; // TODO: Log error or trigger alarm } } else { // Hardware initialization failed g_current_sensor_status = SENSOR_STATUS_ERROR_INIT; status = SENSOR_STATUS_ERROR_INIT; // TODO: Log error or trigger alarm } return status;}/* * @brief Reads raw data from the sensor * @param raw_data_ptr: Pointer to the structure for storing raw data * @return e_sensor_status: Data reading result status * @retval SENSOR_STATUS_OK: Reading successful * @retval SENSOR_STATUS_ERROR_READ: Reading failed * * @note Before reading, the current status of the sensor will be checked. If the status is abnormal, the reading operation will not be executed. * After reading, the raw value will be stored in the specified structure. */e_sensor_status sensor_read_raw_data(s_sensor_raw_data *raw_data_ptr){ // Parameter validity check, although simple examples can omit this, it is very important in actual projects if (raw_data_ptr == NULL) { // TODO: Handle null pointer error, e.g., assert or return error code return SENSOR_STATUS_ERROR_READ; // Or define a specific parameter error status } // Key judgment comment: Only attempt to read data when the sensor status is normal if (g_current_sensor_status != SENSOR_STATUS_OK) { // printf("Sensor not in OK state, cannot read.\n"); // Debug information, actual microcontroller can omit or use Log instead return SENSOR_STATUS_ERROR_READ; // Sensor status abnormal, return reading failure } uint16_t adc_value = 0; e_sensor_status status = SENSOR_STATUS_ERROR_READ; // TODO: Call hardware abstraction layer function to read raw value from ADC // Assume HAL_ADC_Read() returns ADC value, failure returns specific error value or checks return value if (HAL_ADC_Read(&adc_value) == HAL_OK) // Assume HAL_ADC_Read has a return value indicating success or failure { raw_data_ptr->raw_value = adc_value; status = SENSOR_STATUS_OK; } else { // Hardware reading failed g_current_sensor_status = SENSOR_STATUS_ERROR_READ; // Update module status to reading failure status = SENSOR_STATUS_ERROR_READ; // TODO: Log error or trigger alarm } return status;}/* * @brief Processes raw sensor data and converts it to usable values * @param raw_data: Structure of raw sensor data * @param processed_data_ptr: Pointer to the structure for storing processed data * @return e_sensor_status: Data processing result status (usually processing does not involve hardware, always succeeds, but still returns to maintain interface consistency) * @retval SENSOR_STATUS_OK: Processing successful * * @note This function performs linear conversion or other complex algorithms to convert raw ADC values to actual physical quantities. * For example, converting ADC values to voltage, temperature, humidity, etc. */e_sensor_status sensor_process_data(const s_sensor_raw_data *raw_data, s_sensor_processed_data *processed_data_ptr){ // Parameter validity check if (raw_data == NULL || processed_data_ptr == NULL) { // TODO: Handle null pointer error return SENSOR_STATUS_ERROR_READ; // Or define a specific parameter error status } // Key algorithm comment: Convert 12-bit raw ADC value (range 0-4095) to voltage value (assuming reference voltage 3.3V) // Formula: Voltage = (ADC_Value / 4095.0) * 3.3V const float ADC_MAX_VALUE = 4095.0f; // Use named constant instead of magic number, and add comment explaining its meaning const float REFERENCE_VOLTAGE = 3.3f; // Reference voltage value processed_data_ptr->processed_value = ((float)raw_data->raw_value / ADC_MAX_VALUE) * REFERENCE_VOLTAGE; // TODO: If more complex conversions are needed (e.g., non-linear, lookup table), implement here and add detailed comments explaining the algorithm or formula. return SENSOR_STATUS_OK; // Data processing usually does not fail unless input parameters are invalid}/* * @brief Gets the current status of the sensor module * @param None * @return e_sensor_status: Current operational status of the sensor module */e_sensor_status sensor_get_status(void){ return g_current_sensor_status;}// Assume the hardware abstraction layer function declarations, should actually be defined in hardware_abstraction.h/*HAL_OK: Assume the hardware operation success return valueHAL_ERROR: Assume the hardware operation failure return value*/typedef int HAL_StatusTypeDef; // Assume HAL status type is int#define HAL_OK 0#define HAL_ERROR -1HAL_StatusTypeDef HAL_Sensor_Init(void); // Initialize hardwareHAL_StatusTypeDef HAL_Sensor_SelfTest(void); // Sensor self-testHAL_StatusTypeDef HAL_ADC_Read(uint16_t *value); // Read value from ADC// Assume these functions have simple implementations for compilation exampleHAL_StatusTypeDef HAL_Sensor_Init(void) { /*printf("HAL: Initializing sensor...\n");*/ return HAL_OK; }HAL_StatusTypeDef HAL_Sensor_SelfTest(void) { /*printf("HAL: Sensor self-test...\n");*/ return HAL_OK; } // Or return HAL_ERROR to simulate failureHAL_StatusTypeDef HAL_ADC_Read(uint16_t *value) { /*printf("HAL: Reading ADC...\n");*/ if (value) *value = 2048; return HAL_OK; } // Simulate reading a value
4. Functions
Functions are the building blocks of programs.
•Single Responsibility Principle: A function should do one thing and do it well. The more single-purpose a function is, the easier it is to understand, test, and reuse.
•Control Function Length: Try to keep functions short; ideally, a function should not exceed one screen. Long functions often mean they are doing too much and can be split into smaller functions.
•Clear Interfaces: Function parameters and return values should clearly express inputs and outputs. Avoid using global variables as the main input or output of functions.
•Code Example:
#include <stdint.h> // Includes standard integer type definitions#include <stdio.h> // Example requires printf, actual microcontroller may need to replace with other output methods// Define some constants that comply with naming conventions for voltage conversion calculationsconst uint16_t ADC_MAX_VALUE = 4095; // Assume ADC is 12-bit, maximum value is 2^12 - 1const float REFERENCE_VOLTAGE = 3.3f; // Assume ADC's reference voltage is 3.3V/* * @brief Reads raw ADC value from the sensor hardware * @details This function is responsible for interacting with the underlying hardware to obtain the raw ADC value. * It does not know what this value represents and does not perform any conversions. * @param None * @return uint16_t: The raw ADC value read */uint16_t sensor_read_raw_adc(void){ // TODO: Simulate reading raw data from hardware ADC channel // Actual code would call lower-level driver or HAL library functions, e.g.: // uint16_t raw_value = HAL_ADC_GetValue(ADC_CHANNEL_SENSOR); // Assume reading hardware may fail, but for simplicity, this example omits complex error handling and return value checks // In actual applications, check the return value of the hardware reading function and handle errors uint16_t raw_value = 2048; // Simulate reading a mid-value, e.g., half of the reference voltage return raw_value;}/* * @brief Converts raw ADC value to actual voltage value * @details This function is responsible for performing mathematical calculations to convert the raw ADC data according to a specific formula. * It does not read hardware or handle subsequent data usage (e.g., printing). * @param raw_adc_value: uint16_t type raw ADC value * @return float: Converted voltage value (in V) */float sensor_convert_adc_to_voltage(uint16_t raw_adc_value){ // Parameter validation: Ensure input value does not exceed ADC maximum value to avoid potential conversion issues if (raw_adc_value > ADC_MAX_VALUE) { // Can choose to log a warning, return a special value (like NaN), or limit input // For simplicity, this example directly limits the input value raw_adc_value = ADC_MAX_VALUE; } // Perform conversion calculation: Voltage = (Raw Value / Maximum Raw Value) * Reference Voltage // Use floating-point for precise calculations float voltage = ((float)raw_adc_value / ADC_MAX_VALUE) * REFERENCE_VOLTAGE; return voltage;}/* * @brief Completes the task flow of sensor data acquisition, conversion, and reporting * @details This function acts as a coordinator, sequentially calling the functions for reading raw data and converting data, * then reporting the final result (e.g., printing to the console). * It does not concern itself with underlying hardware details or specific conversion formulas. * @param None * @return None */void sensor_process_and_report_voltage(void){ // Step 1: Call the function responsible for reading raw data // sensor_read_raw_adc() function hides the complexity of reading from underlying hardware uint16_t raw_data = sensor_read_raw_adc(); // Step 2: Call the function responsible for data conversion // sensor_convert_adc_to_voltage() function hides the formula for converting raw data to voltage float voltage_value = sensor_convert_adc_to_voltage(raw_data); // Step 3: Report the final processed result // In actual microcontroller applications, this might be sending the value to UART, updating an LCD display, storing in memory, etc. // Here, printf is used as an example reporting method printf("Sensor Raw ADC: %u, Converted Voltage: %.2f V\n", raw_data, voltage_value); // TODO: Based on the voltage value, further logical judgments or control outputs can be made, e.g., checking for over-limit // if (voltage_value > VOLTAGE_UPPER_THRESHOLD) { trigger_warning(); }}// A simple main function to demonstrate the calling process (in a microcontroller, this is usually called in a while(1) main loop)int main(void){ // In a typical microcontroller application, there would be system and peripheral initialization calls here // For example: System_Init(); HAL_ADC_Init(); etc. printf("Starting sensor data processing example...\n"); // Call the function responsible for the entire task flow // sensor_process_and_report_voltage() function is the entry point for the entire task sensor_process_and_report_voltage(); printf("Sensor data processing finished.\n"); // In embedded systems, the main function usually does not return but enters an infinite loop or OS scheduling // while(1); return 0; // To compile and run the example in a standard PC environment, keep return 0}
5. Variables: Allocate as Needed, Use Globals with Caution
•Prefer Local Variables: Prefer using local variables, as their lifecycle and scope are within the function, making them easier to manage and reducing coupling between different functions.
•Use Global Variables with Caution: Global variables can be modified anywhere in the program, making it difficult to trace issues. If global variables must be used, consider adding specific prefixes (like g_) or using static to limit their scope to the current file.
•Variable Declaration Location: Declare variables at the beginning of functions or code blocks and initialize them at declaration.
6. Eliminate All Magic Numbers
Sudden numbers appearing in code (like if (state == 5), delay_ms(100); where 5 and 100 are called magic numbers, making the code hard to understand and modify.
•Use Named Constants or Macro Definitions: Replace magic numbers with meaningful names.
○Example:#define STATE_PROCESSING 5, #define DELAY_SHORT_MS 100
○Use:if (state == STATE_PROCESSING), delay_ms(DELAY_SHORT_MS);
•Use Enumeration Types: For a set of related integer constants, using enum is a better choice.
7. Header Files: Clean and Tidy Interface Definitions
•Include Guards: Use #ifndef, #define, #endif at the beginning of each header file to prevent it from being included multiple times.
○Example:
#ifndef __MY_MODULE_H__#define __MY_MODULE_H__#endif // __MY_MODULE_H__
•Only Include Necessary Header Files: In .c files, only include the header files they need. In .h files, only include header files that define the types, constants, or function signatures declared within. Avoid unnecessary dependencies.
8. Error Handling and Assertions
•Return Value Checks: For function calls that may fail, check their return values and take appropriate error handling measures.
•Assertions (assert): During development and debugging, use assert to check for impossible situations or preconditions of functions. If an assertion fails at runtime, the program will terminate, helping you quickly locate the issue. Assertions are usually disabled in release versions.
This has many applications in the ESP32 codebase, especially for pointers, memory allocation, etc.
9. Control Structures
•Avoid Excessive Nesting: Try to reduce the number of nested if-else or loops; if it exceeds three layers, be cautious and consider extracting functions.
•Use goto with Caution: The goto statement can easily disrupt the linear flow of code, making it difficult to understand and maintain. Only consider using it in a few specific scenarios (like breaking out of multiple loops, unified error exits) and do so with caution.
Every line of code we write is not just to achieve functionality but also reflects your professionalism. Well-structured code is a silent communication between engineers and the best gift you can leave for your future self.
end

Below are more original works by Wuji on personal growth experiences, industry insights, and technical content.
1.What is the growth path of an electronic engineer? A 10-year, 5000-word summary.
2.How to quickly understand others’ code and thinking.
3.How to manage too many global variables in microcontroller development projects?
4.Why do most C language microcontroller developments use global variables??
5.How to achieve modular programming in microcontrollers? The practicality is astonishing!
6.Detailed explanation of the use and actual effects of callback functions in C language.
7.A step-by-step guide to implementing queues in C language, easy to understand and extremely detailed!
8.Detailed explanation of pointer usage in C language, easy to understand and extremely detailed!