1. Disk Structure
1. Physical Structure
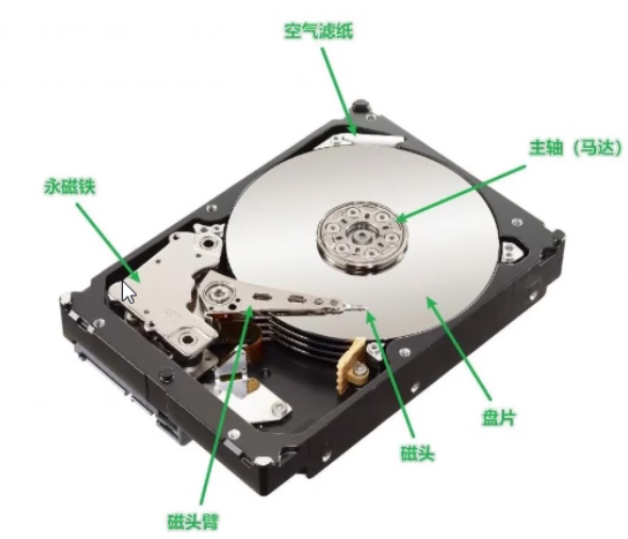
Platters: The disk has multiple platters, each with 2 surfaces.
Read/Write Heads: Each surface has one read/write head (the number of heads corresponds to the number of platters).
2. Data Structure
Sectors: The platters are divided into multiple sectors, each storing 512 bytes of data (the minimum storage unit; if less than 512 bytes, it is counted as 512).
Tracks:
Cylinders: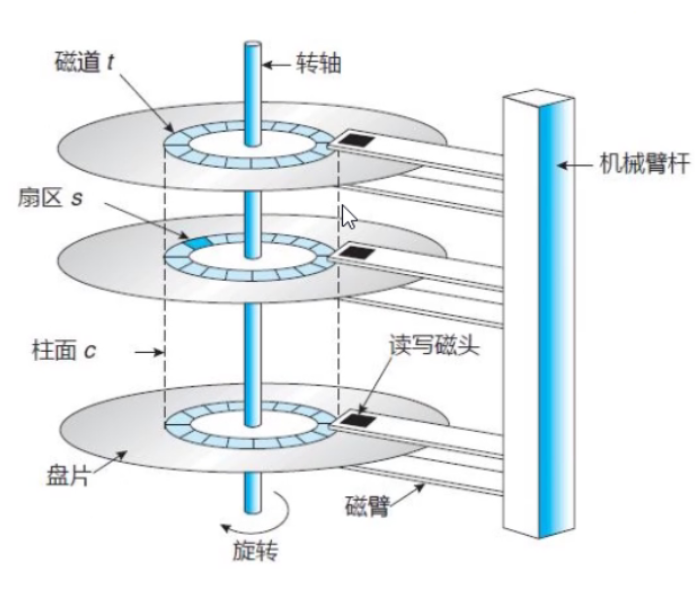
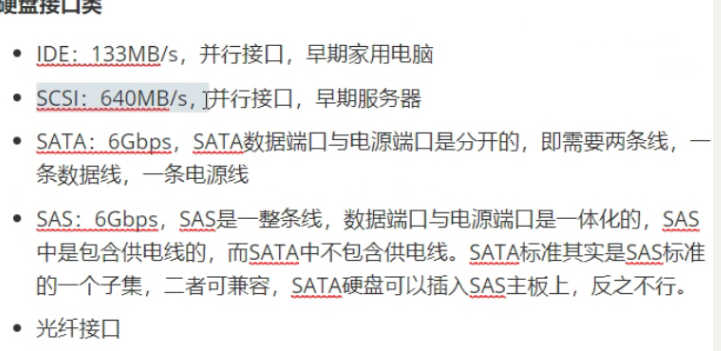
3. Hard Disk Interface Types
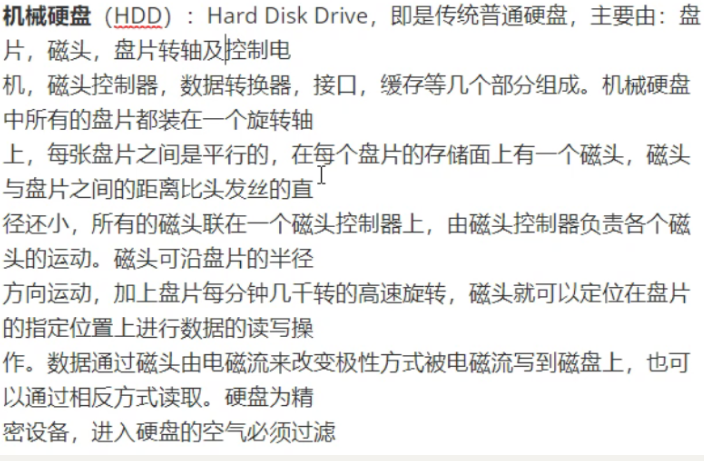
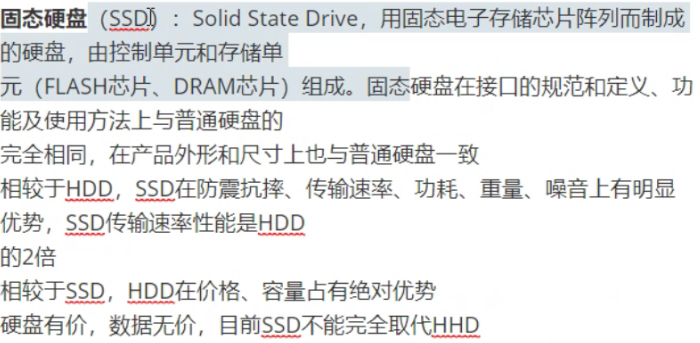
4. Mechanical Hard Drives and Solid State Drives
2. Disk Partitioning
1. Reasons for Partitioning
-
Optimize I/O performance
-
Implement disk space quota limits and improve recovery speed
-
Isolate system and applications
-
Install multiple operating systems
-
Use different file systems
2. Partitioning
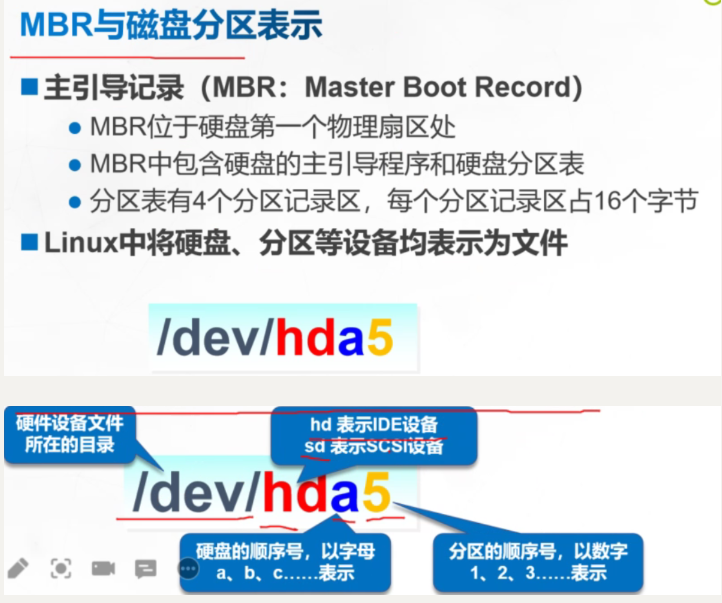
Extended partitions cannot be used alone and must be divided into logical partitions.
3. Disk Partition Structure
There can only be 4 primary partitions on a hard disk.
The numbering of primary and extended partitions is limited to 1-4.
Extended partitions are further divided into logical partitions.
The numbering of logical partitions will always start from 5.
3. File Systems
XFS File System
-
Partitions that store file and directory data
-
A high-performance journaling file system
-
The default file system used in CentOS 7 (supports data recovery)
SWAP, Swap File System
-
Creates a swap partition for the Linux system
Other File System Types Supported by Linux
-
FAT16, FAT32, NTFS
-
EXT4, JFS
disk Command
-
View or manage disk partitions
fdisk -l [disk device]
or
fdisk [disk device]
fdisk -l to view the overall status and partitioning of the hard disk
-
Device: The device file name of the partition.
-
Boot: Whether it is a boot partition. If so, it is marked with a “*”. Start: The starting position of the partition on the hard disk (cylinder number).
-
End: The ending position of the partition on the hard disk (cylinder number).
-
Blocks: The size of the partition, measured in blocks, with the default block size being 1024 bytes.
-
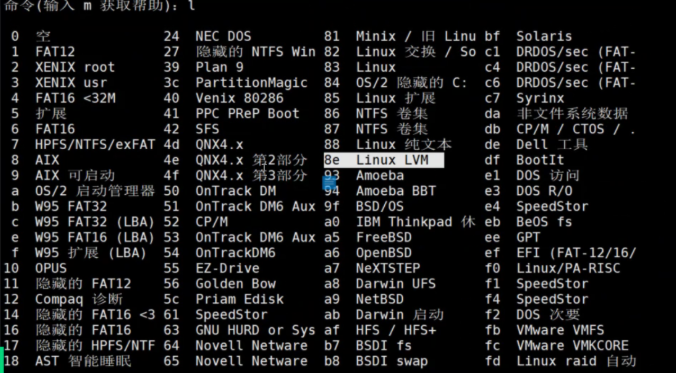
Id: The system ID number corresponding to the partition. 83 indicates an XFS or EXT4 partition in Linux, while 8e indicates an LVM logical volume. LVM is a logical mechanism for managing disk partitions in the Linux operating system, which will be discussed in later chapters.
-
System: The partition type. After a new hard disk device is recognized, new partitions can be created on that disk. In Linux, the processes of partitioning and formatting are relatively independent; the operations for formatting partitions will be explained in subsequent content.
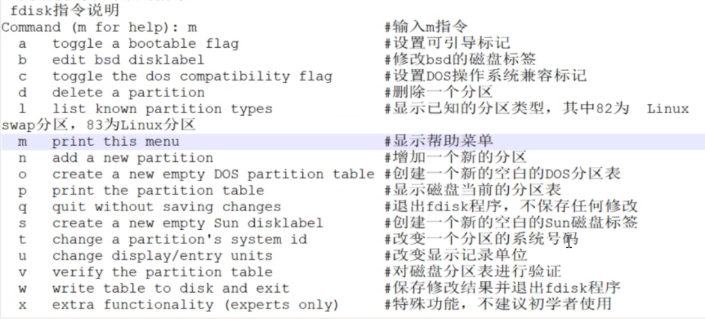
Common Commands in Interactive Mode
-
m, p, n, d, t, w, q
mkfs Command
-
Make Filesystem, create a file system (formatting)
Boot partition: The partition that boots the system, marked with ” * “: boot partition.
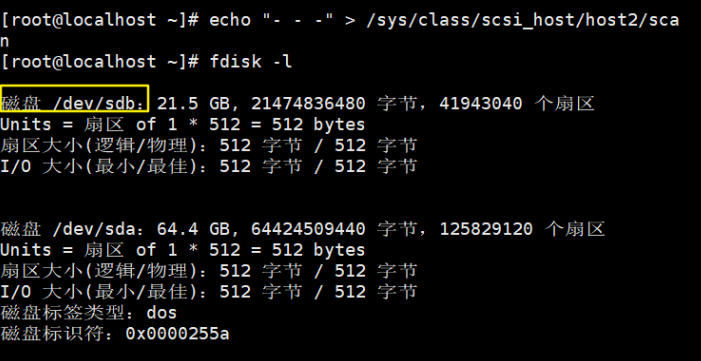
echo “- – -” > /sys/class/scsi_host/host2/scan
Scan the SCSI bus without rebooting, directly scan the hard disk.
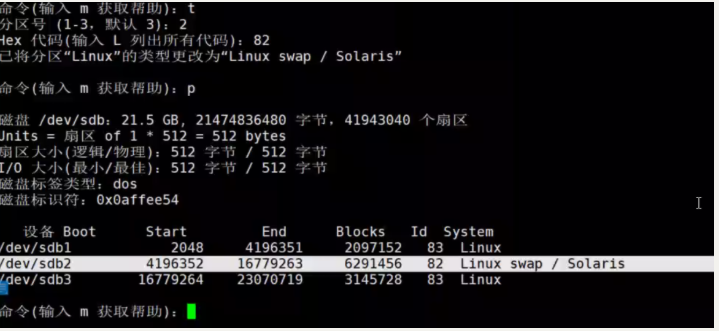
Change the type of a partition.
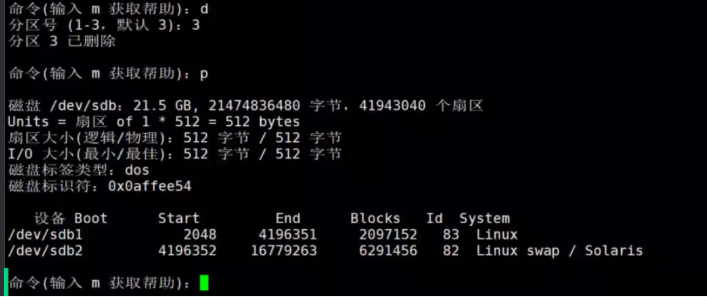
Delete a partition.
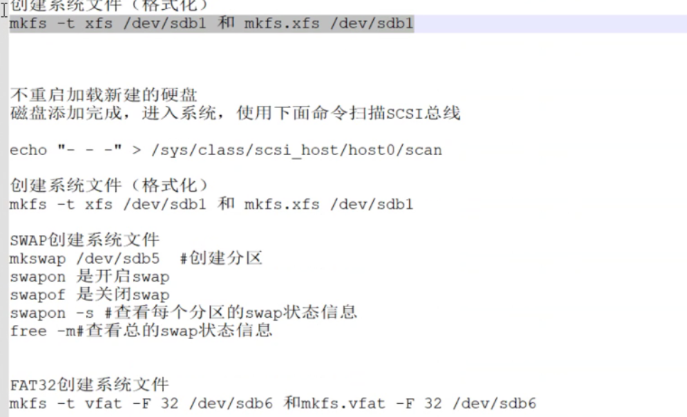
Steps: Partition —- Format —- Create new folder —– Mount to the new folder.
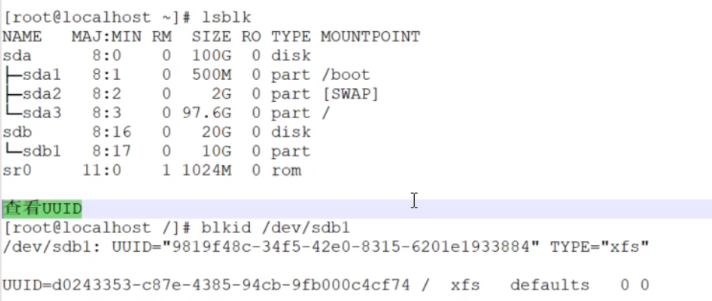
UUID Unique Identifier
4. Mounting and Unmounting File Systems
mount Command
-
Mount file systems or ISO images to a specified directory
mount [ -t type] storage device mount point directory
mount -o loop iso image file mount point directory
umount Command
-
Unmount an already mounted file system
umount storage device location
umount mount point directory
The above is for temporary mounting.
Setting Automatic Mounting of File Systems
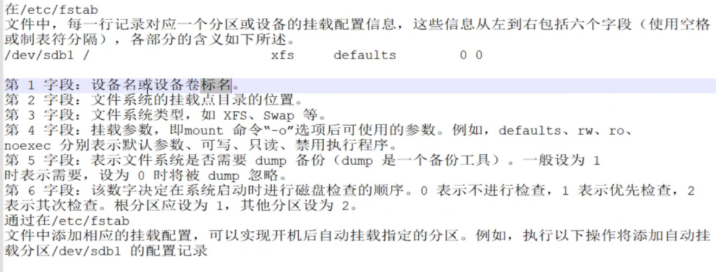
In the /etc/fstab file, each line records the mounting configuration information for a corresponding partition or device. These details include six fields from left to right (separated by spaces or tabs), with the meanings of each part described below.
/dev/sdb1 / xfs defaults 00
-
Field 1: Device name or device label.
-
Field 2: The location of the file system’s mount point directory.
-
Field 3: File system type, such as xfs, swap, etc.
-
Field 4: Mount parameters, which can be used after the “-o” option in the mount command. For example, defaults, rw, ro, noexec represent default parameters, read-write, read-only, and disable execution, respectively.
-
Field 5: Indicates whether the file system needs to be dumped for backup (dump is a backup tool). Generally set to 1 to indicate it is needed, set to 0 to be ignored by dump.
-
Field 6: This number determines the order in which disk checks are performed at system startup. 0 means no check, 1 means priority check, and 2 means secondary check. The root partition should be set to 1, while other partitions should be set to 2.
By adding the corresponding mounting configuration in the /etc/fstab file, automatic mounting of specified partitions after boot can be achieved. For example, executing the following operation will add the configuration record for automatically mounting the partition /dev/sdb1.
Viewing Disk Usage
df Command
df [options] [file]
[root@localhost ~]# df -hT
Filesystem                       Type     Size    Used   Avail   Use%   Mounted on
/dev/mapper/VolGroup-Lv_root  ext4     6.7G   4.1G   2.3G   65%   /
/dev/sda1                      ext4     99M    11M    83M    12%   /boot
tmpfs                          tmpfs    252M   0      252M   0%    /dev/shm
/dev/sdb1                     ext4     19G    173M   18G    1%    /mailbox
Link: https://www.cnblogs.com/qfzr2508/p/15755874.html
(Copyright belongs to the original author, please delete if infringing)
Group
WeChat group

To facilitate better communication on operation and maintenance and related technical issues, a WeChat group has been created. Friends who want to join the group can scan the QR code below to add me as a friend (note: join group).

Blog
Guest
Blog
CSDN Blog: https://blog.csdn.net/qq_25599925

Juejin Blog: https://juejin.cn/user/4262187909781751

Knowledge Planet: https://wx.zsxq.com/group/15555885545422

Long press to recognize the QR code to visit the blog website for more quality original content.