Recently, during my technical exploration, I noticed that the Kylin system has released version V11. As a long-time user of the V10 series, I became very interested in this major version update and decided to personally install and experience it.
Brief Introduction: The Kylin operating system (Kylin OS) is an operating system independently developed in China, widely used in critical fields such as government, finance, and energy, featuring high security, stability, and compatibility. Among them, Kylin V11 (Kylin Linux Advanced Server V11), as the next-generation version, is built on the Linux 6.6 kernel, with significant improvements in performance optimization, hardware support, and ecological compatibility, suitable for server and desktop scenarios.
This article will fully document the installation process, providing a reference for friends interested in trying this system.
1. System Acquisition
The Kylin V11 system image must be obtained from official channels, with the following steps:
Official website: https://www.kylinos.cn/
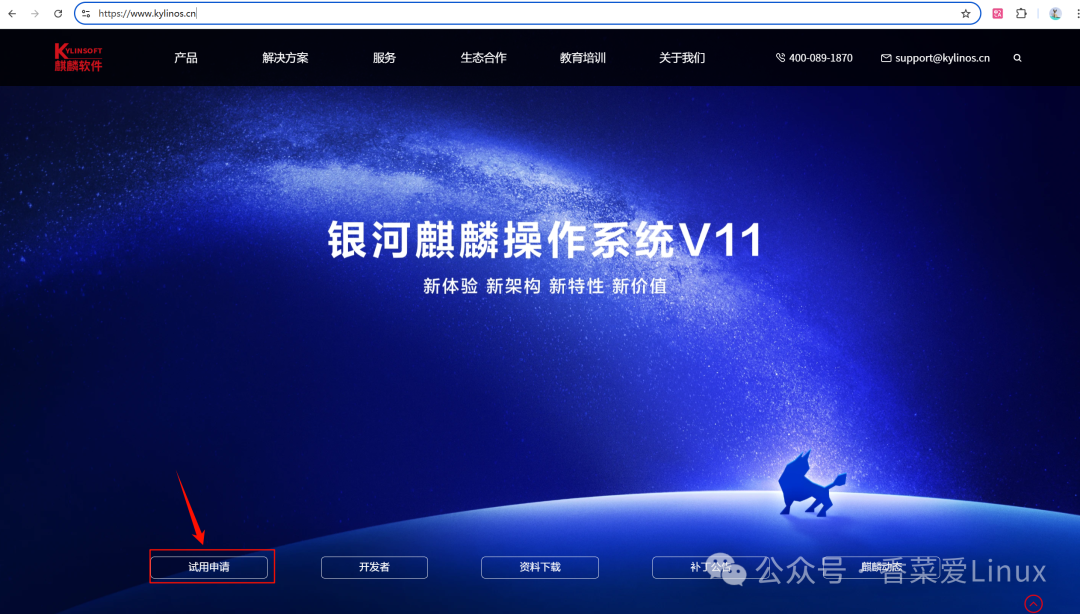
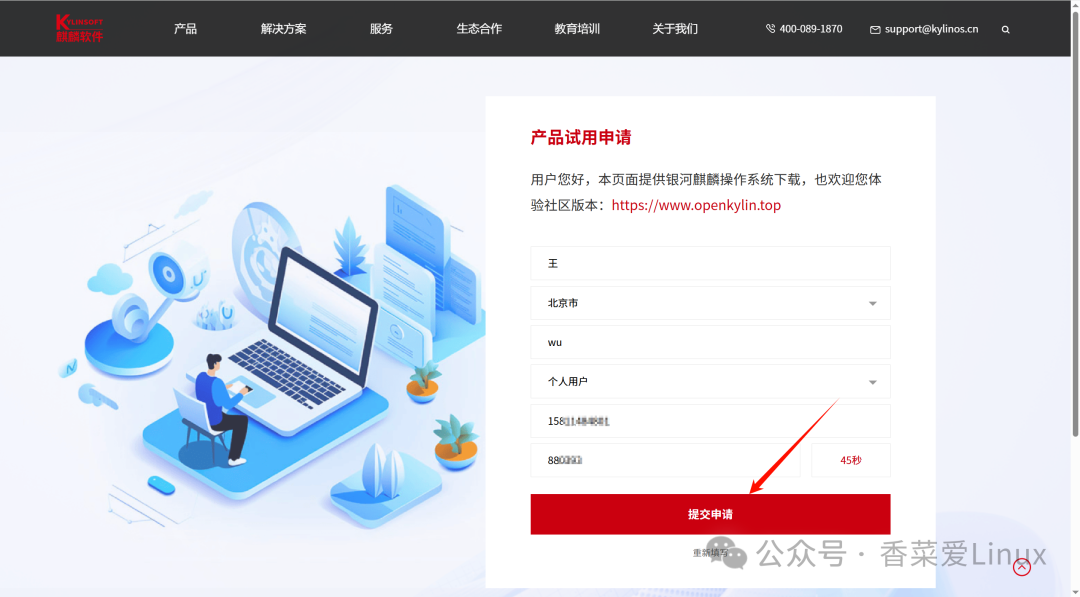
Find the trial application entry on the official website, fill in the relevant information to obtain download permissions:
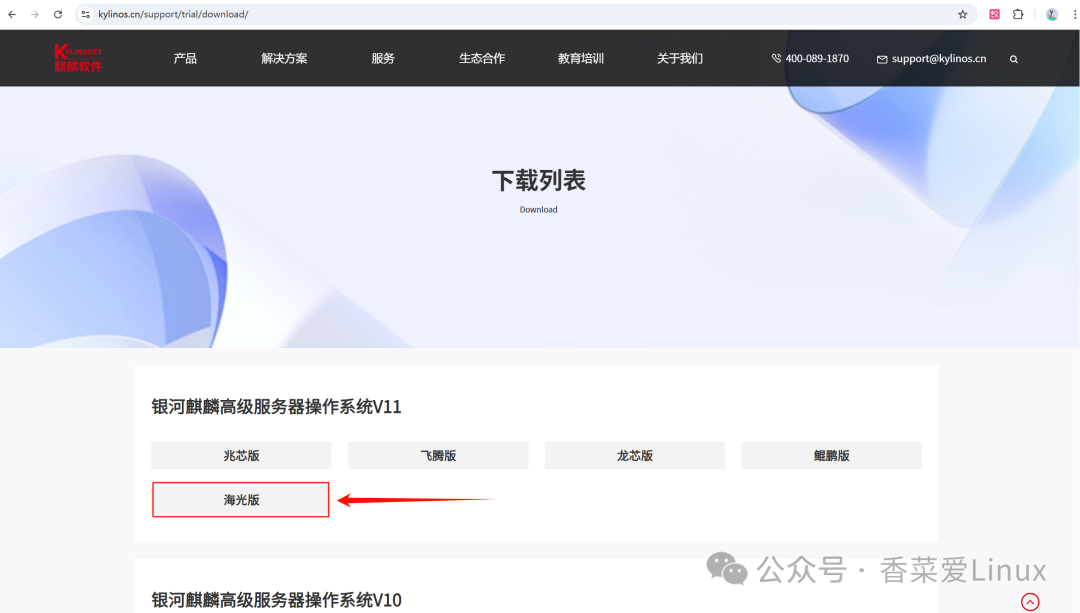
The obtained ISO download address is:
https://iso.kylinos.cn/web_pungi/download/cdn/kz4Ju6NbSg7DUA9mlf5M2rqZeBRat1vC/Kylin-Server-V11-2503-Release-General-20250715-X86_64.iso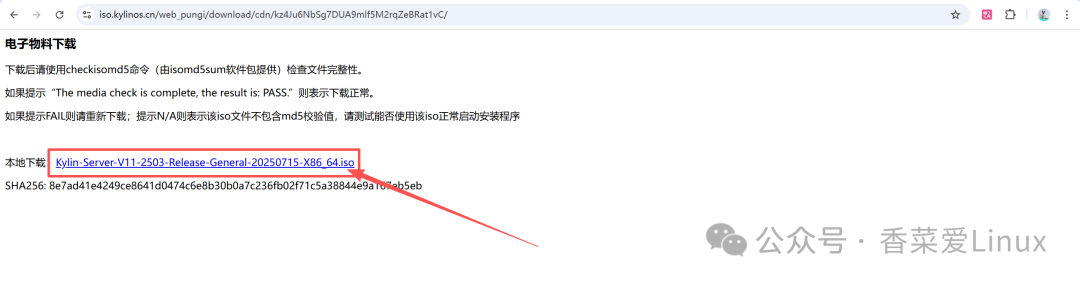
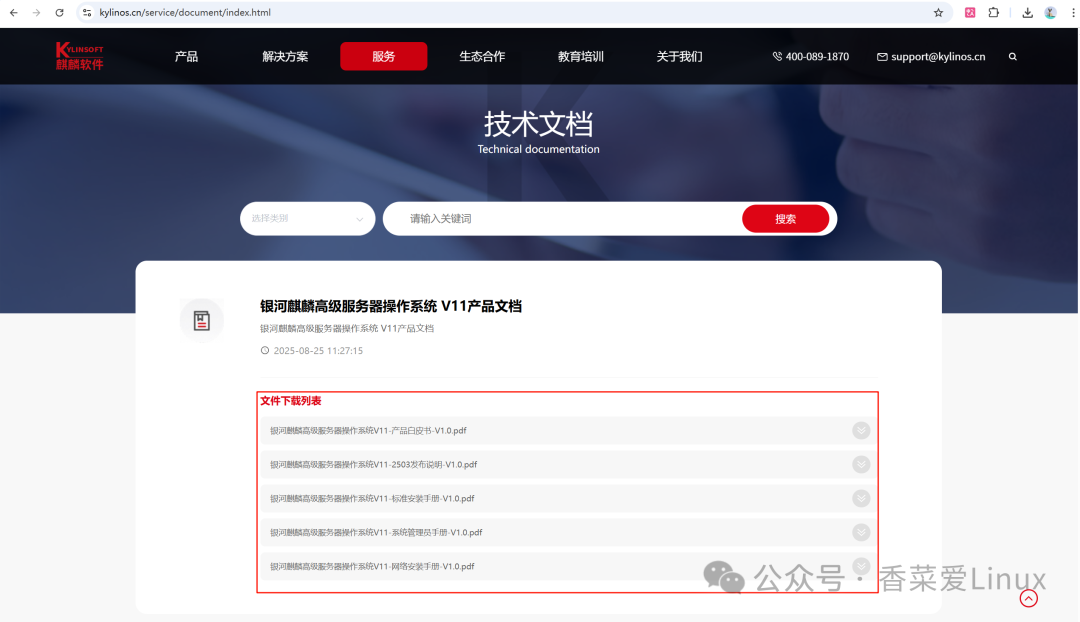
Installation and usage can refer to the official Kylin product documentation, available at:
Documentation address: https://www.kylinos.cn/service/document/index.html
2. Installation Environment Preparation
According to the official website requirements, prepare the following resource configurations:
| IP | CPU | Memory (G) | Disk (GB) |
|---|---|---|---|
| 192.168.145.131 | 4 | 4 | 30 |
3. Creating VMware Virtual Machine
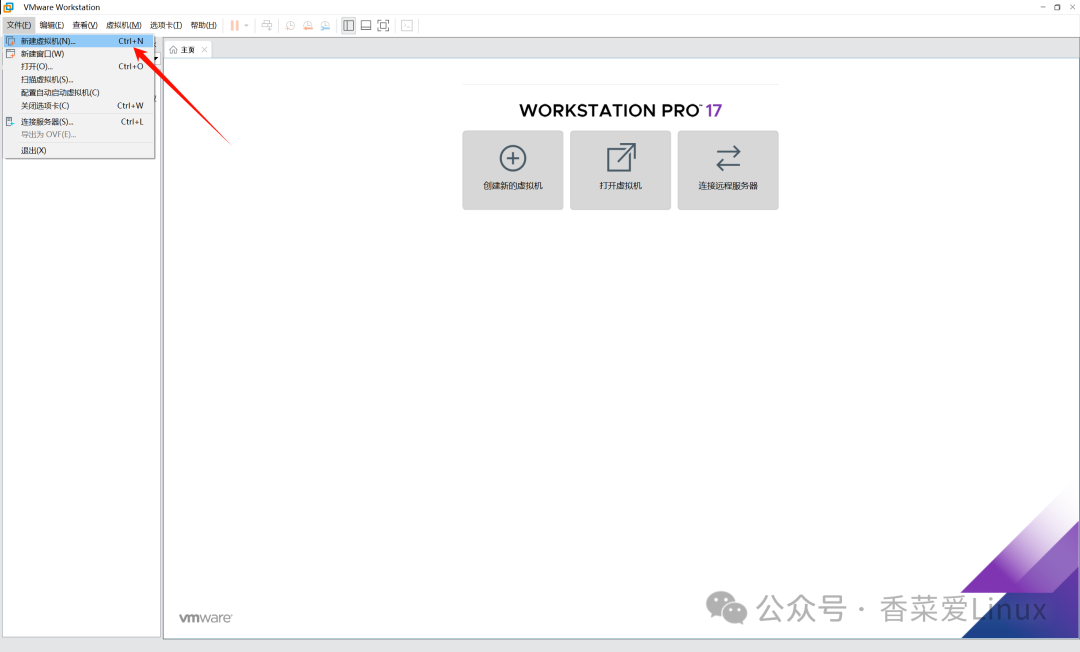
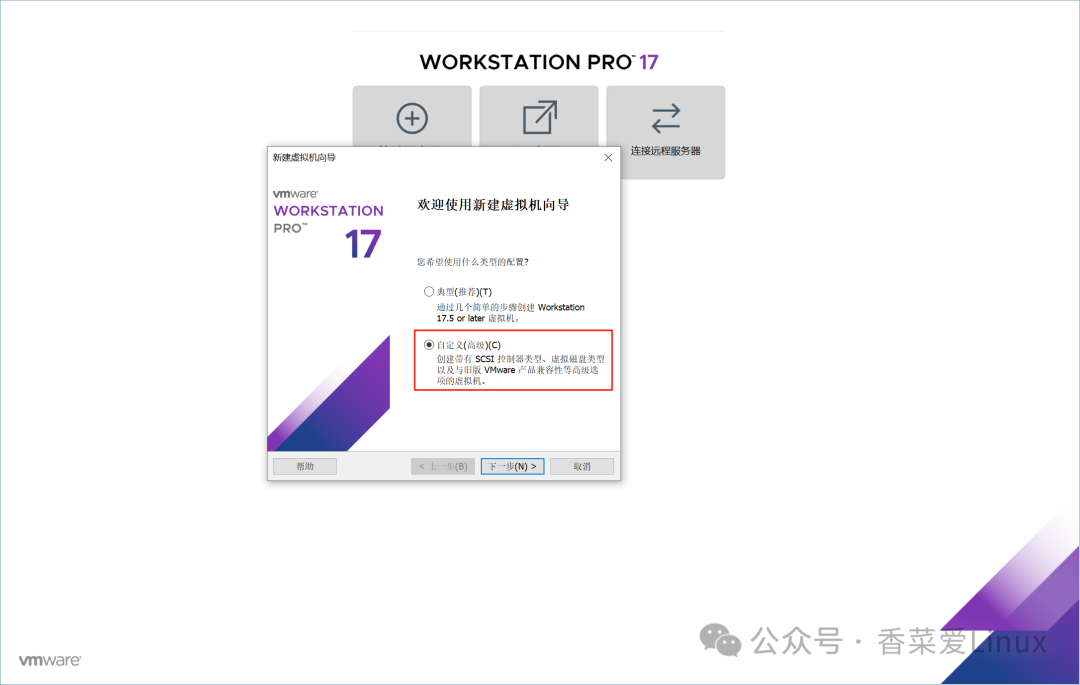
3.1 Open VMware and select the [Custom] installation mode
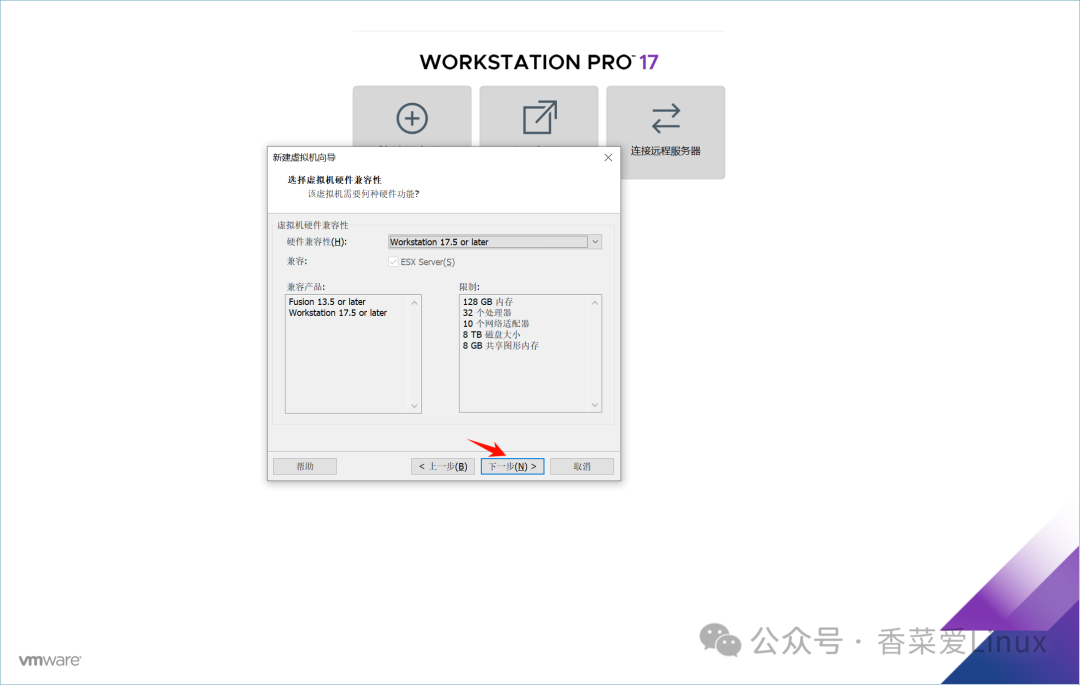
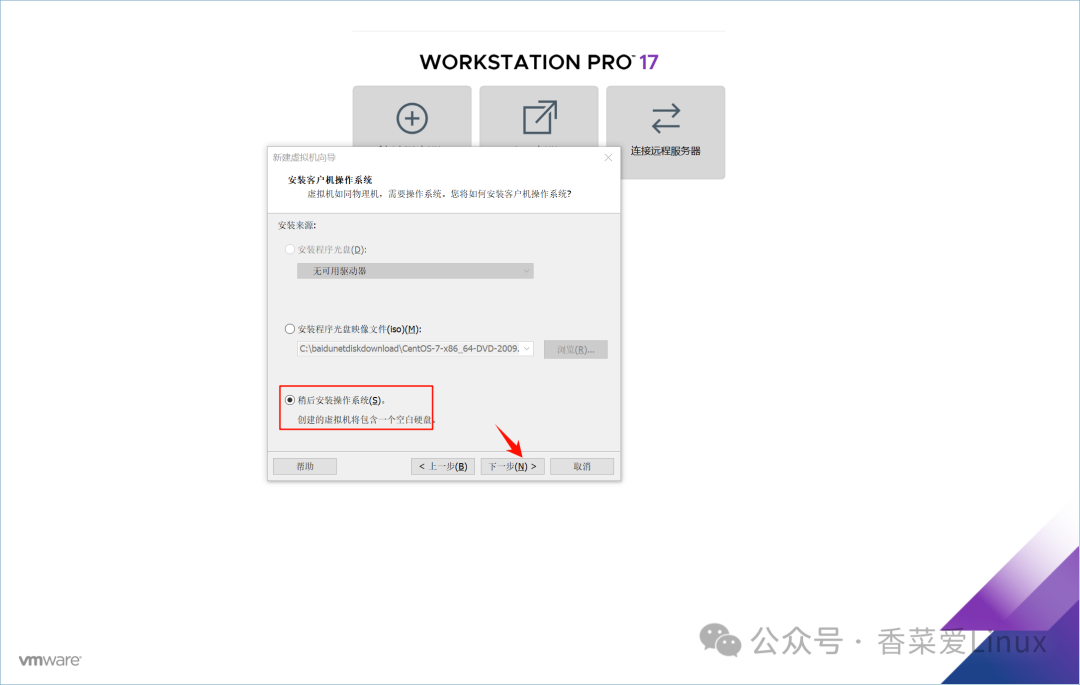
3.2 Select [Install Operating System Later] and click Next
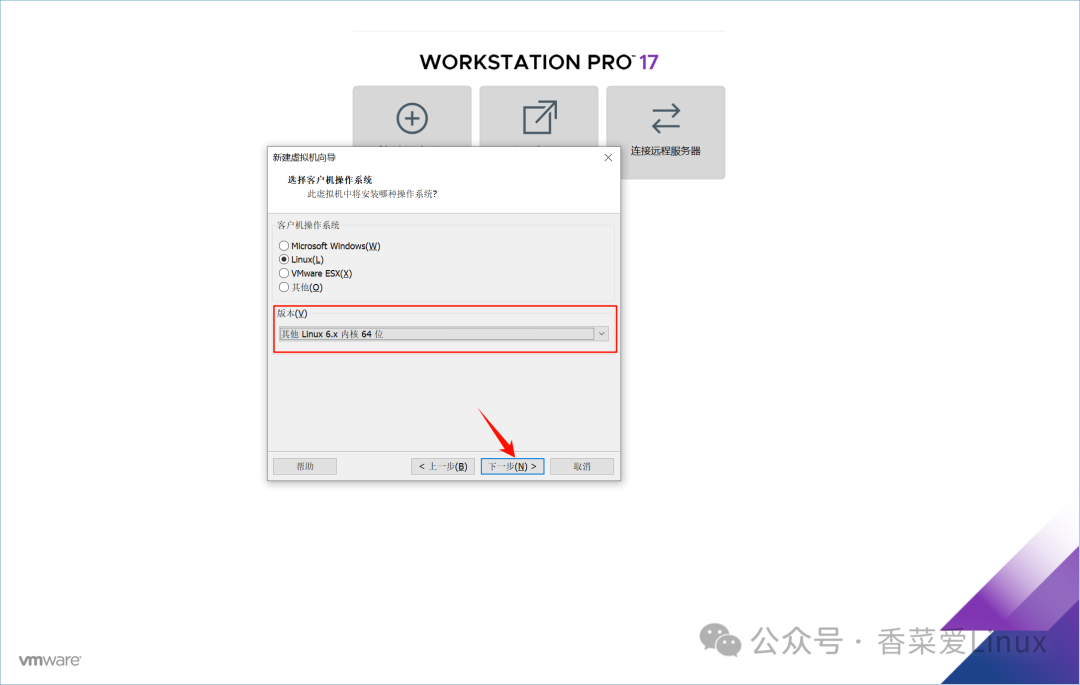
3.3 Since Kylin V11 uses the 6.6 kernel version, select [Other Linux 6.x Kernel 64-bit]
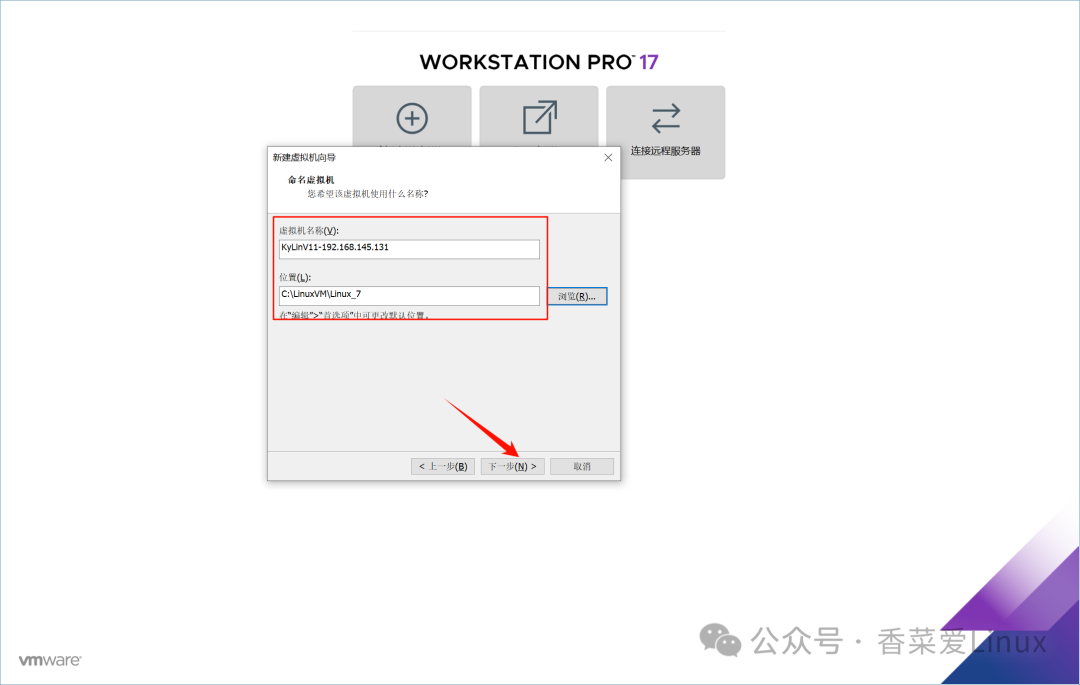
3.4 Fill in the virtual machine name and installation location (I personally prefer using the OS+IP naming method for easy distinction)
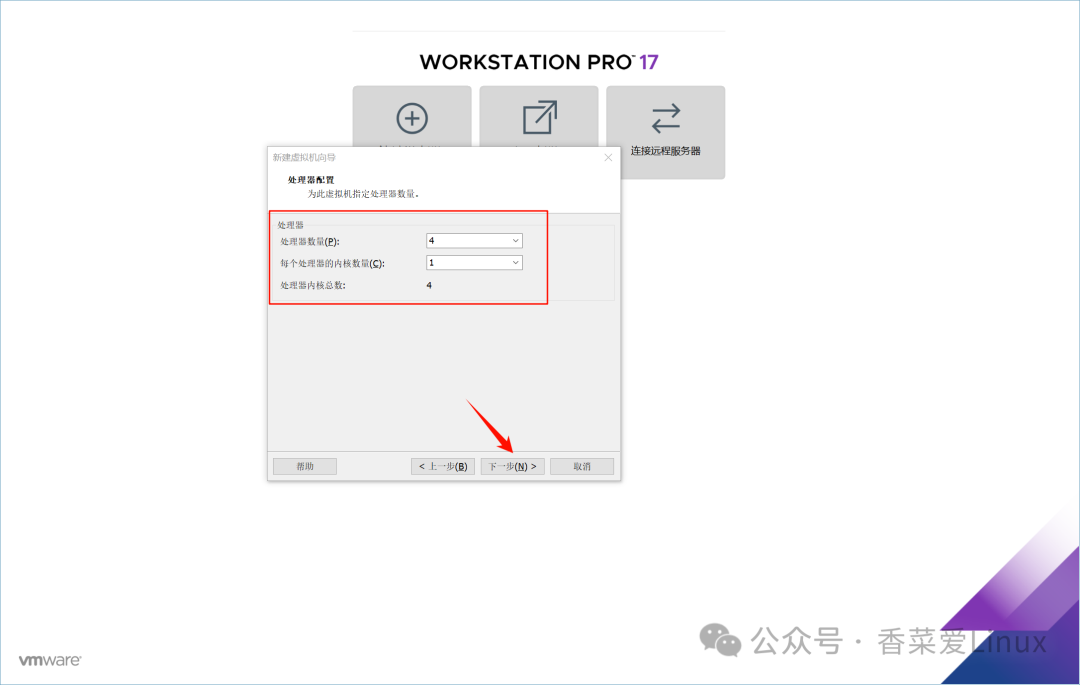
3.5 Processor configuration: Set to 4 cores
3.6 Memory configuration: Allocate 4G of memory
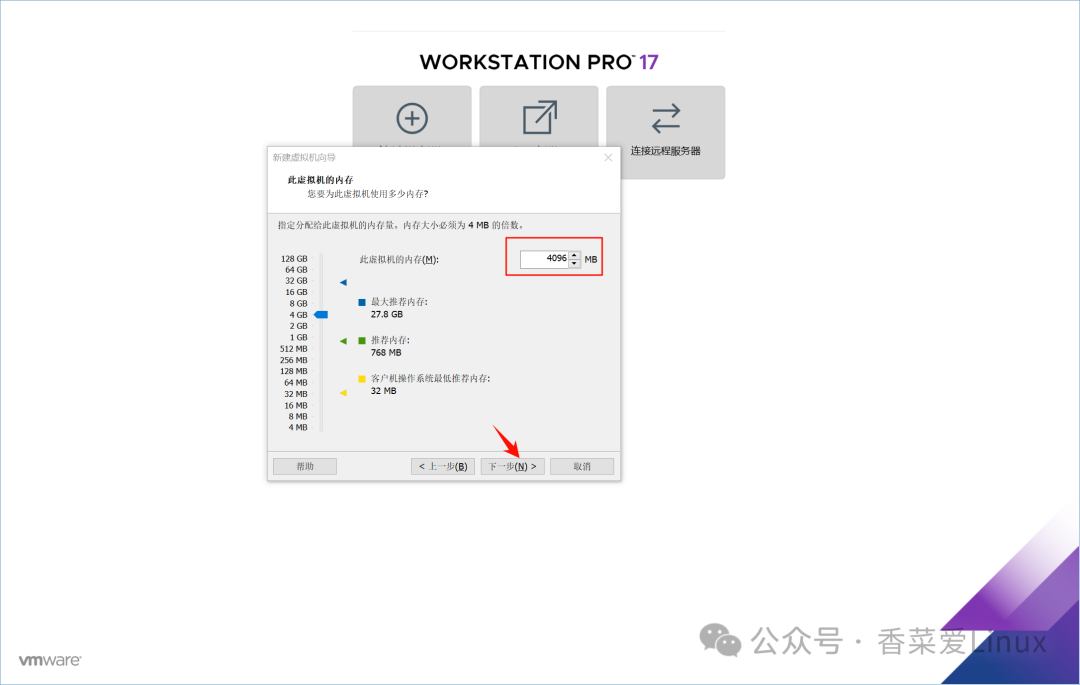
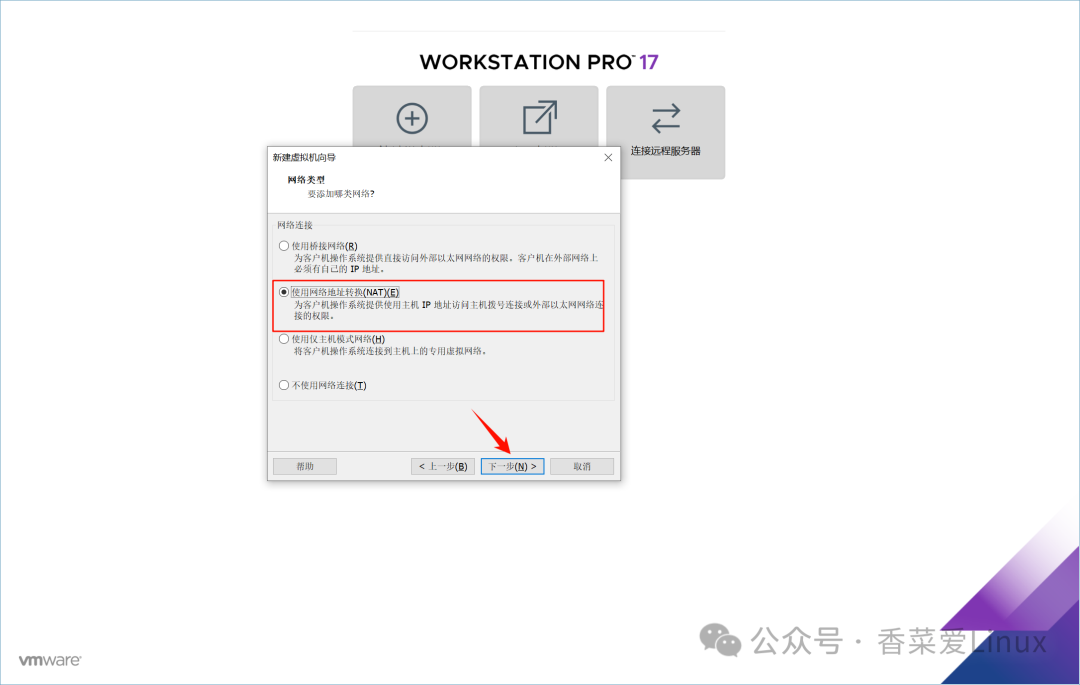
3.7 Network connection: Select [Use Network Address Translation (NAT)]
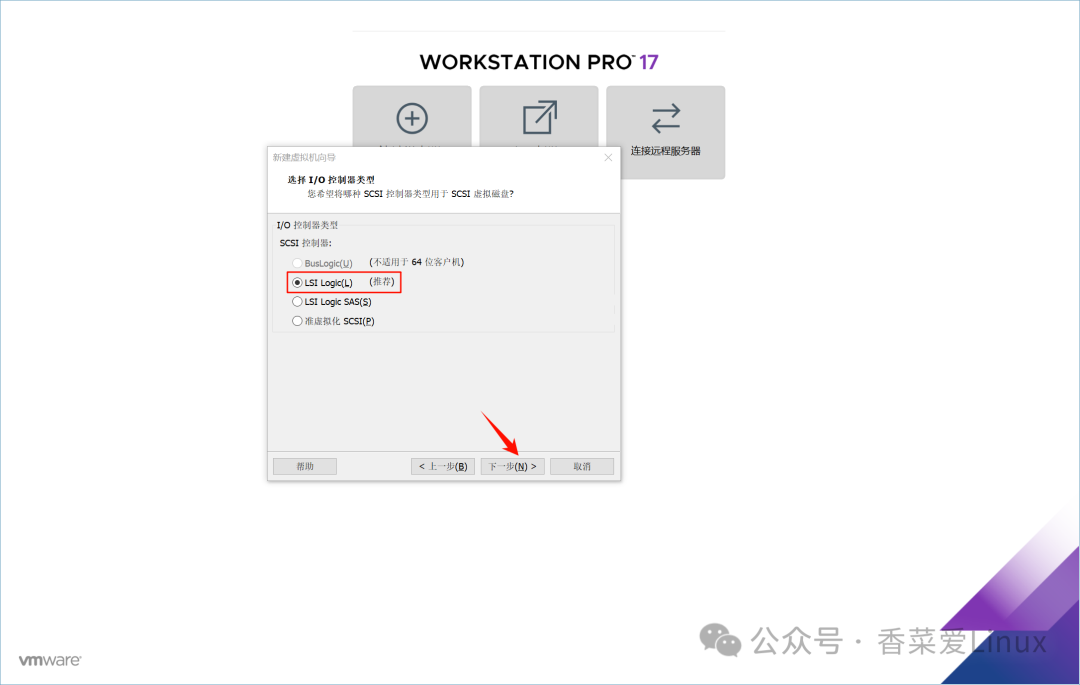
3.8 Controller type: Select [LSI Logic]
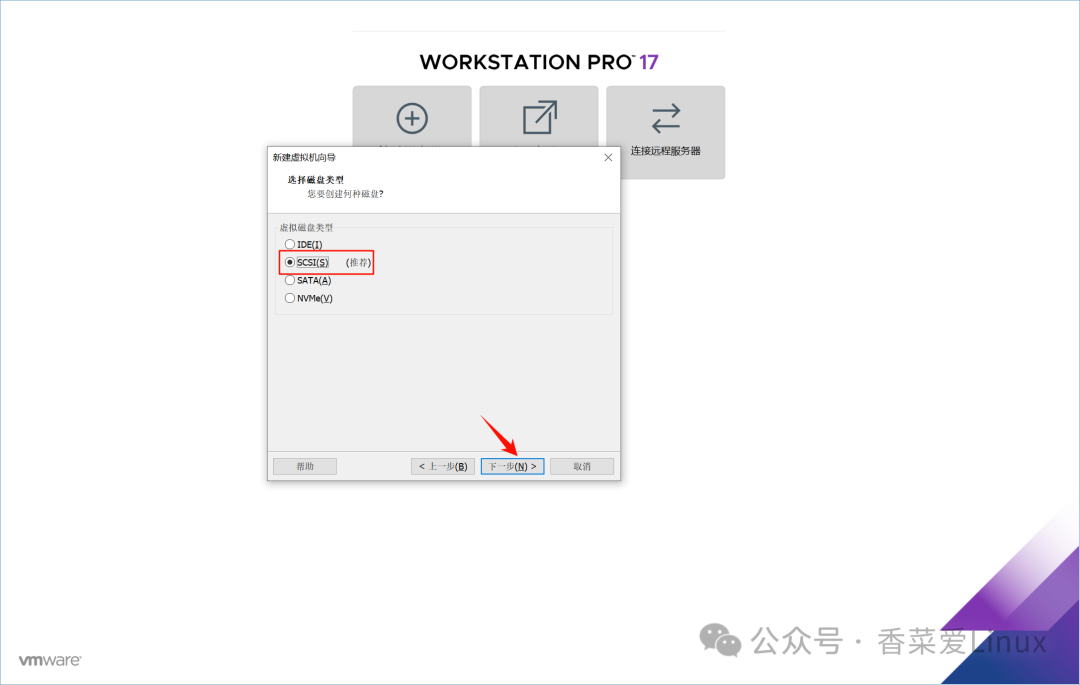
3.9 Disk type: Select [SCSI]
3.10 Create a new virtual disk with a capacity of at least 30GB
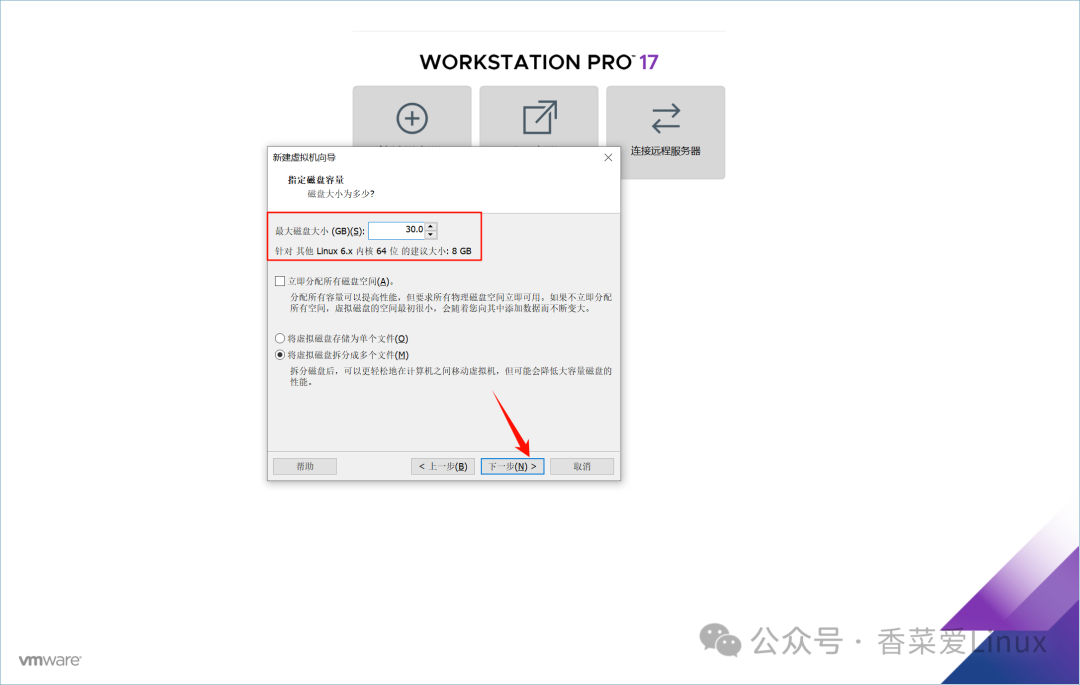
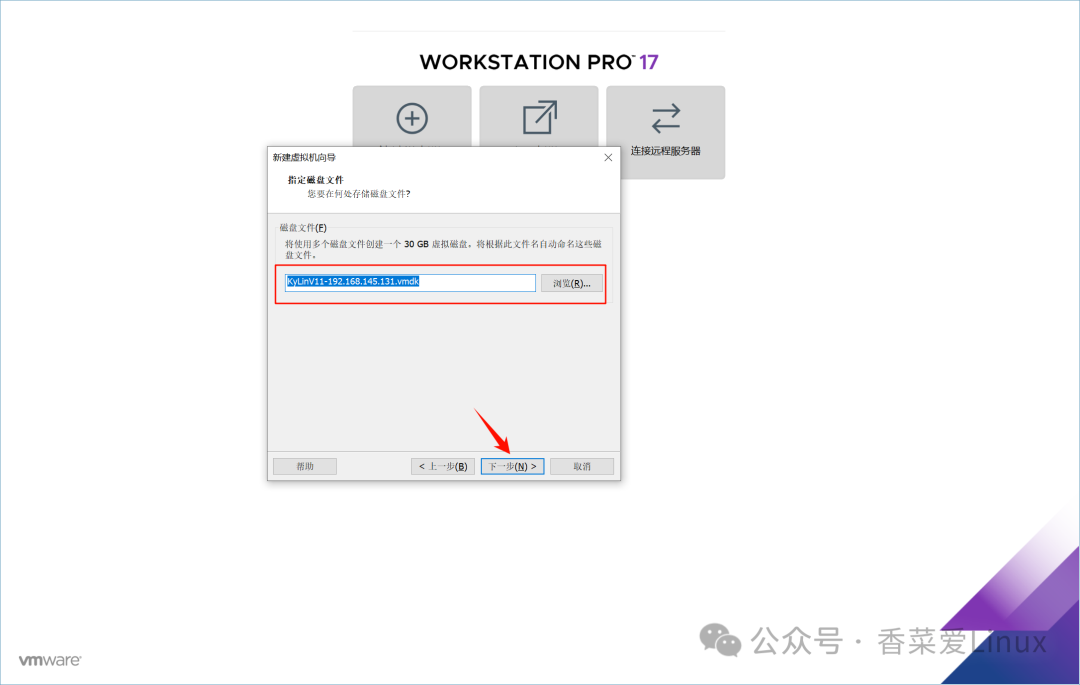
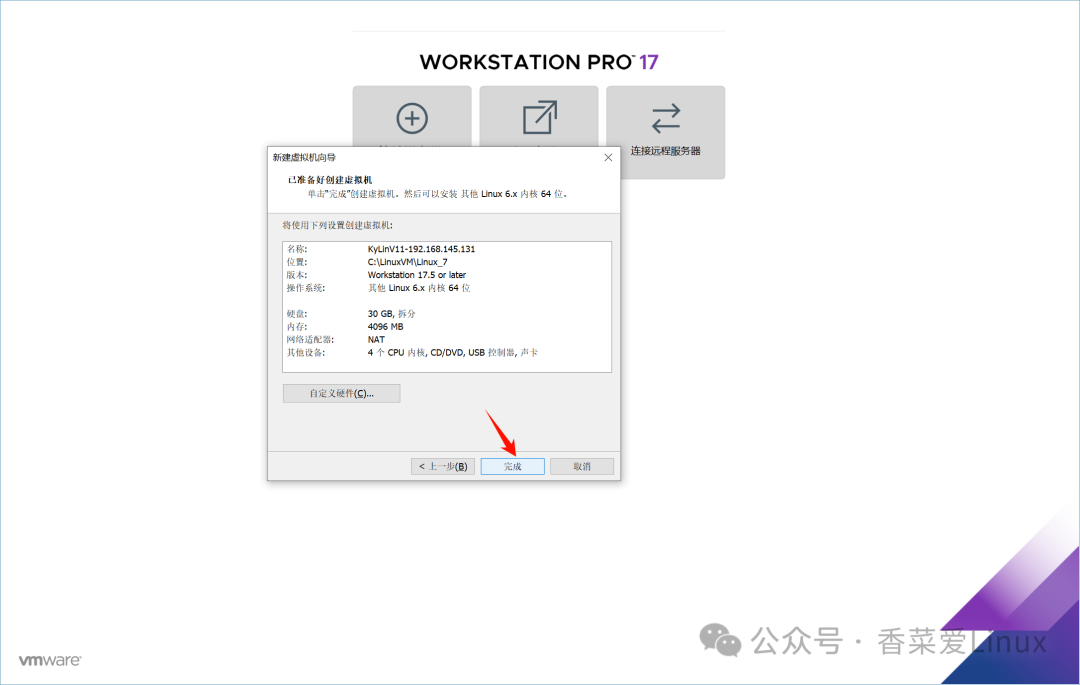
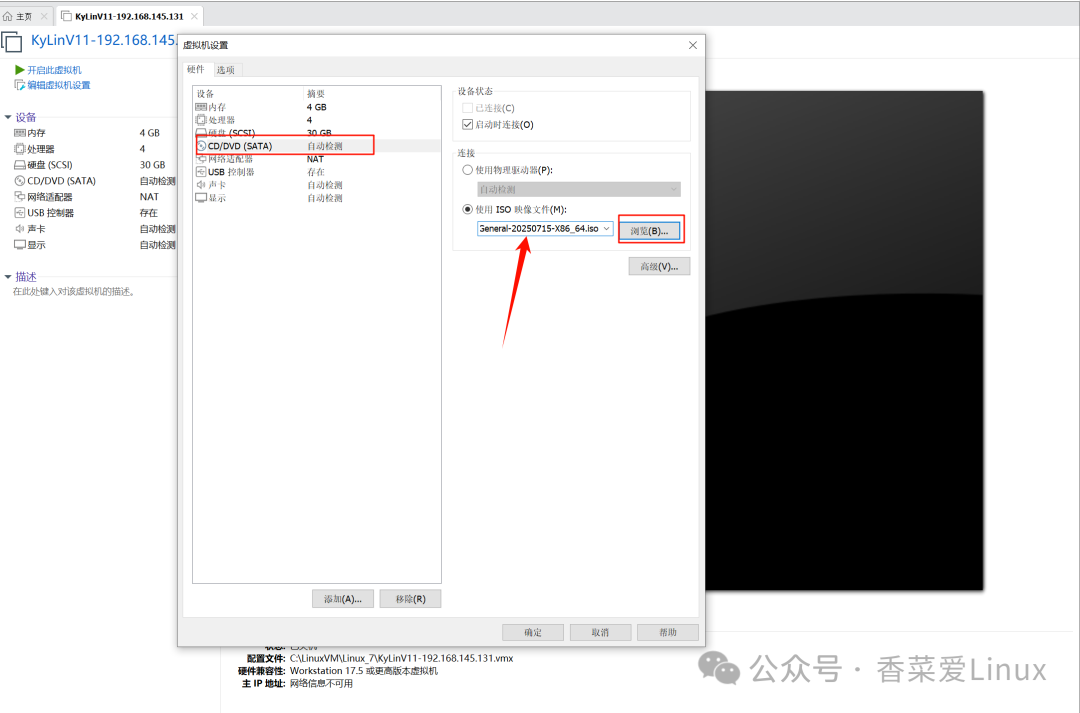
3.12 After completing the virtual machine creation, edit the settings to load the ISO image file
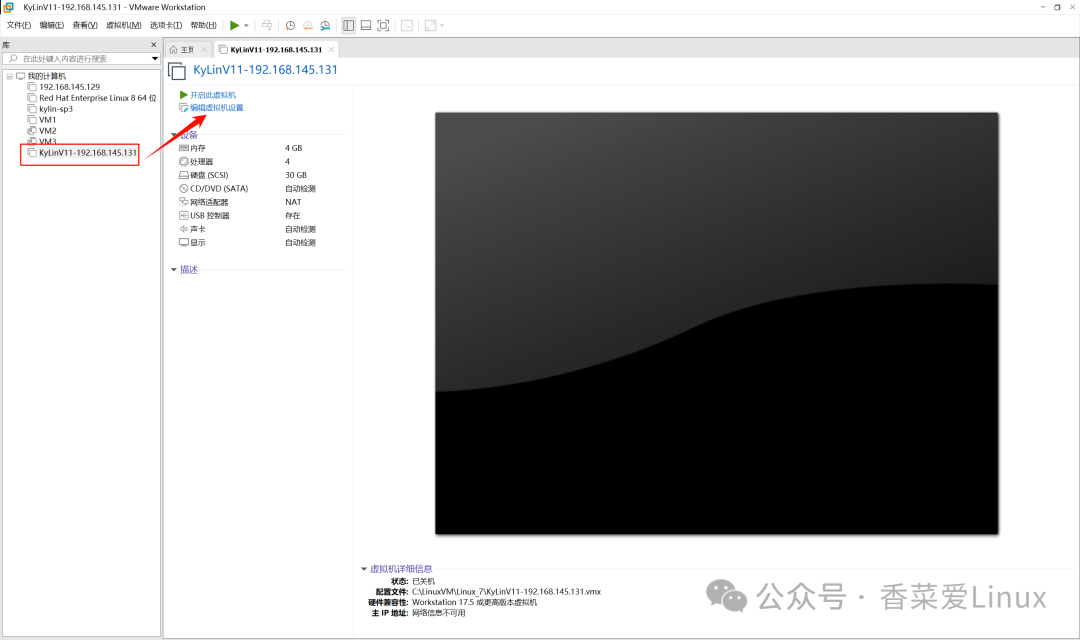
4. System Installation Process
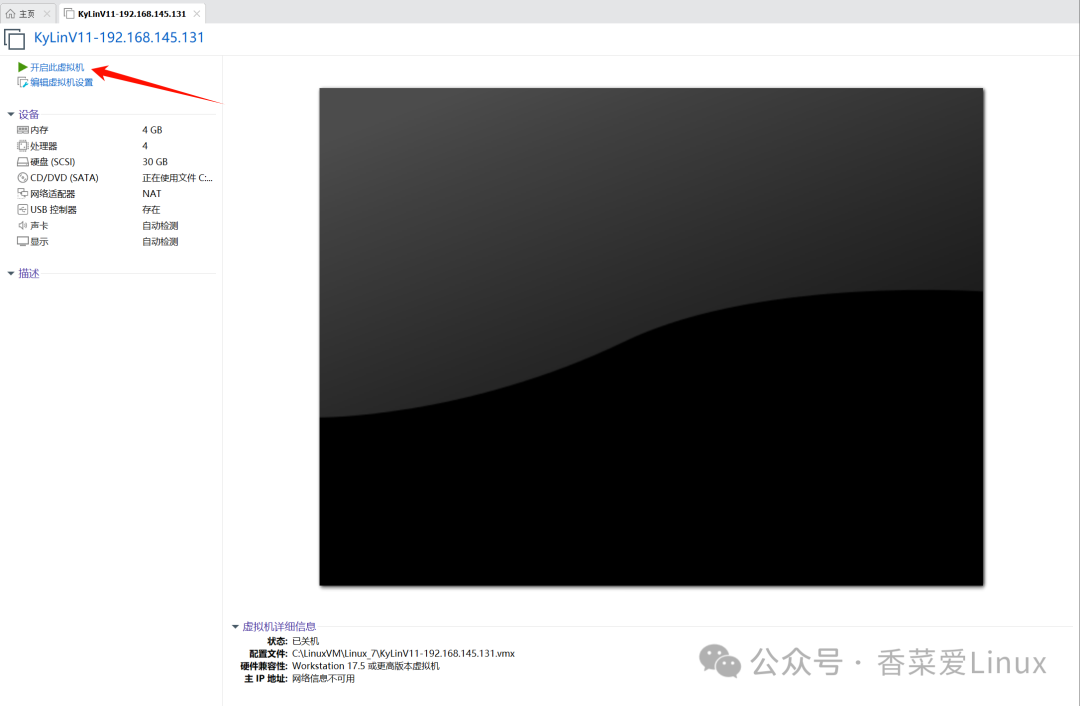
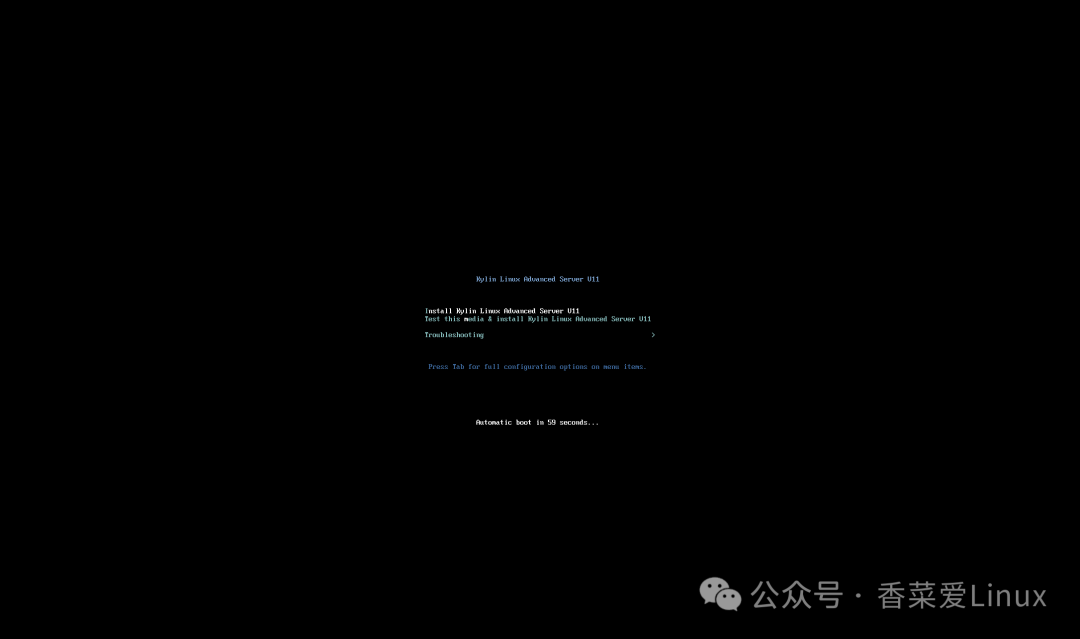
4.1 Start the virtual machine to begin the installation process
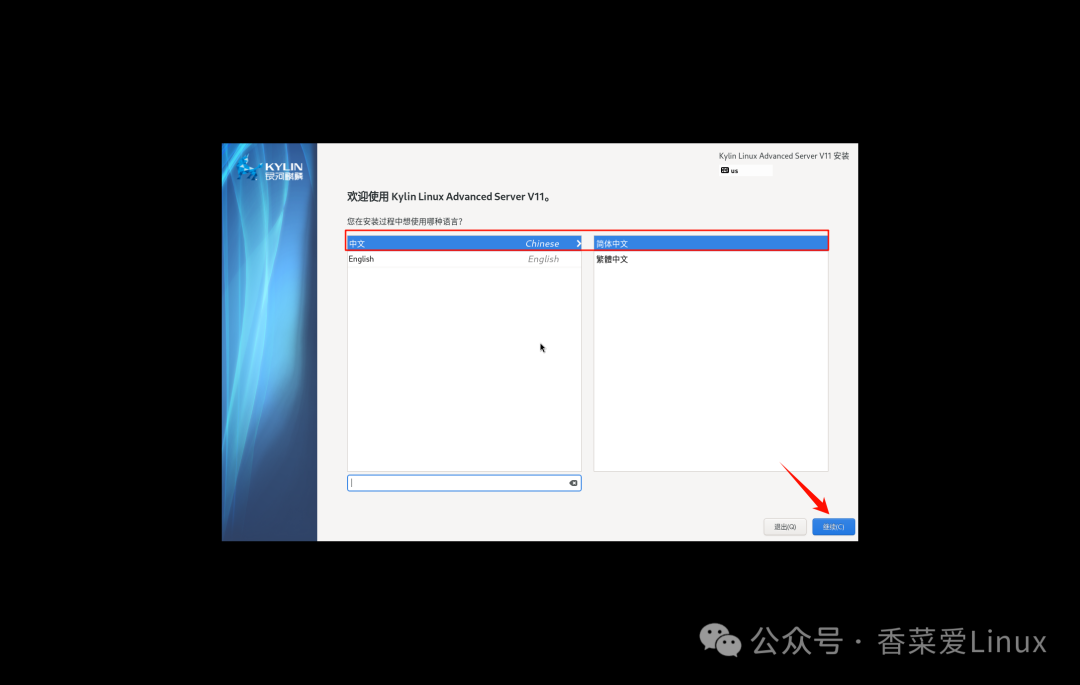
4.2 Select [Chinese] as the installation language
4.3 Enter the custom installation directory
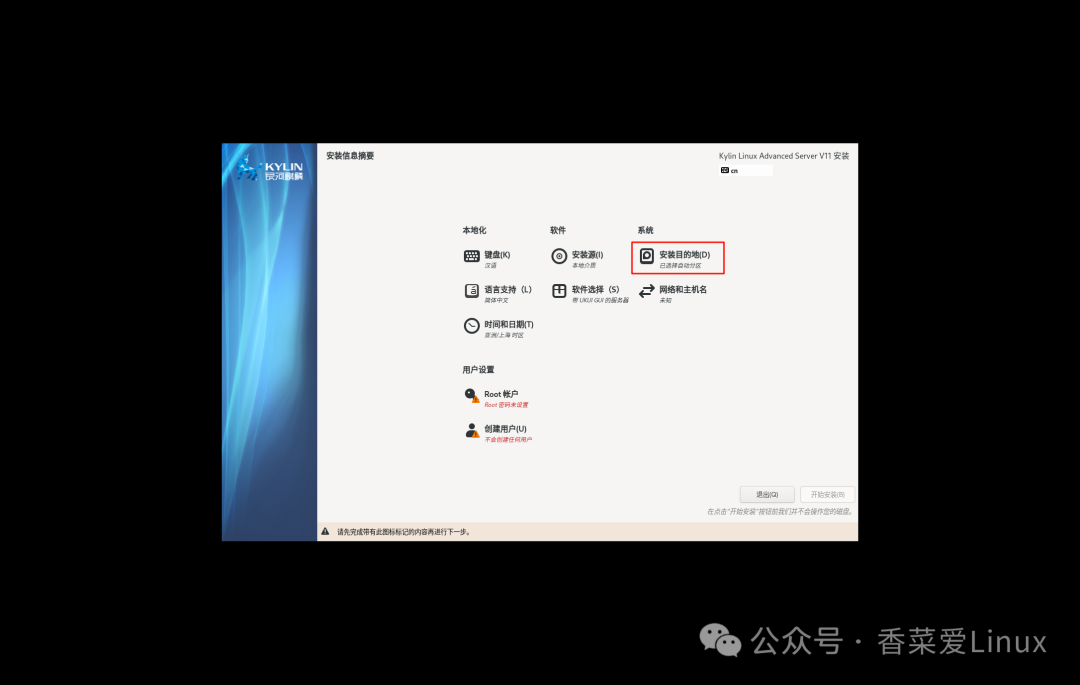
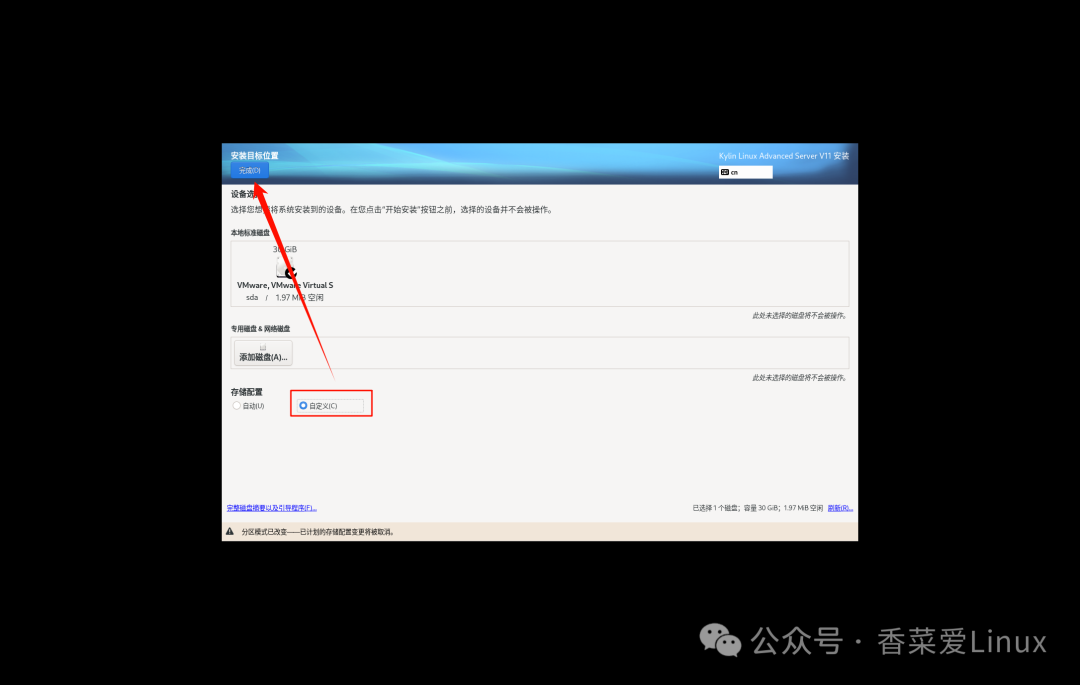
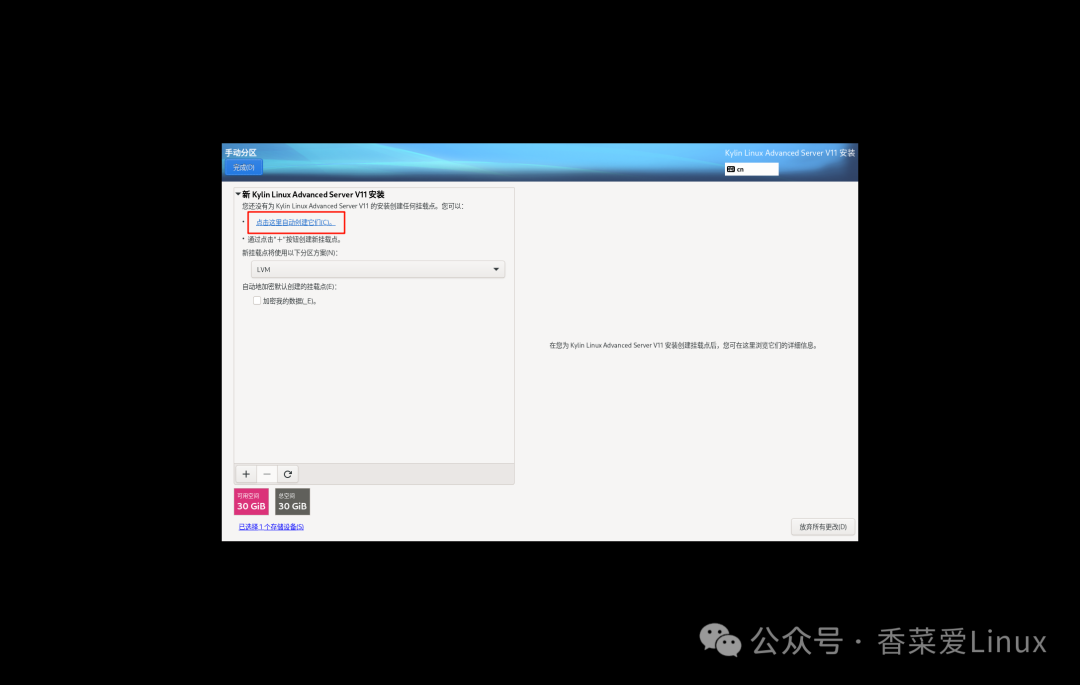
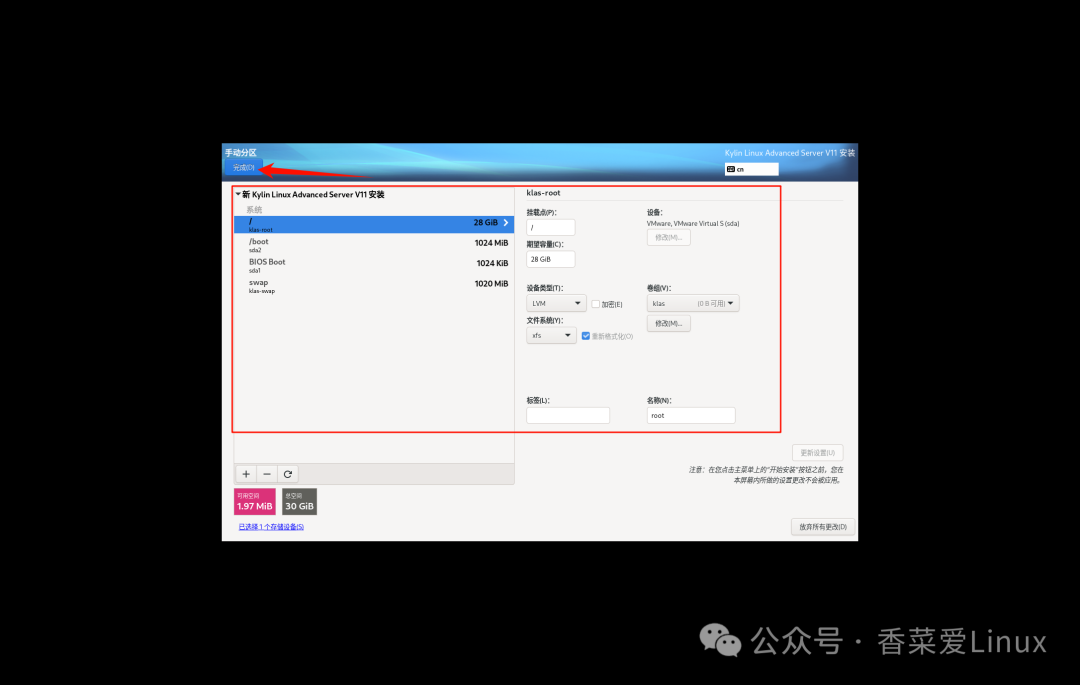
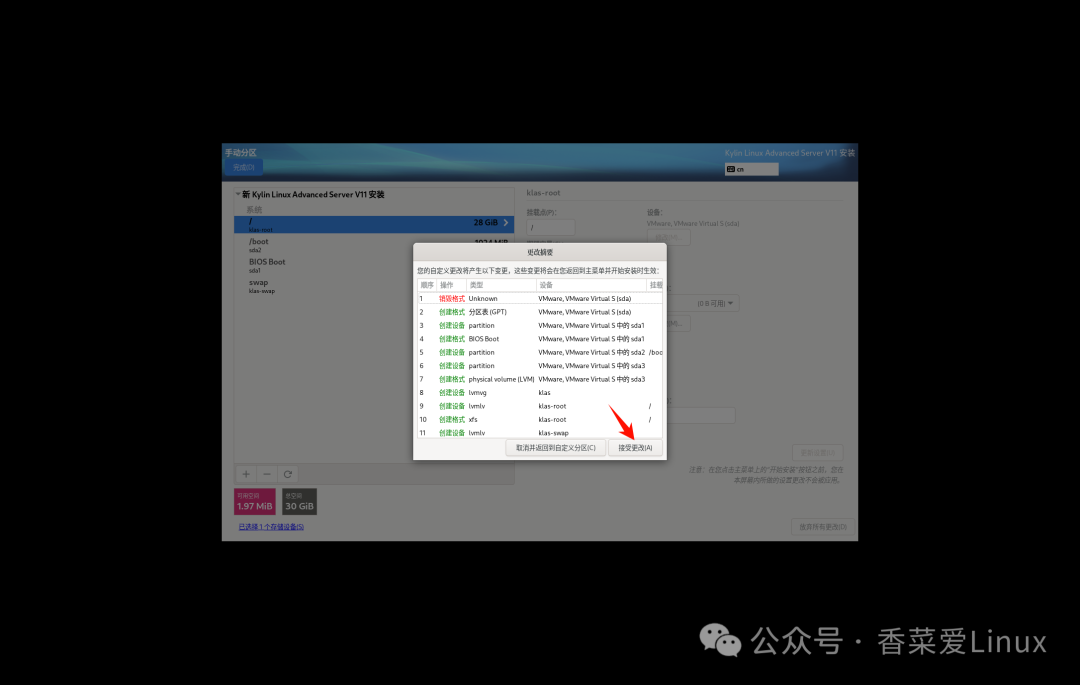
4.4 Adjust the disk partition layout (in this example, the swap partition size is reduced from the default 3GB)
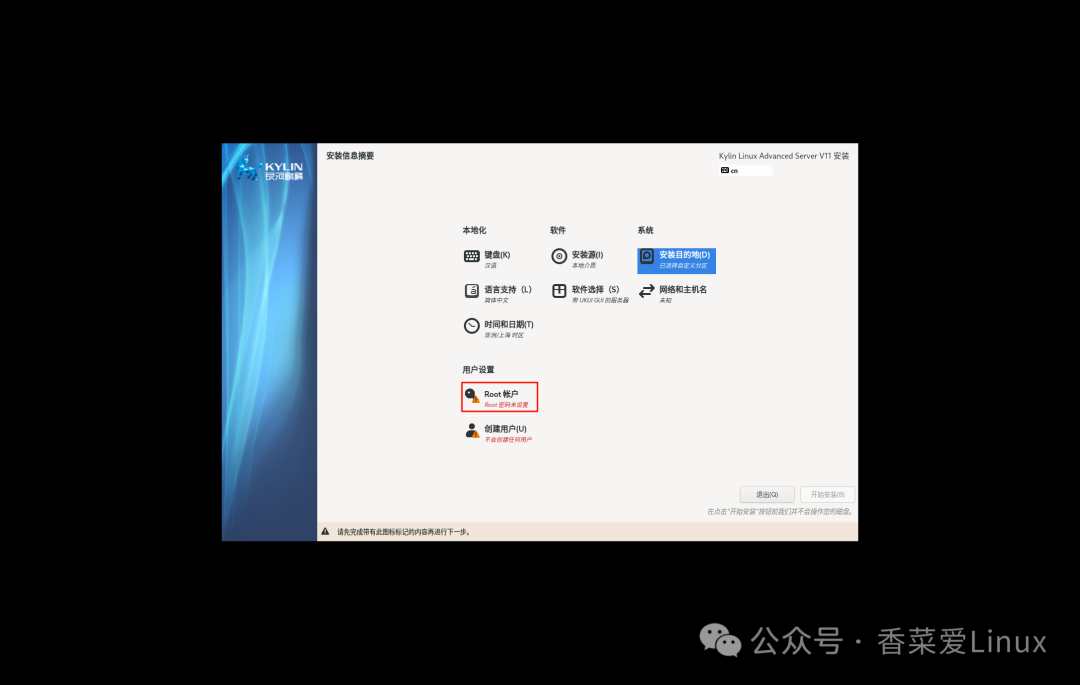
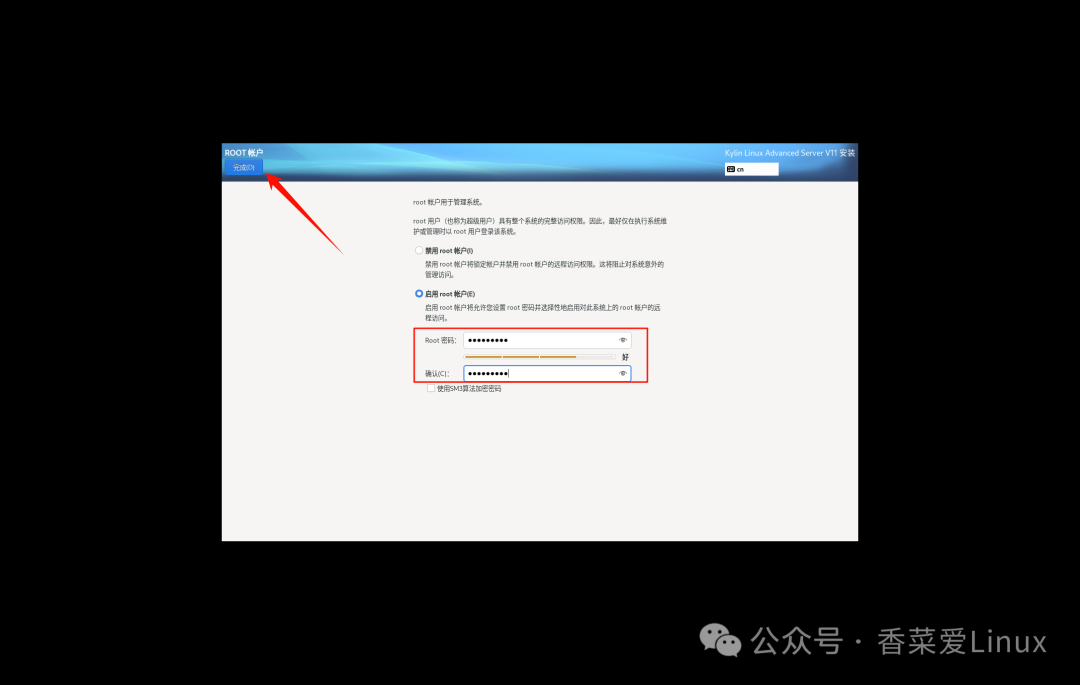
4.5 Set the root user password (must meet complexity requirements, such as including uppercase and lowercase letters, numbers, and special symbols)
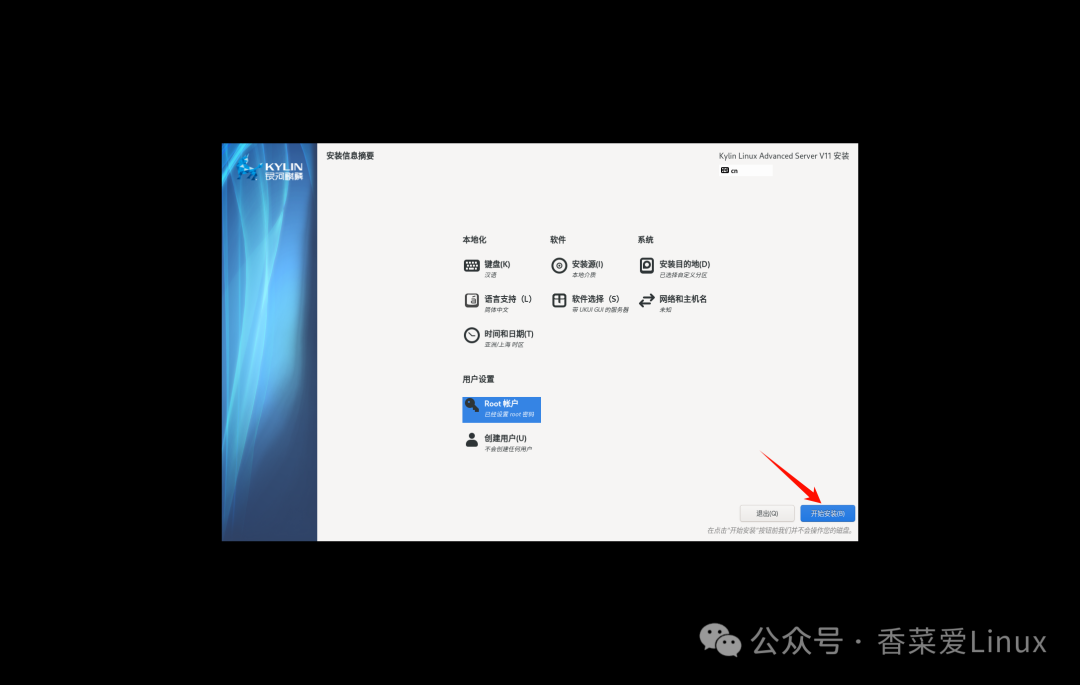
4.6 Start the installation process
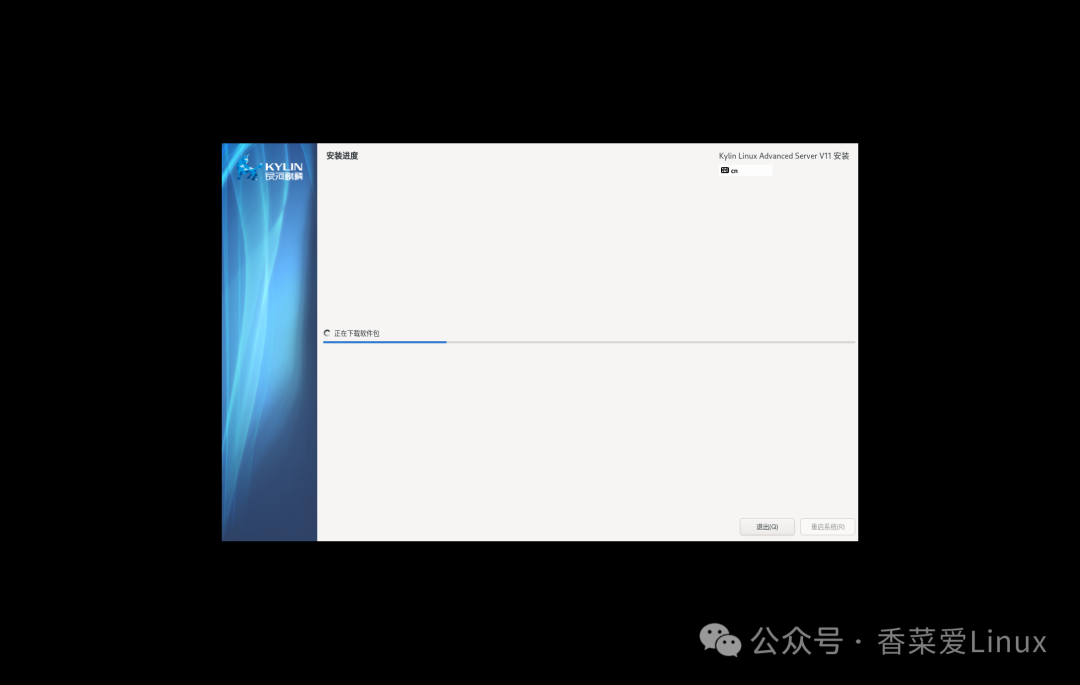
4.7 After installation is complete, restart the system
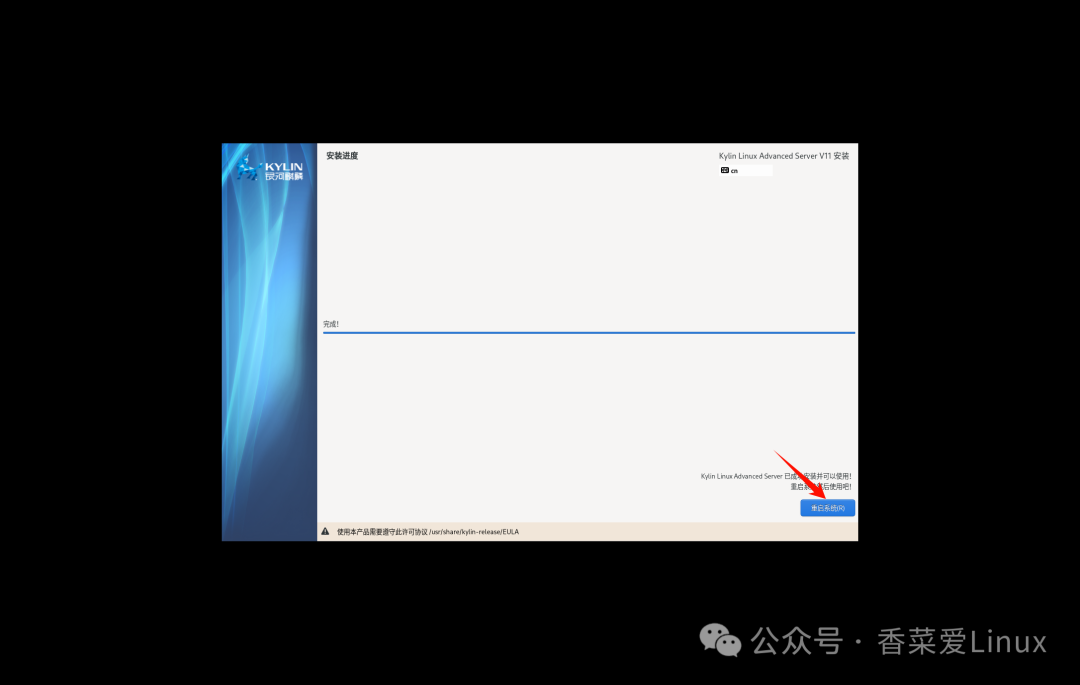
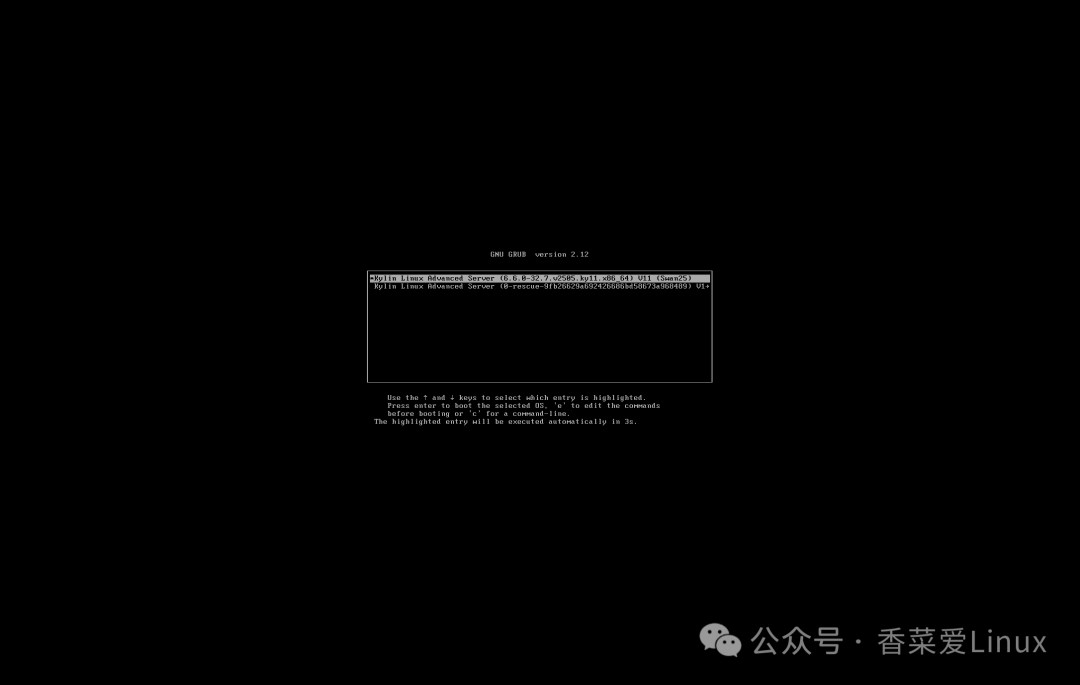
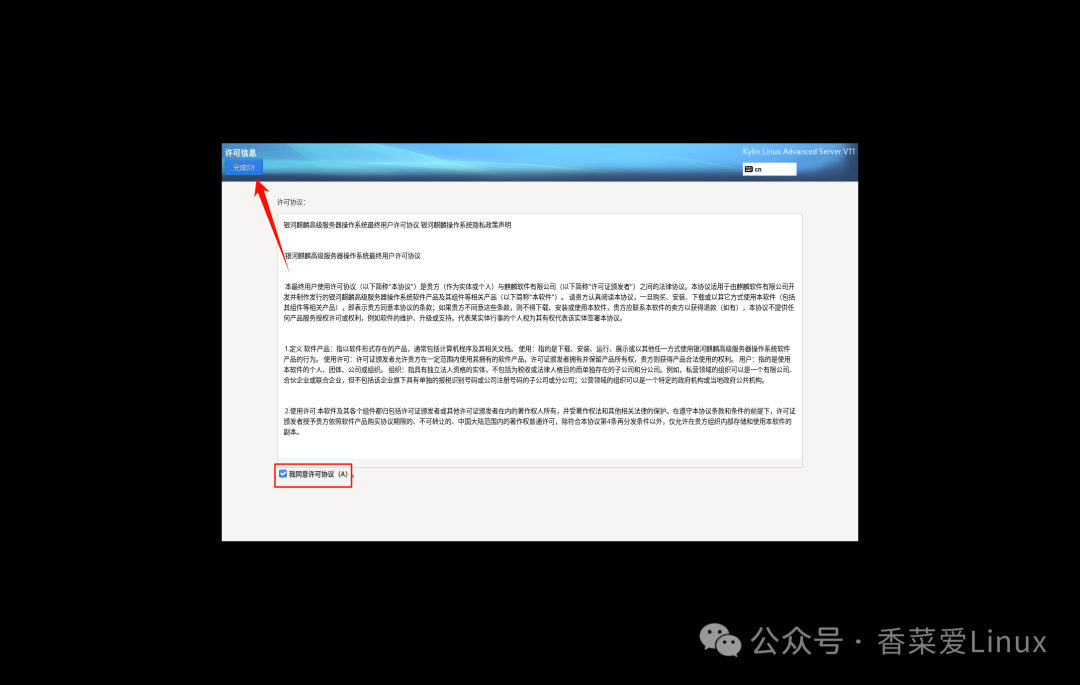
4.8 Accept the license agreement
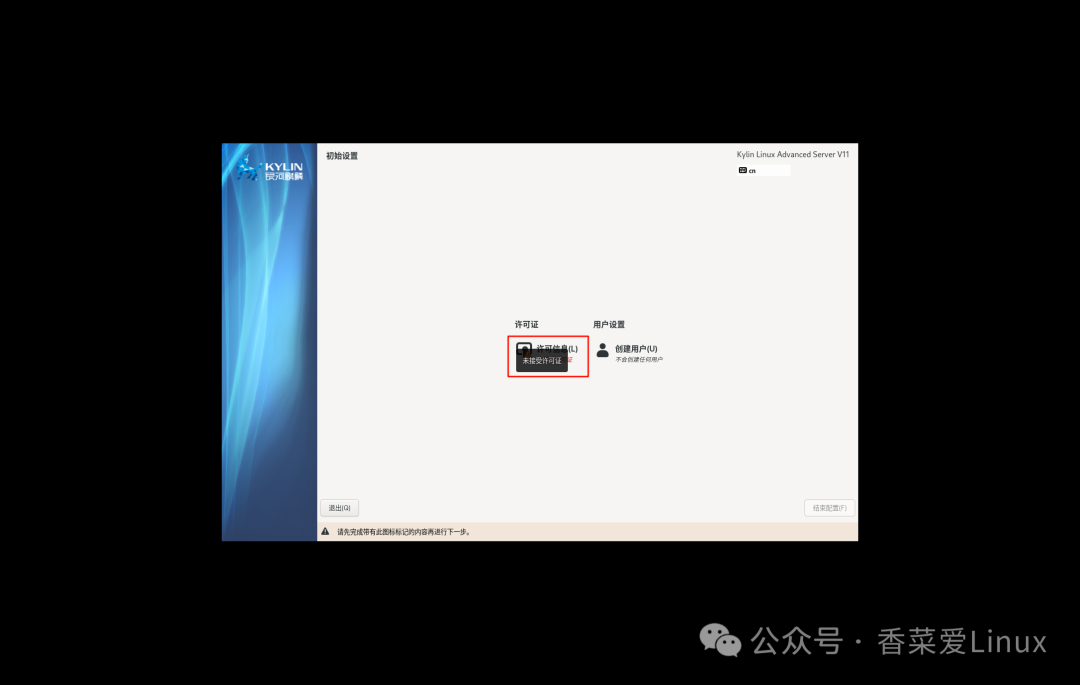
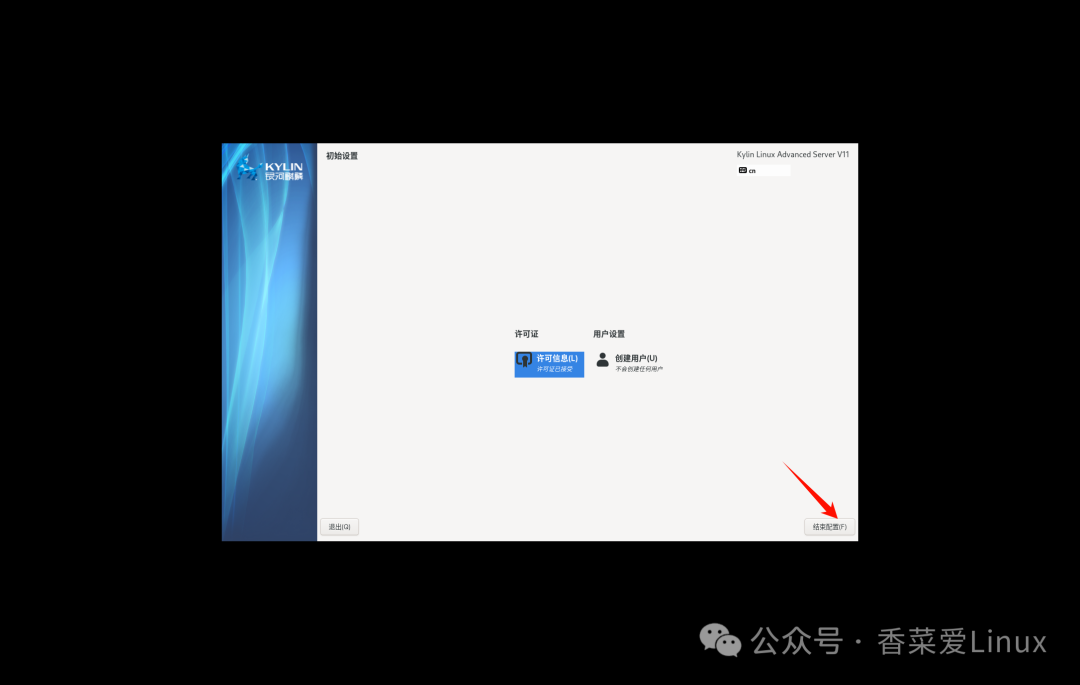
4.9 Complete the initial configuration
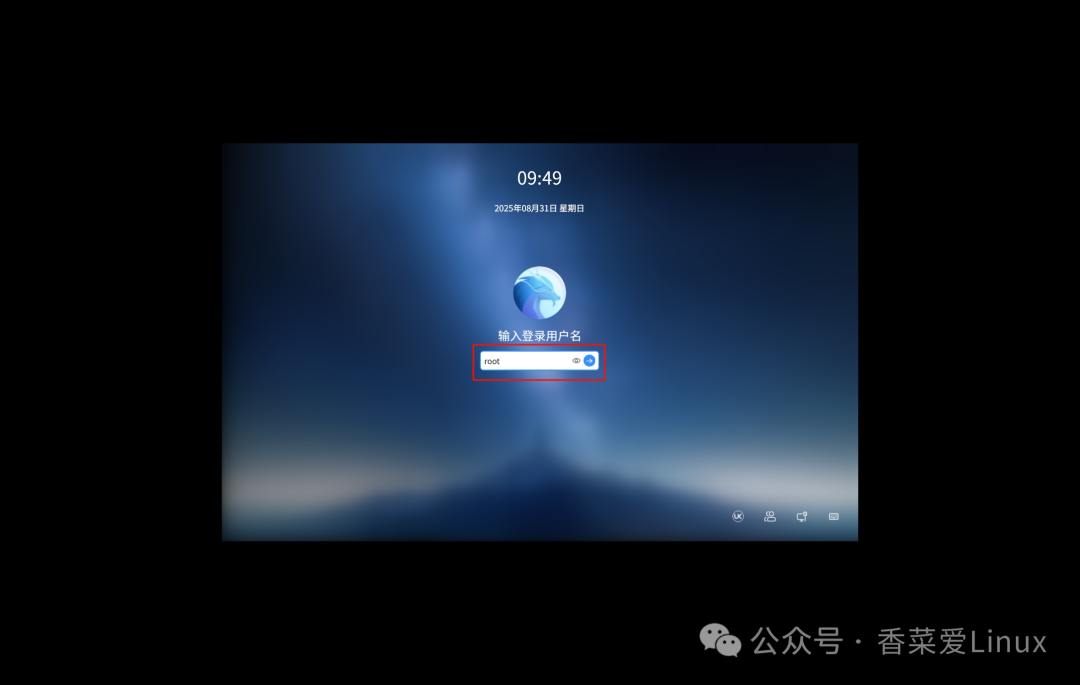
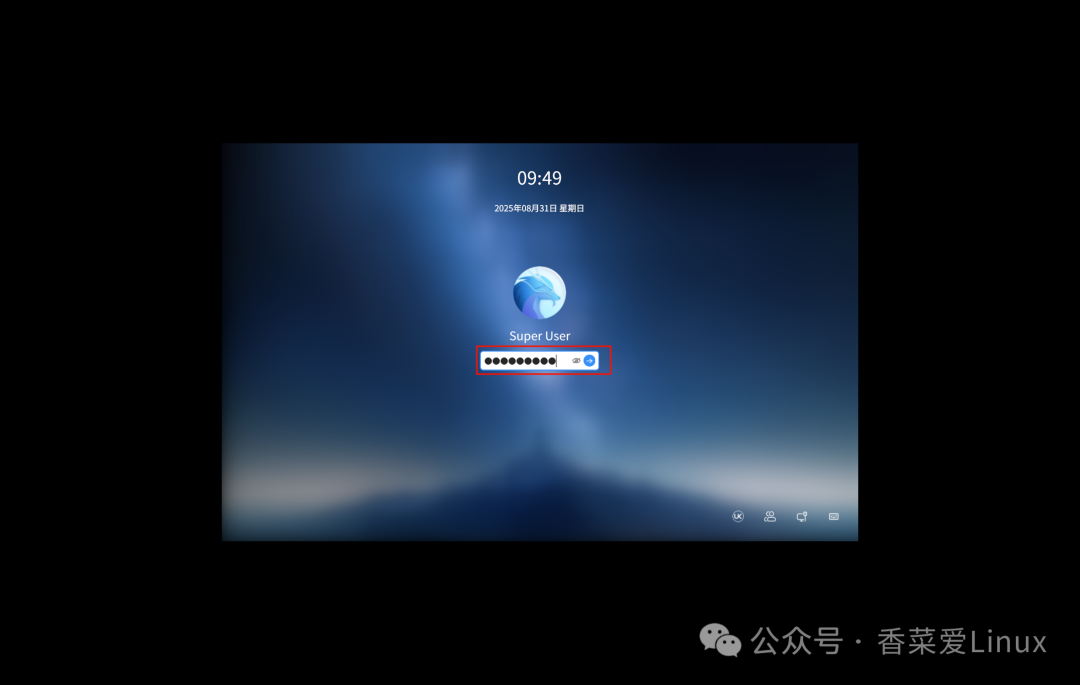
4.10 Log in to the system using the root account
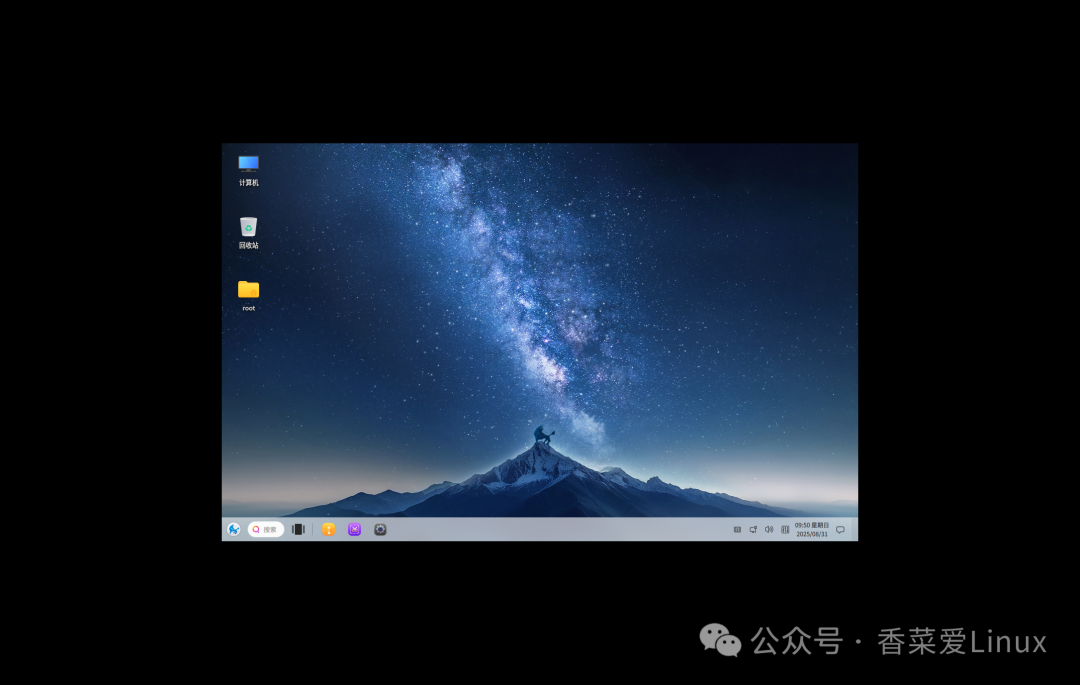
5. System Configuration
5.1 Configure Network Connection
Right-click on the desktop and select [Open Terminal], edit the network card configuration file:
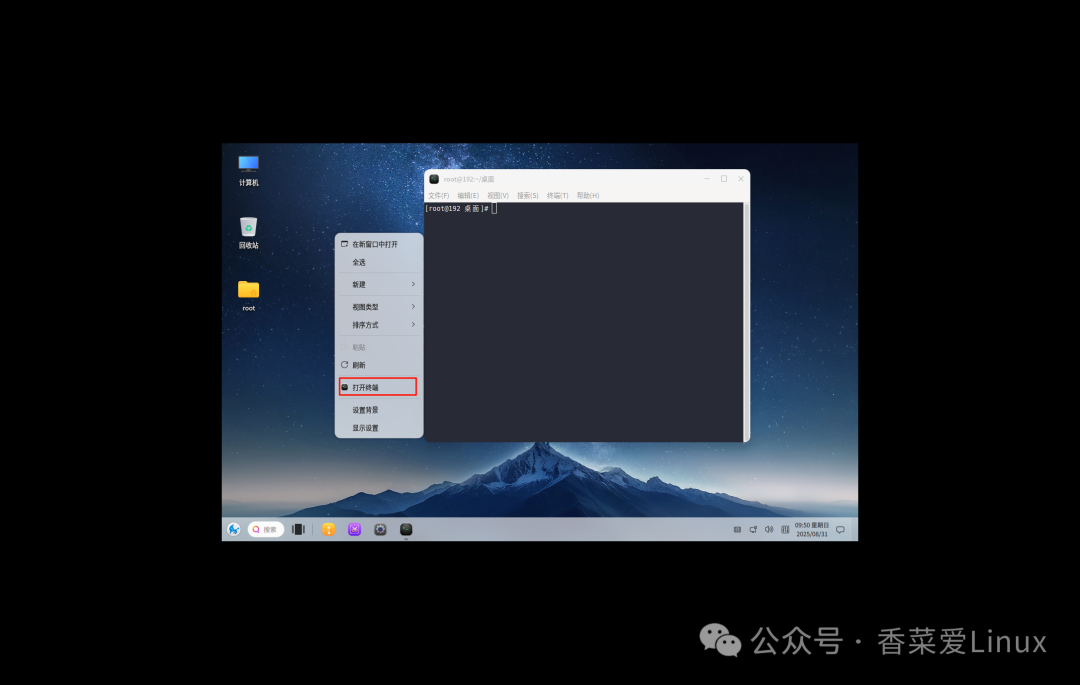
vim /etc/sysconfig/network-scripts/ifcfg-ens33Configure the IP address according to the actual network environment:
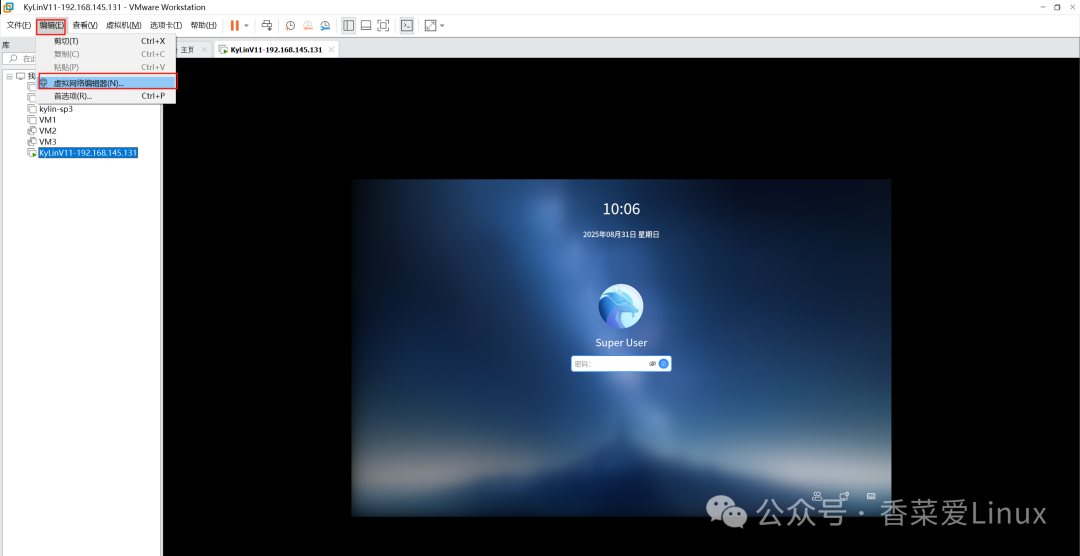
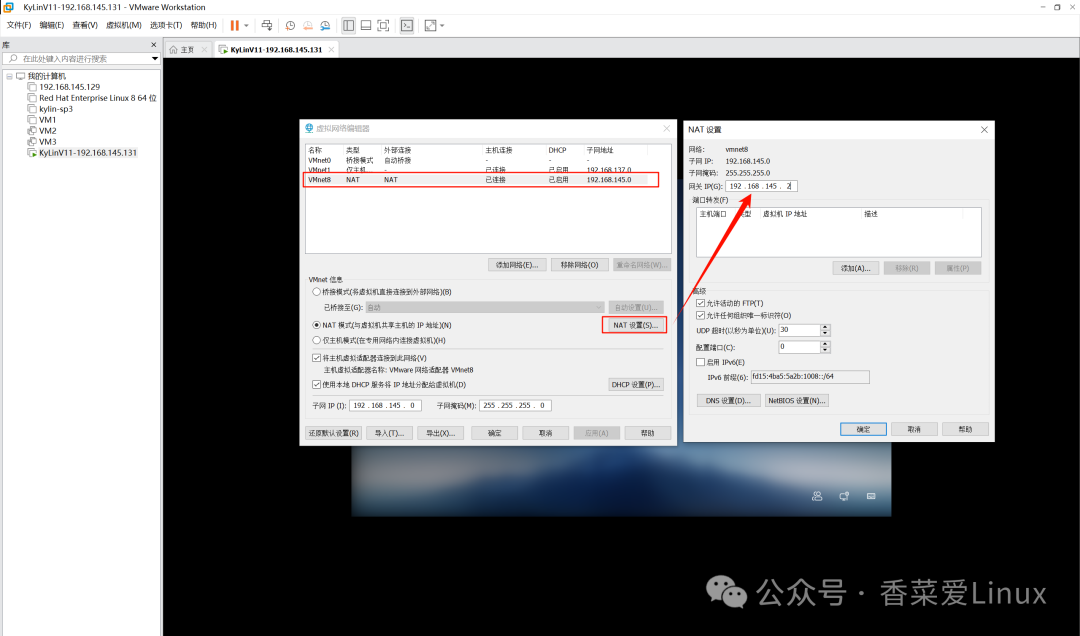
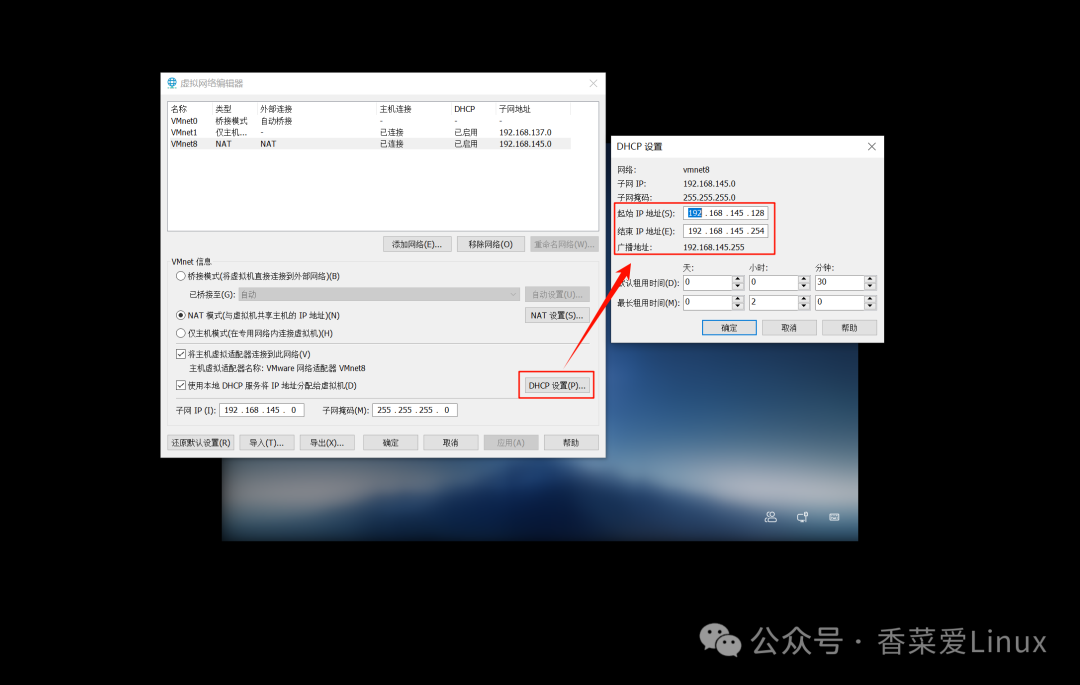
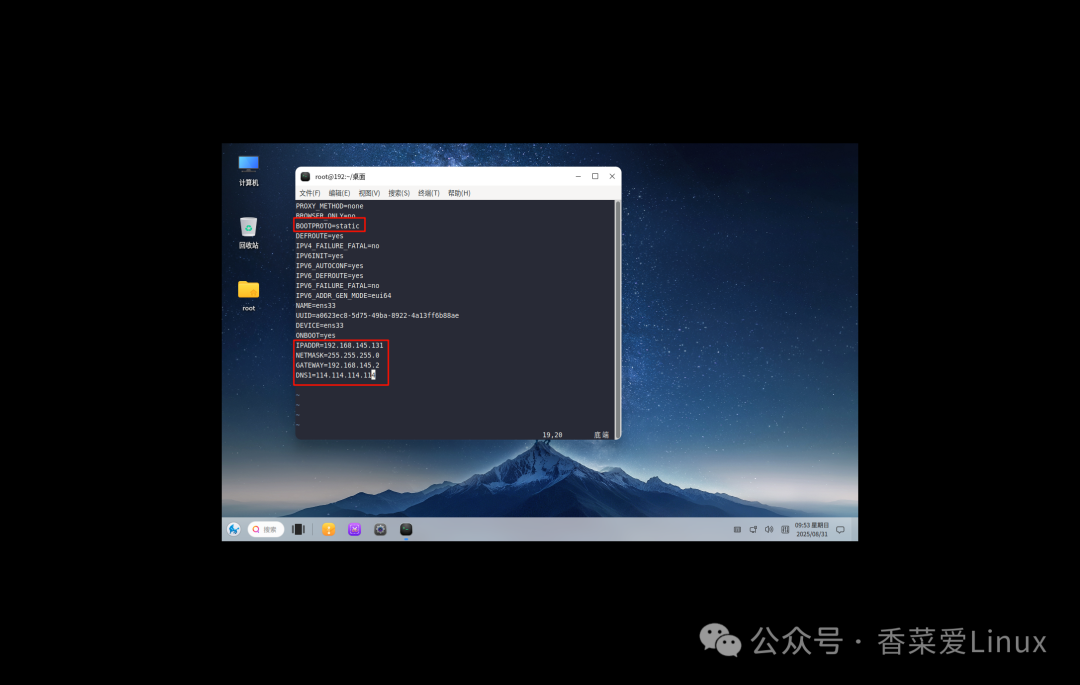
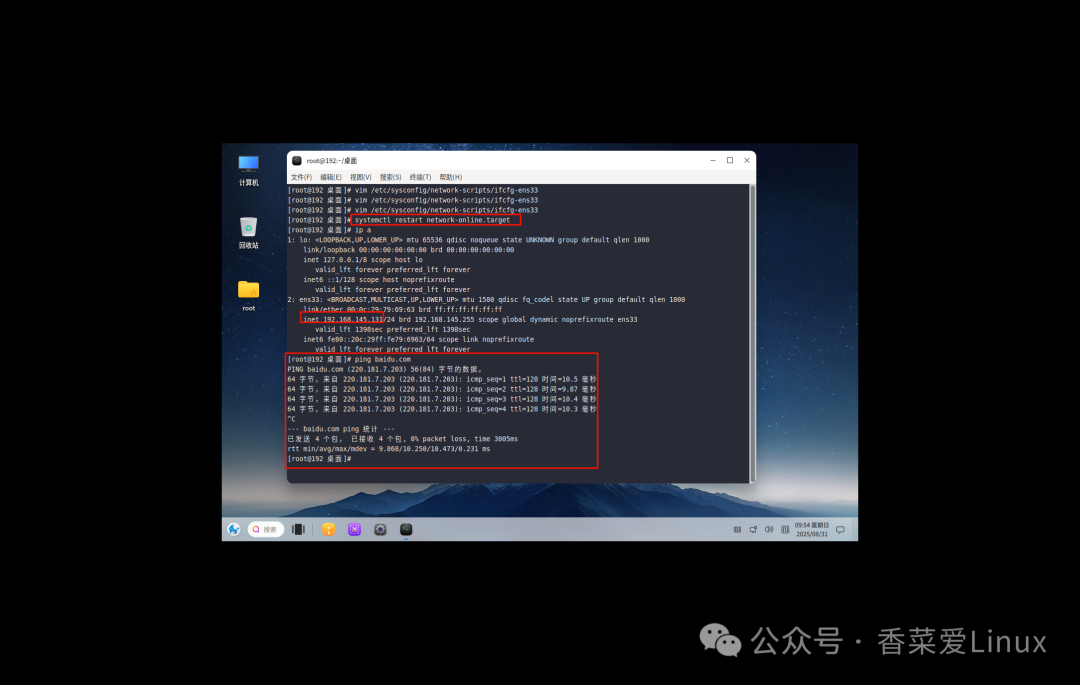
5.2 Use tools like Xshell for remote connection
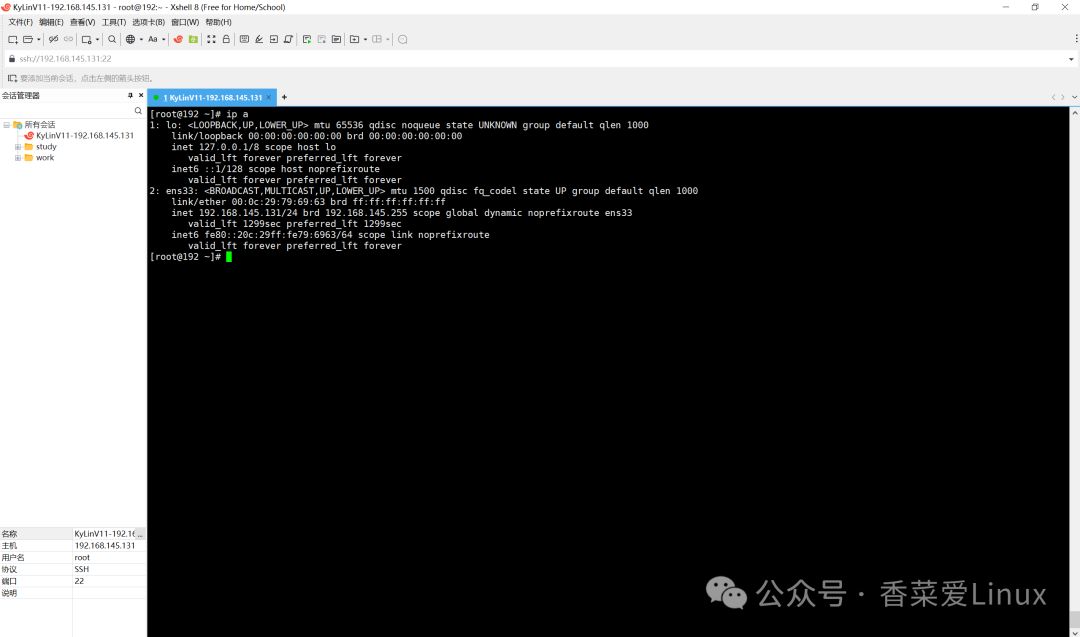
6. System Information Verification
Check the system version information:
[root@192 ~]# nkvers
############## Kylin Linux Version #################
Release:
Kylin Linux Advanced Server release V11 (Swan25)

Kernel:
6.6.0-32.7.v2505.ky11.x86_64

Build:
Kylin Linux Advanced Server
release V11 2503/(Swan25)-x86_64-Build20/20250715
#################################################
[root@192 ~]# uname -a
Linux 192.168.145.131 6.6.0-32.7.v2505.ky11.x86_64 #1 SMP PREEMPT_DYNAMIC Fri Jul  4 13:31:43 UTC 2025 x86_64 x86_64 x86_64 GNU/Linux
[root@192 ~]# cat /etc/os-release
NAME="Kylin Linux Advanced Server"
VERSION="V11 (Swan25)"
ID="kylin"
VERSION_ID="V11"
PRETTY_NAME="Kylin Linux Advanced Server V11 (Swan25)"
ANSI_COLOR="0;31"
7. Software Installation Testing
Test the installation of the podman container tool:
# Check available podman versions
yum list | grep podman

# Install podman
yum install podman -y

# Verify installation
podman version
Successful installation shows:
Client:       Podman Engine
Version:      4.9.4
API Version:  4.9.4
Go Version:   go1.21.4
Built:        Thu Jan  1 08:00:00 1970
OS/Arch:      linux/amd64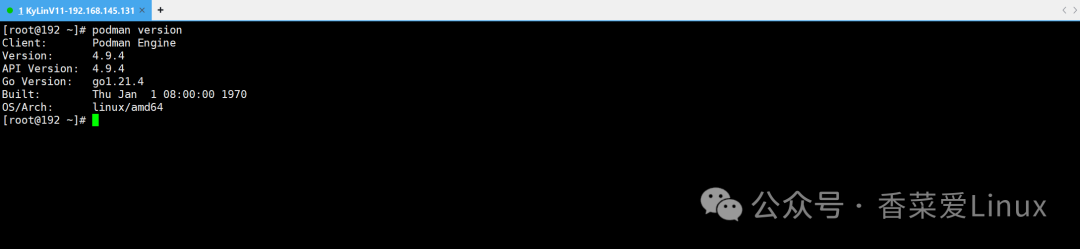
Conclusion
This article provides a detailed introduction to the installation process of the Kylin V11 system in VMware, including image acquisition, virtual machine configuration, system installation, initialization, and function verification. By following the steps in this article, users can quickly set up a Kylin V11 testing environment, and further configuration and application deployment can be carried out according to actual needs. The Kylin system V11 version maintains the original stability while bringing updated kernels and software packages, with a simple and smooth installation process and good hardware compatibility, indicating that domestic operating systems are continuously improving and perfecting, providing a reliable foundational platform choice for domestic information technology construction.