Raspberry Pi (Chinese name: “树莓派”, abbreviated as RPi or RasPi) is a credit card-sized computer designed for computer programming education for students, and its system is based on Linux.
I bought a Raspberry Pi B long ago, but I never got around to using it. Since I plan to go into embedded development in the future, I decided to start experimenting with the Raspberry Pi B.
The reason I chose Raspberry Pi is that it is popular both domestically and internationally, with abundant resources available in both Chinese and English. I didn’t choose a microcontroller because it requires a deeper understanding of low-level programming, which has a higher entry barrier for beginners. In contrast, the Raspberry Pi does not require extensive knowledge of low-level development or hardware details, making it easier to get started, and there are many applications to explore. Beginners can treat this as a slightly less powerful desktop computer or as a powerful microcontroller.
A special note: I am also just starting out, not an expert, so in many cases, my understanding is limited, and this is part documentation of my testing and learning. If there are any errors or issues in the materials, please feel free to point them out. I will gradually update this as I learn more. Some details may not be discussed extensively as they are not used (I am really updating slowly as I learn and document along the way).
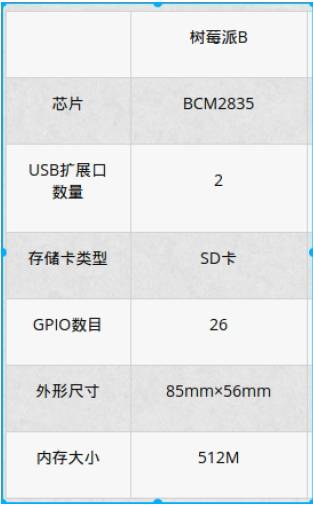
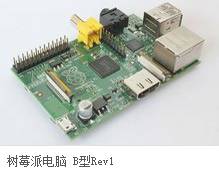
The Raspberry Pi comes in several models. The B model I bought is an earlier version, with a clock speed of 700MHz (which can be overclocked to over 1GHz, but this may shorten its lifespan, not recommended), 512MB of memory, VGA, HDMI video ports, and one audio port. The B version has fewer external interfaces, 2 USB ports, and 26 GPIO pins. The Raspberry Pi 3 has already been released; if you want to play, you can buy the latest model, which has better performance and more interfaces. For specific details, you can refer to the wiki.
https://zh.wikipedia.org/wiki/%E6%A0%91%E8%8E%93%E6%B4%BE
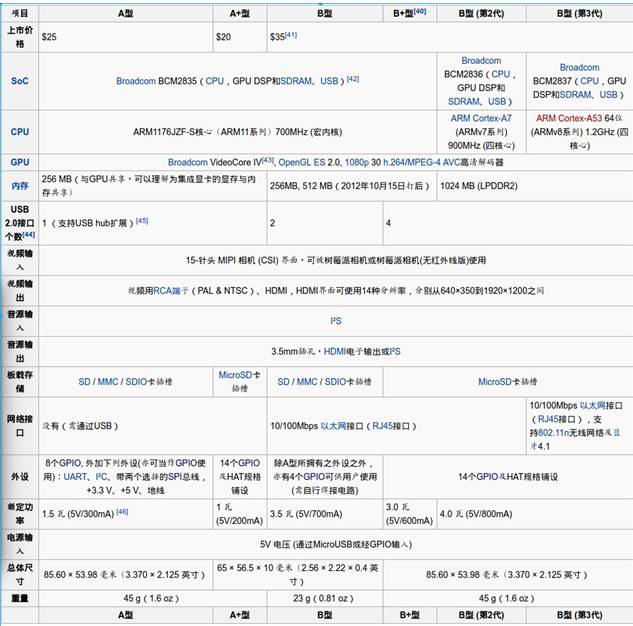
Image source: Wiki. The equipment I purchased for my initial setup includes:
-
Raspberry Pi main unit (essential)
-
Heat sinks
-
Raspberry Pi SD card and adapter (other versions may not require an adapter, buy according to your needs) (essential)
-
Raspberry Pi case to protect the device
-
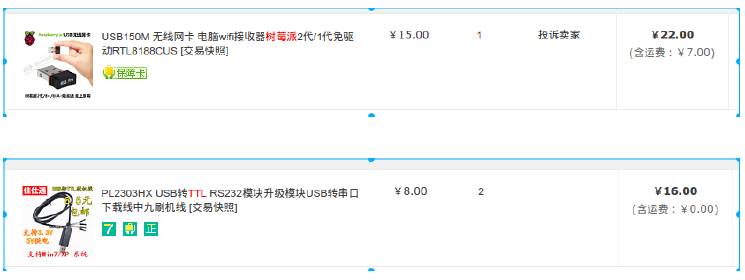
Driver-free wireless network card
-
USB to TTL serial debugging cable
Below are the devices and the prices I paid at the time (the latest models are now cheaper than what I paid):
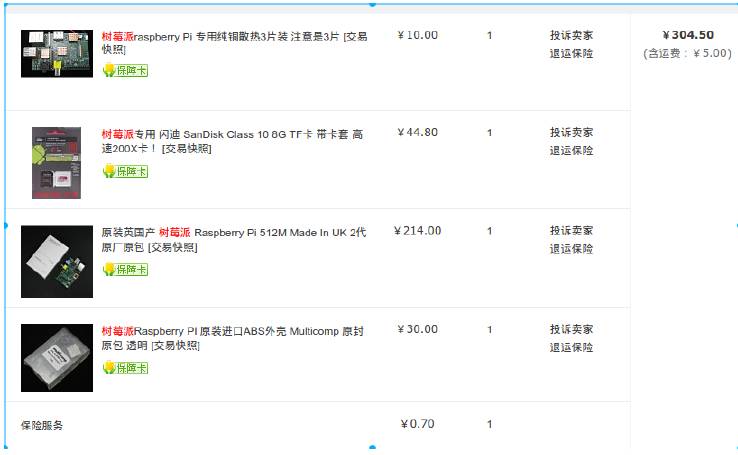
About these devices:
-
Heat sinks are optional. Just buy a few cheap ones. Stick them on the CPU; the Raspberry Pi shares a core between CPU and GPU. It does get a bit hot.
-
For the Raspberry Pi SD card, it is recommended to buy a C10 (U1) speed card, as this acts as the hard drive, and faster speeds will ensure better performance.
-
The Raspberry Pi case protects the device; the one I bought for 30 yuan is super sturdy and definitely sufficient for protection. (Unfortunately, it did not leave an opening for the GPIO port, so I had to cut it open myself; the quality was so good that my pliers got bent. I later used a soldering iron to make a hole).
-
For the driver-free wireless network card, it’s best to buy one that is either driver-free or comes with a driver, as finding drivers can be troublesome. It’s also better to use wireless with the Raspberry Pi for convenience.
-
The USB to TTL serial debugging cable is very important for those without a monitor. Initially, you need to log in via the serial port to configure the device, including wireless settings, and it can also be used for debugging later.
With the above basic hardware, you can start experimenting. More basic introductions can be found through Google search; I won’t elaborate further on the 34 uses of Raspberry Pi.
Source: https://linuxtoy.org/archives/cool-ideas-for-raspberry-pi.html
If you have a Raspberry Pi, what would you use it for? Perhaps the following 34 creative uses for Raspberry Pi can inspire you.
• Web server
• Home automation
• BitTorrent server
• Webcam server
• Weather station
• Bitcoin wallet
• Quadcopter
• VoIP PBX
• XBMC media center
• Audiobook player
• Arduino shields
• NAS server
• Apple Time Machine support
• Tor relay
• Home VPN server
• GPS tracker (with 3G support)
• Advice machine (useless but cool)
• Analog input
• Supercomputer
• Kindle as a display
• PIC programmer
• Pen testing/hacking
• Android system
• Network status checker
• Solar data logger
• Send me to space
• Coffee
• Build a cool tank
• Digital photo frame
• Add WiFi
• Open source kiosk
• Node.js
• Traffic monitor
• Overclocking
(End)
Tomorrow’s preview: Installing the Basic System on Raspberry Pi B (Part II)
Kanxue Review: http://ce.kanxue.com
Kanxue Forum: http://bbs.pediy.com/

—– WeChat ID: ikanxue —–
Kanxue • Security has been focusing on security for 16 years, serving you professionally!