This article provides a detailed explanation for students who are using or learning about oscilloscopes for the first time.Introduction to Oscilloscopes – Detailed Steps for First-Time Use.
1. What is an oscilloscope used for??
An oscilloscope is an instrument used to observe the relationship between the voltage of electrical signals and time, used for analyzing the time-domain characteristics of signals.
Using an oscilloscope allows for intuitive testing of signal period, phase, edge time, and comparison of multiple signals, as well as observing the amplitude variation of signals over time.
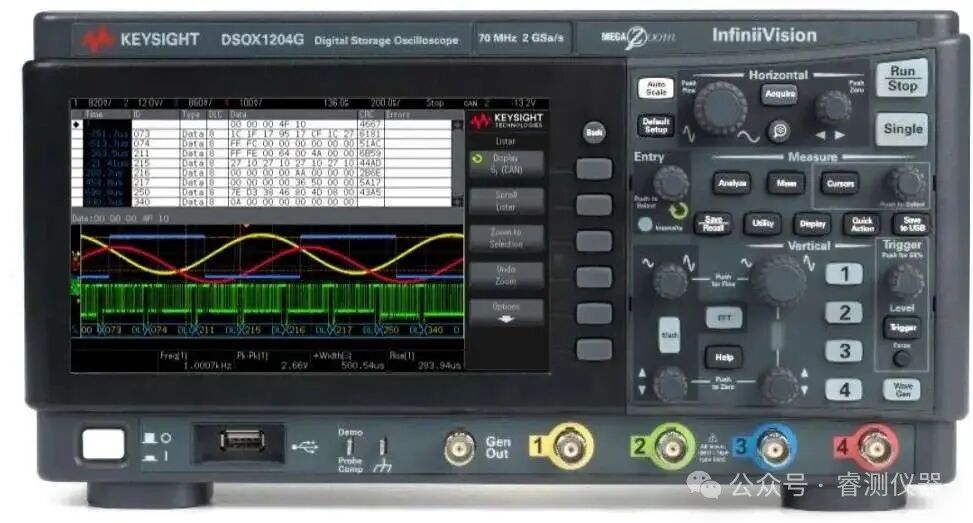
2. What can an oscilloscope measure?
Basic waveform parameter measurement and circuit anomaly diagnosisHigh-speed signal integrity analysis (eye diagrams, jitter analysis)Standard bus compliance analysis (USB, PCIe, DDR, HDMI, etc.)Serial signal decoding (I2C, SPI, CAN, etc.)Modulation analysis of broadband signals (UWB, radar, etc.)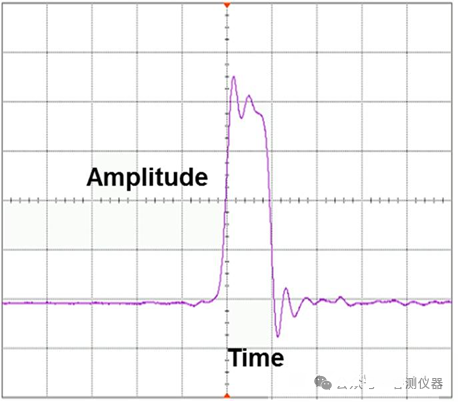
3. Introduction to Oscilloscopes – Detailed Steps for First-Time Use
This article introduces how to use the Keysight 1000B series oscilloscope – detailed steps for first-time use of the oscilloscope.Step 1. Check the packaging itemsStep 2. Turn on the oscilloscope powerStep 3. Load the default oscilloscope settingsStep 4. Input waveformStep 5. Use auto setupStep 6. Compensate the probeStep 7. Familiarize with the front panel controlsStep 8. Familiarize with the oscilloscope displayStep 9. Use the run control keysStep 10. Access built-in helpSecure the oscilloscope
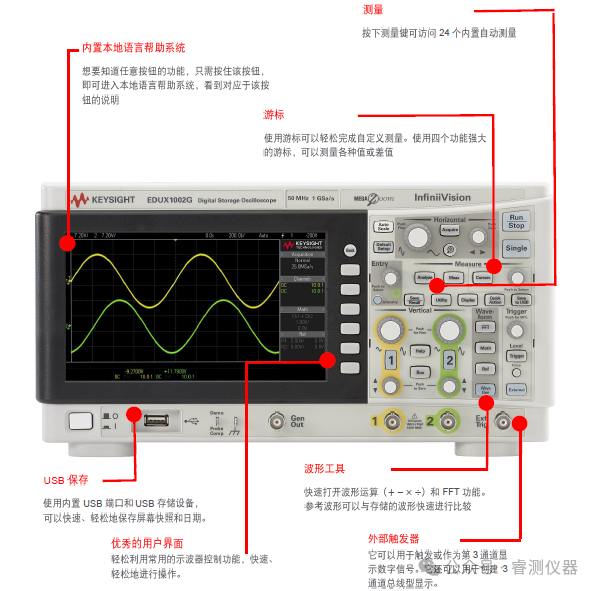
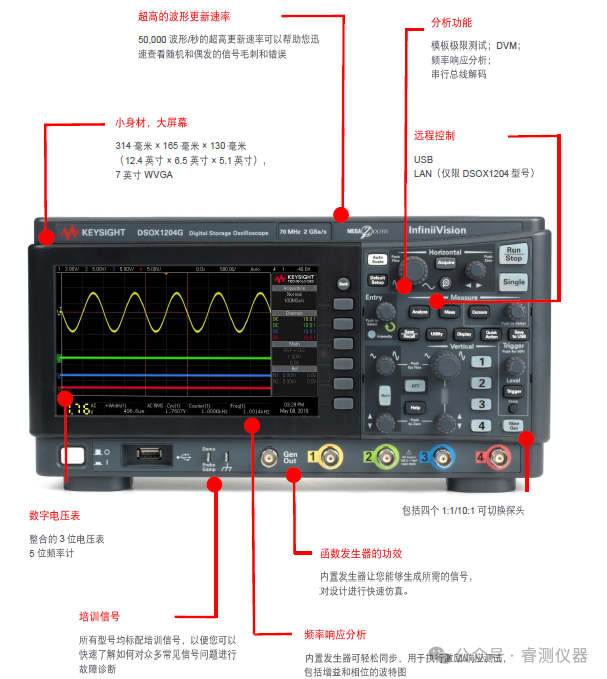
Step 1. Check the packaging items1 Check if the shipping box is damaged. Please keep the damaged shipping box or padding material until you have checked the integrity of the items and the mechanical and electrical performance of the oscilloscope.2 Verify that the following items are included in the oscilloscope packaging:• Oscilloscope.• Power cord.• N2841A 10:1 10 MΩ passive probes, quantity = 2.• Documentation CD.• Front panel label (if a non-English language option was selected).3 Check the oscilloscope.
Step 2. Turn on the oscilloscope powerThe following steps (turning on the oscilloscope power, loading default settings, and inputting waveforms) will provide a quick functional check to verify that the oscilloscope is working properly.1. Connect the power cord to the power source. Only use the power cord designed for the oscilloscope. Use a power source that provides the required power.Table 2 Power Requirements

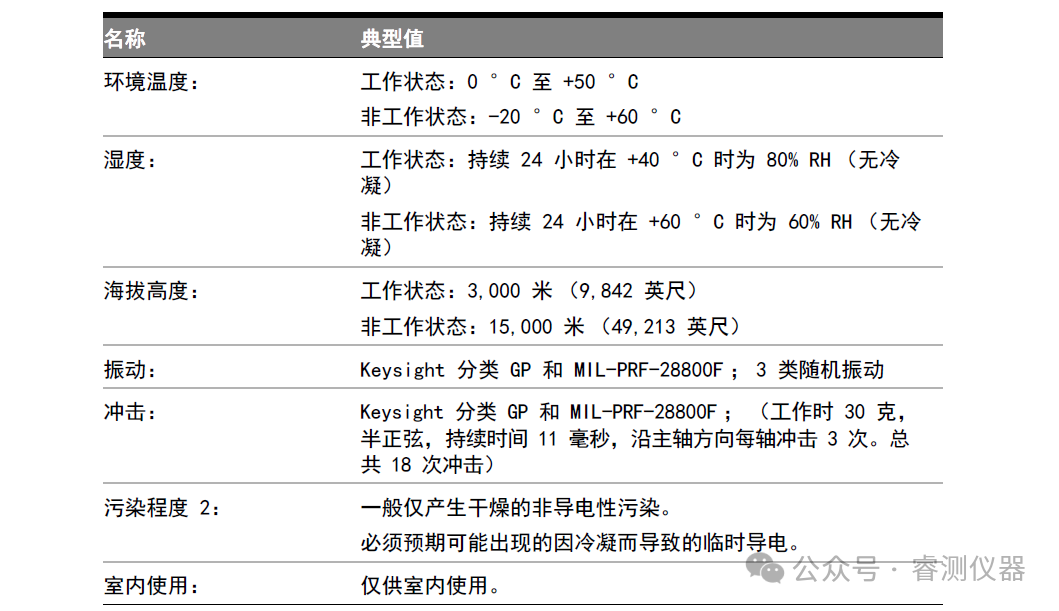
Warning – To avoid electric shock, ensure the oscilloscope is properly grounded.Table 3 Environmental Characteristics
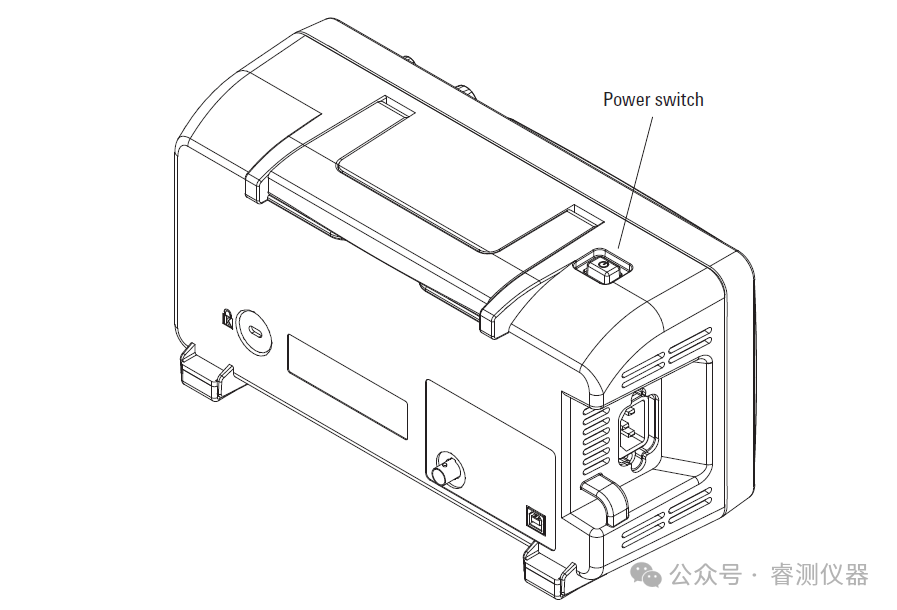
2. Turn on the oscilloscope power.
Step 3. Load the default oscilloscope settingsYou can load the factory default settings at any time to restore the oscilloscope to its original settings.
1 Press the default setup [Default Setup] button on the front panel.
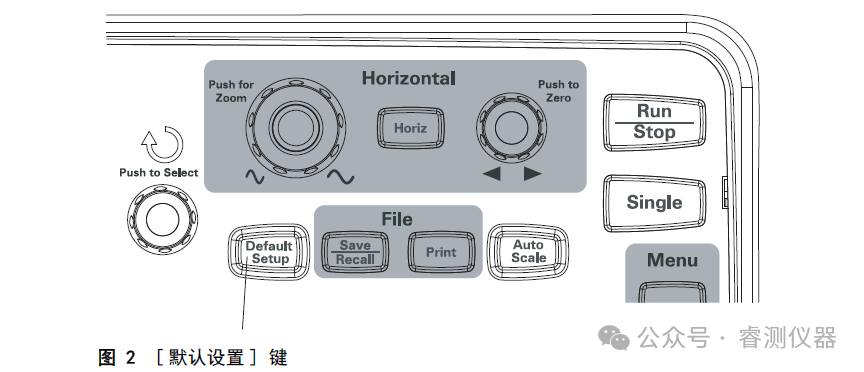
2 When the “Default” menu is displayed, press the menu on/off [Menu On/Off] to close the menu. (You can use the undo softkey in the “Default” menu to cancel the default settings and return to the previous settings.
Step 4. Input waveform1. Input the waveform into the oscilloscope’s channel. Use one of the provided passive probes to input the probe compensation signal from the oscilloscope’s front panel.To avoid damaging the oscilloscope, ensure that the input voltage on the BNC connector does not exceed the maximum voltage (maximum 300 Vrms).When measuring voltages above 30V, use a 10:1 probe.
Step 5. Use auto setupThe oscilloscope has an auto setup feature that automatically sets the oscilloscope controls for the existing input waveform.
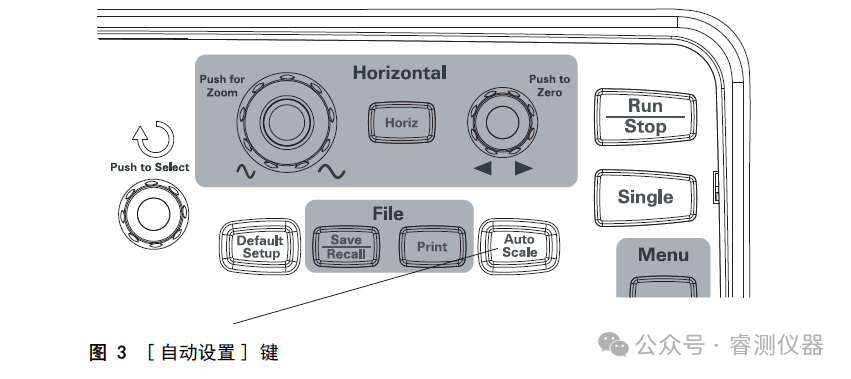
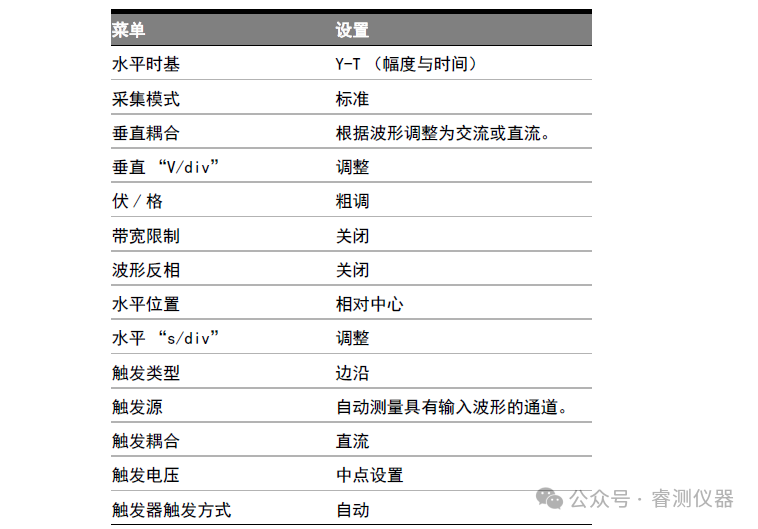
The auto setup requires the waveform frequency to be greater than or equal to 50 Hz and the duty cycle to be greater than 1%.1 Press the auto setup [Auto Scale] button on the front panel.2 When the “Auto” menu is displayed, press the menu on/off [Menu On/Off] to close the menu.The oscilloscope will open all channels with applied waveforms and set the vertical and horizontal scales accordingly. It will also select the time base range based on the trigger source. The selected trigger source is the channel with the highest number of applied waveforms.(You can use the undo softkey in the “Auto” menu to cancel the auto setup and return to the previous settings.)
The oscilloscope is configured with the following default control settings:Table 4 Auto Setup Default Settings
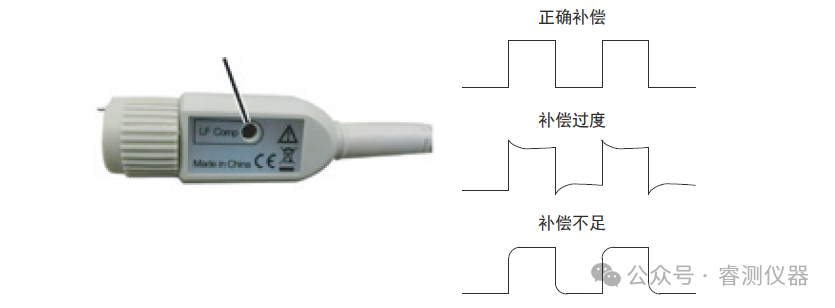
Step 6. Compensate the probeCompensate the probe to match the probe with the input channel. The probe should be compensated whenever it is connected to the input channel for the first time.
Oscilloscope Low-Frequency CompensationFor the provided passive probes:1 Set the “Probe” menu attenuation to 10X. If using the probe hook tip, ensure the hook tip is securely inserted into the probe for proper connection.2 Connect the probe tip to the probe compensation connector and connect the ground lead to the probe compensator ground connector.3 Press the auto setup [Auto Scale] button on the front panel.4 If the waveform does not resemble the correctly compensated waveform shown in Figure 4, adjust the low-frequency compensation adjustment on the probe using a non-metallic tool to achieve the flattest square wave possible.
Oscilloscope Low-Frequency Compensation Adjustment
Step 7. Familiarize with the oscilloscope front panel controlsBefore using the oscilloscope, familiarize yourself with the front panel controls.The front panel has knobs, buttons, and softkeys. The knobs are most commonly used for adjustments. The buttons can run controls and change other oscilloscope settings through menus and softkeys.
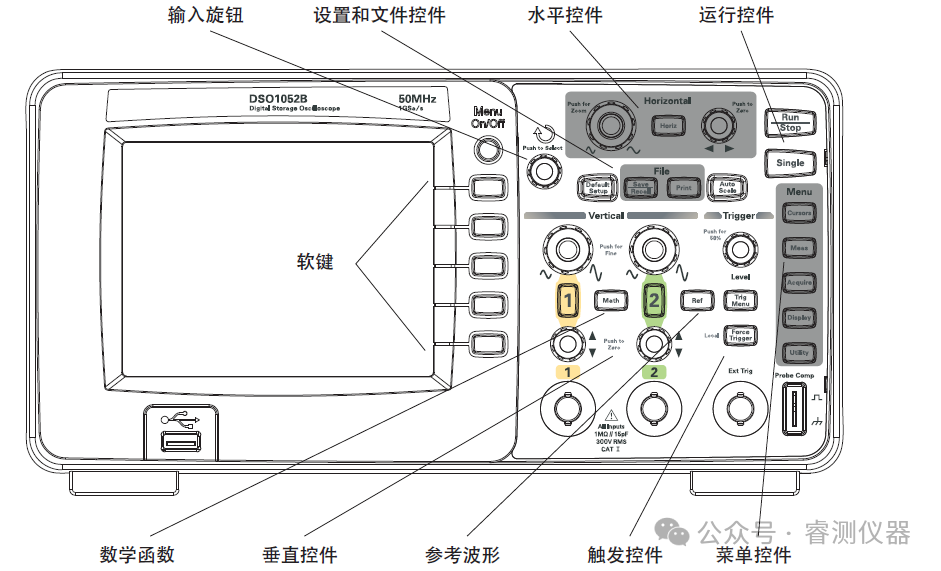
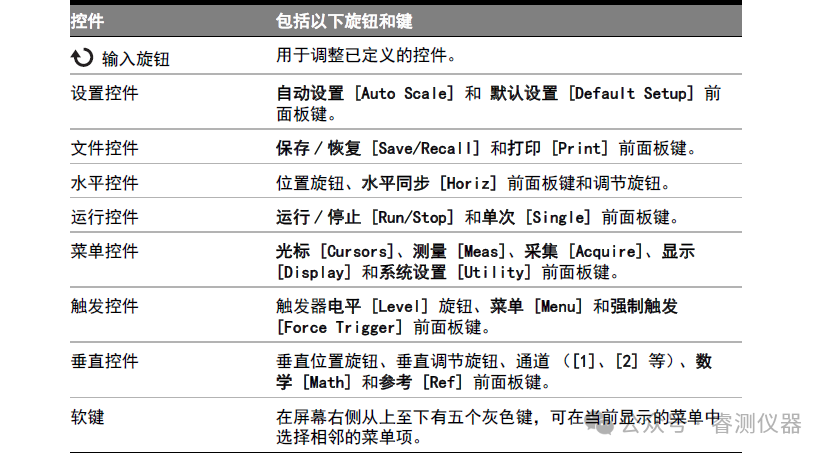
The definitions of the knobs, buttons, and softkeys on the oscilloscope front panel are as follows:Oscilloscope Front Panel Controls
Front panel labels in different languagesIf a language option other than English was selected, front panel labels in the selected language are available.To install the front panel labels:1 Insert the left tab of the label into the appropriate slot on the front panel.2 Gently press the label onto the knobs and buttons.3 When the label is aligned with the front panel, insert the right tab of the label into the slot on the front panel. 4 Flatten the label. It should be secured to the front panel.
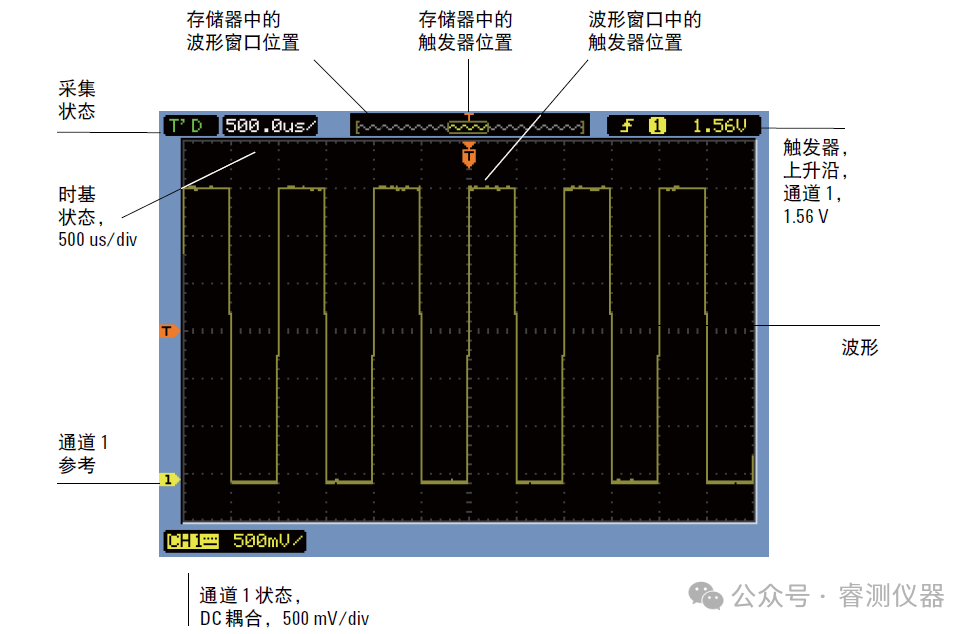
Step 8. Familiarize with the oscilloscope display
Using the oscilloscope softkey menu
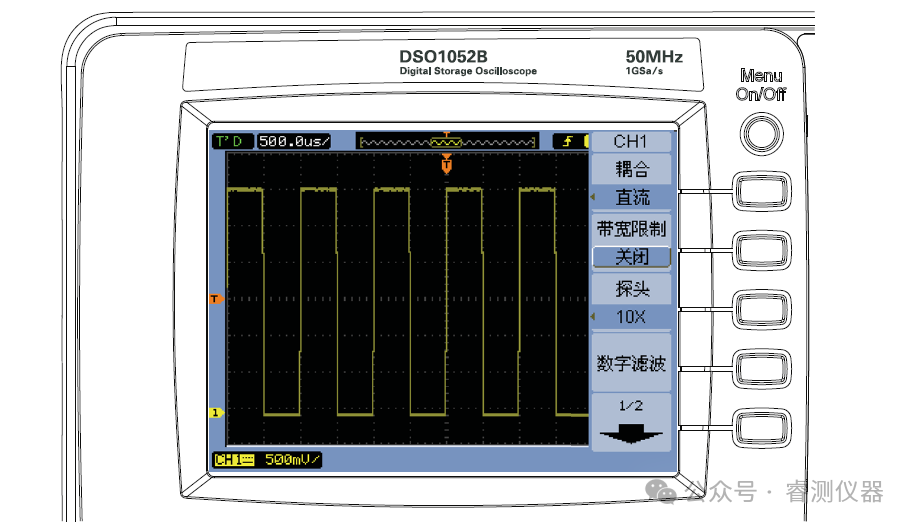
When a front panel key opens a menu, you can use the five softkeys to select items from the menu. Some commonly used menu options are as follows:
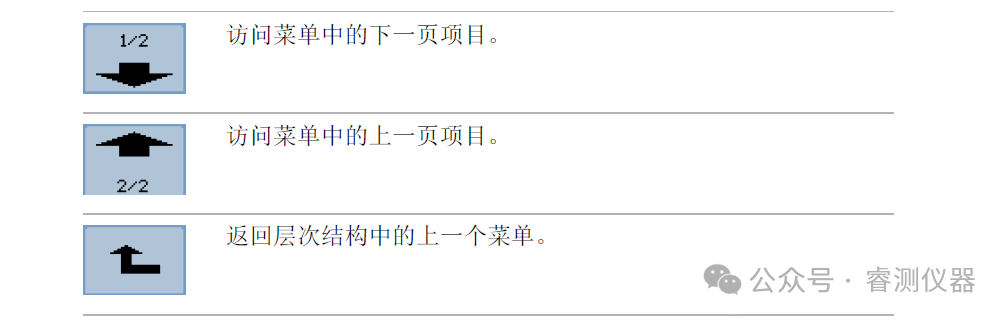
The menu on/off [Menu On/Off] front panel key can close the menu or reopen the last accessed menu.
Using the hold item in the “Display” menu can select the display time of the menu.
Step 9. Use the run control keysThere are two front panel keys for starting and stopping the oscilloscope acquisition system: run/stop [Run/Stop] and single [Single].
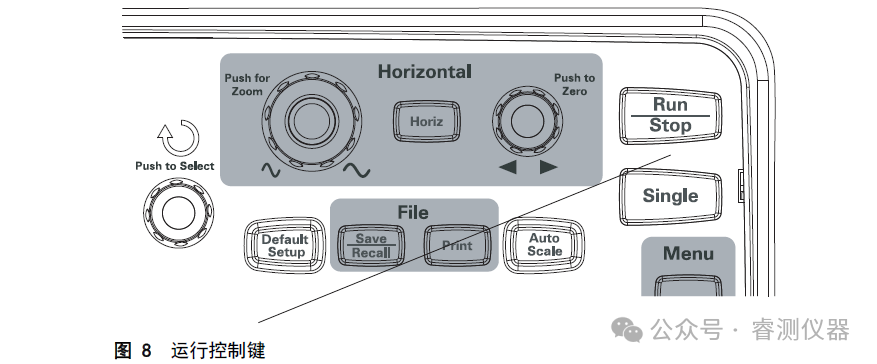
• When the run/stop [Run/Stop] key is green, it indicates that the oscilloscope is acquiring data. To stop data acquisition, press the run/stop [Run/Stop]. After stopping, the last acquired waveform will be displayed.• When the run/stop [Run/Stop] key is red, it indicates that data acquisition has stopped. To start data acquisition, press the run/stop [Run/Stop].• To capture and display a single acquisition (regardless of whether the oscilloscope is running or stopped), press single [Single]. After capturing and displaying a single acquisition, the run/stop [Run/Stop] key will be red.Step 10. Access built-in helpThe oscilloscope has built-in quick help information. To access built-in help:1 Press and hold the front panel key, softkey, or pushable knob for which you want quick help information. Built-in help is provided in 11 different languages.
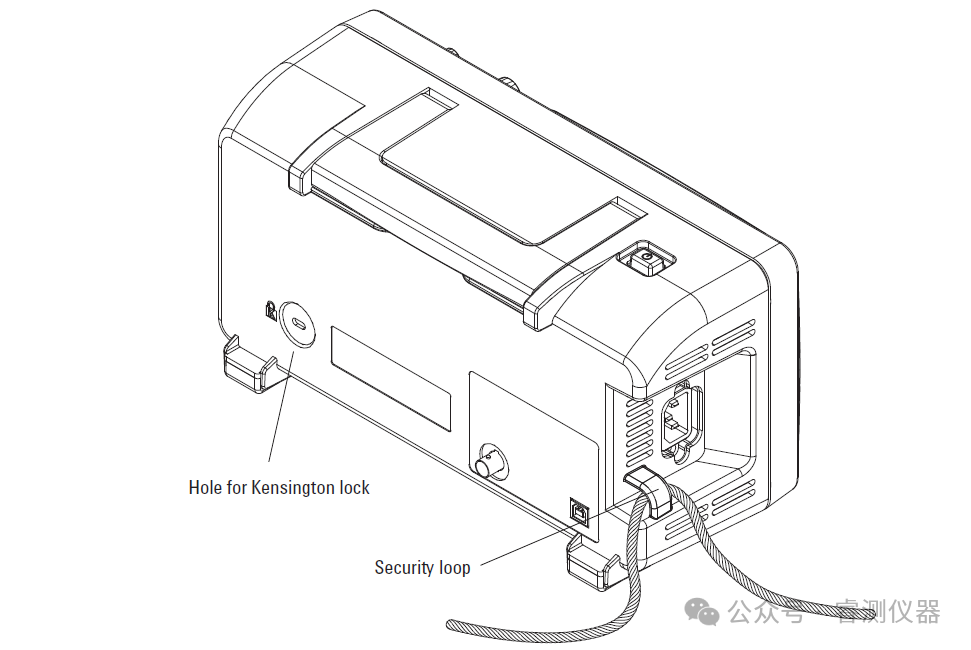
Secure the oscilloscopeTo secure the 1000B series oscilloscope in place, use the security lock hole or safety ring.

Scan the QR code

Follow us
If you have questions, contact us|Instrument rental Instrument sales Instrument maintenance
Service hotline|13912605605/18964059485
(Source: Keysight Technologies)