Click on the “Fruit Little Master” above, select “Top/Star Official Account“
Practical Benefits Delivered First-Hand!

Abstract: The commonly used chip for Arduino development boards is the AVR microcontroller series produced by Atmel. The most common is the ATmega328P, widely used in the Arduino Uno development board. Developing AVR microcontrollers on the Arduino platform is very convenient. The Arduino IDE provides a very simple and easy-to-use development environment, making it easy to write and upload code. It offers a simplified library of functions and APIs, allowing developers to easily interact with the hardware of the ATmega328P without needing to deeply understand the underlying register operations. However, Arduino can also be developed using registers.
1. Lighting Up with Arduino
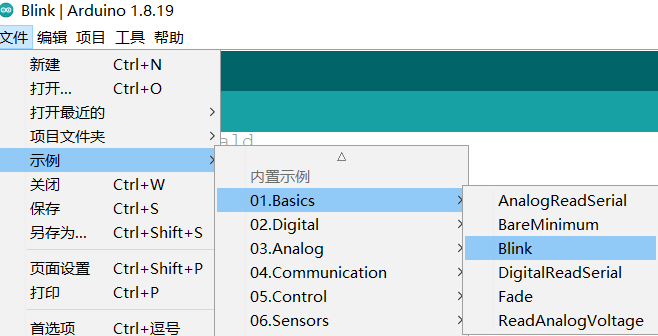
It is very convenient to develop the AVR ATmega328P microcontroller using the Arduino IDE. After downloading the Arduino IDE from the official website, you can play with the built-in examples of the IDE.
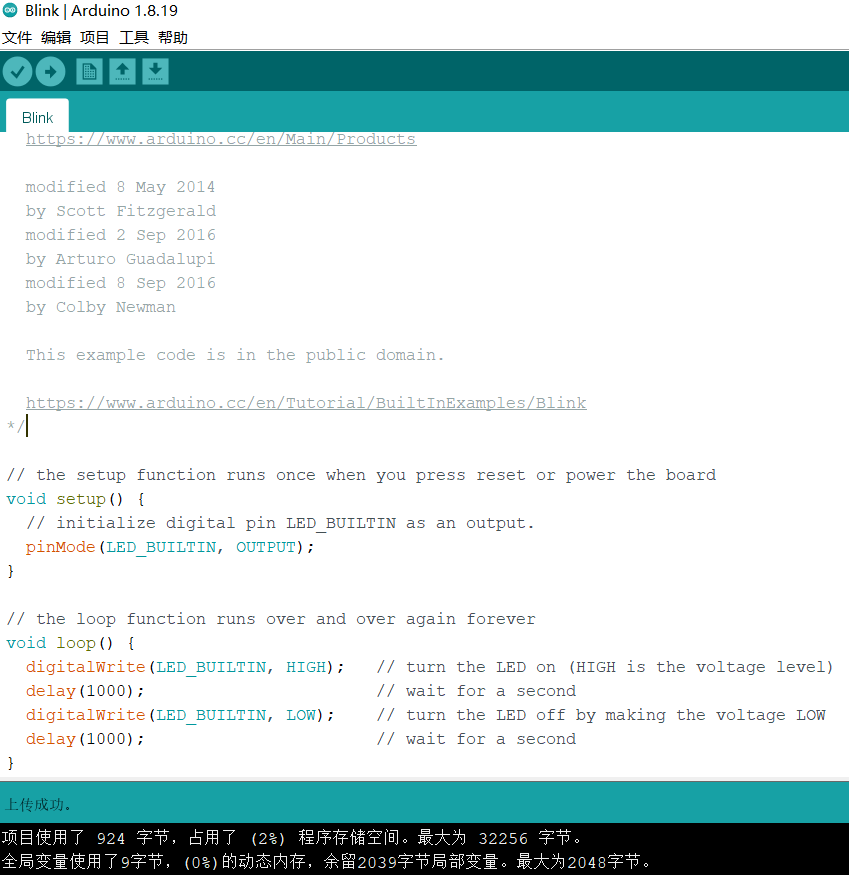
// the setup function runs once when you press reset or power the board
void setup() {
  // initialize digital pin LED_BUILTIN as an output.
  pinMode(LED_BUILTIN, OUTPUT);
}

// the loop function runs over and over again forever
void loop() {
  digitalWrite(LED_BUILTIN, HIGH);   // turn the LED on (HIGH is the voltage level)
  delay(1000);                       // wait for a second
  digitalWrite(LED_BUILTIN, LOW);    // turn the LED off by making the voltage LOW
  delay(1000);                       // wait for a second
}
This looks very simple, which is completely different from learning STM32 microcontrollers. Some may think that playing with Arduino is too trivial. In fact, there are more advanced applications for this microcontroller.
2. Steps for AVR Microcontroller IO Operations
Before playing with the AVR ATmega328P, it’s essential to understand the AVR microcontroller. The IO ports of AVR are standard bi-directional ports, and all ports are in high-impedance state upon reset. Each port of the AVR corresponds to three registers: DDRx, PORTx, and PINx. Before using the AVR microcontroller, you must initialize the corresponding ports according to the pin functions; otherwise, the ports may not work correctly. When the microcontroller’s pins are used as general digital I/O ports, each pin has three register bits: DDRxn, PORTxn, and PINxn.
| DDRxn | PORTxn | PINxn | I/O | Pull-up Resistor | Description |
|---|---|---|---|---|---|
| 0 | 0 | — | Input | None | High-Z |
| 0 | 1 | — | Input | Yes | With pull-up resistor |
| 1 | 0 | — | Output | None | Output low level |
| 1 | 1 | — | Output | None | Output high level |
Before operating the IO ports in the AVR microcontroller, you need to perform the corresponding initialization. The steps for setting up are as follows:
-
1. Set the corresponding port as input or output through the direction register DDRx. -
2. If set as output, send the data to be output to the data register PORTx. If set as input, read the external input value from the input register PINx, while you can set whether the corresponding pin needs a pull-up resistor through PORTx.
3. Lighting Up with Atmel Studio
Atmel Studio is an integrated development environment (IDE) launched by Atmel (now Microchip) specifically for embedded system development. It provides rich tools and features to support programming, debugging, and deploying Atmel microcontrollers. Atmel Studio supports various compilers, including GCC and IAR compilers, which can be used to generate optimized code. It supports multiple programming languages, including C, C++, and assembly language. Developers can choose the most suitable programming language to write their applications based on their needs.
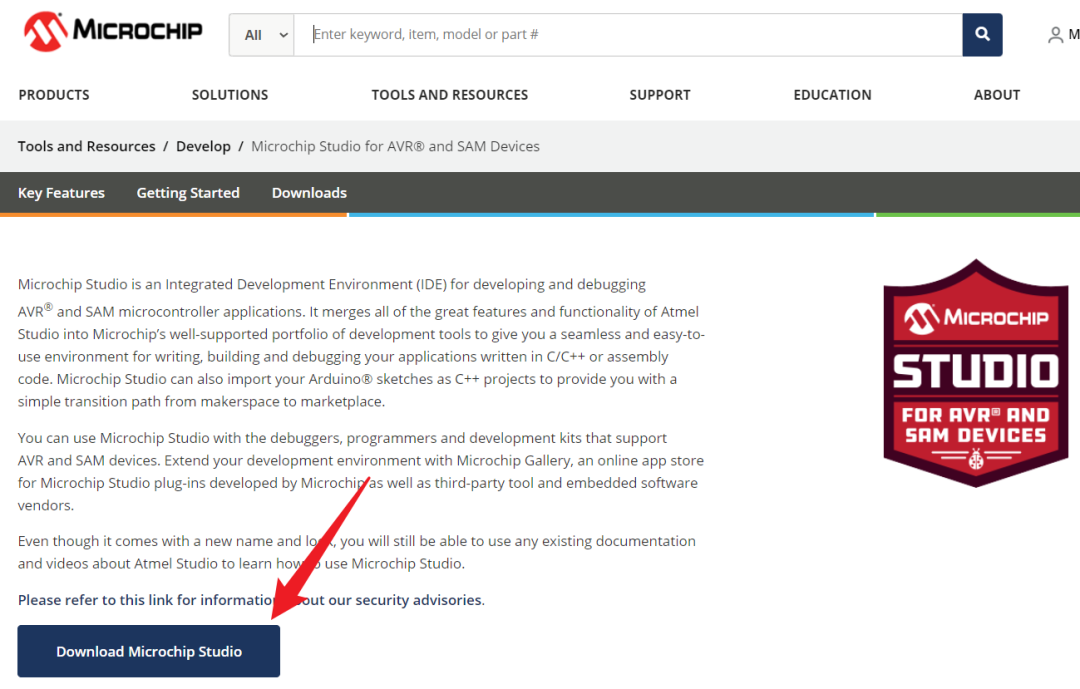
First, download the installation package for Atmel Studio from the official website. Since Atmel has been acquired by Microchip, Atmel Studio has also been renamed to Microchip Studio, which integrates the functions of Atmel Studio and expands support for more Microchip microcontroller series, including PIC and dsPIC series. Both Atmel Studio and Microchip Studio are IDEs for microcontroller application development. Atmel Studio mainly targets Atmel microcontrollers, while Microchip Studio extends support for more Microchip microcontroller series.
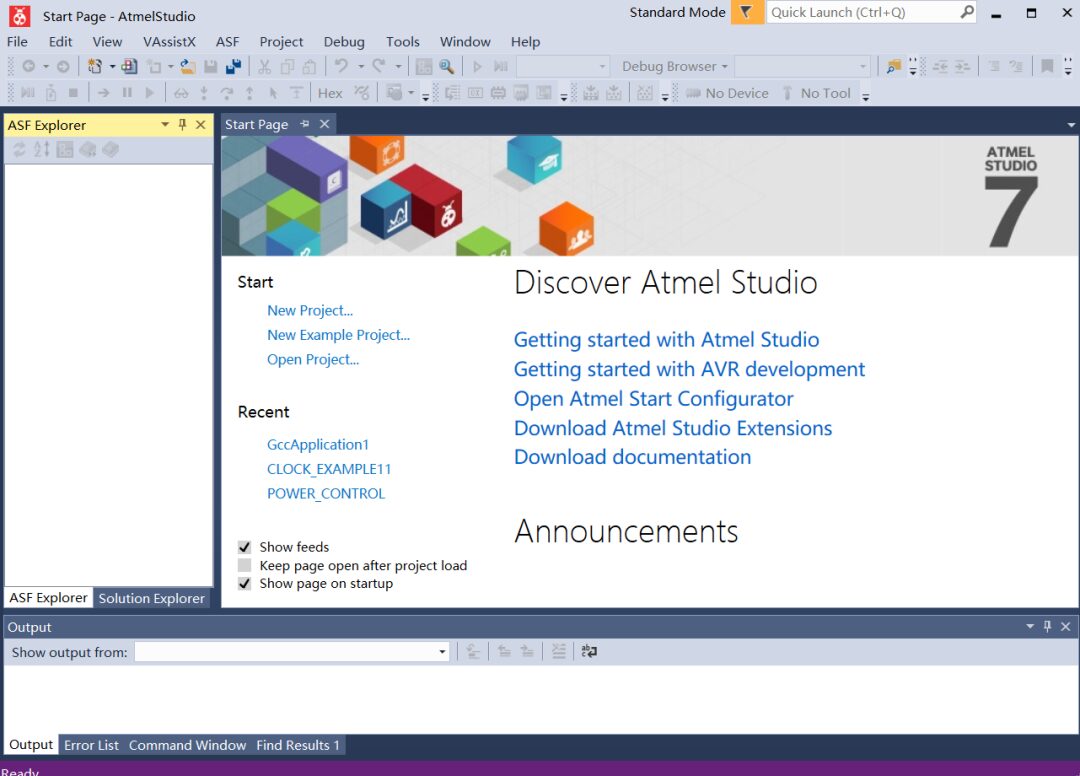
After downloading, you can install it with a simple installation process. The interface after installation is as follows; doesn’t it look familiar? Atmel Studio and Visual Studio share many similarities in interface and functionality because Atmel Studio is developed based on the Visual Studio Shell. Their main difference lies in the target platform and hardware. Atmel Studio focuses on the development of Atmel microcontrollers, while Visual Studio is a general development environment that can be used for developing various applications. Therefore, if you are already familiar with Visual Studio, switching to Atmel Studio will be relatively easy due to many shared features and workflows.
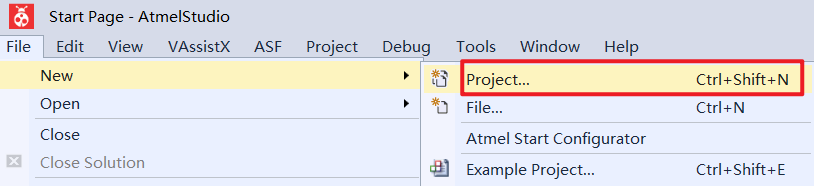
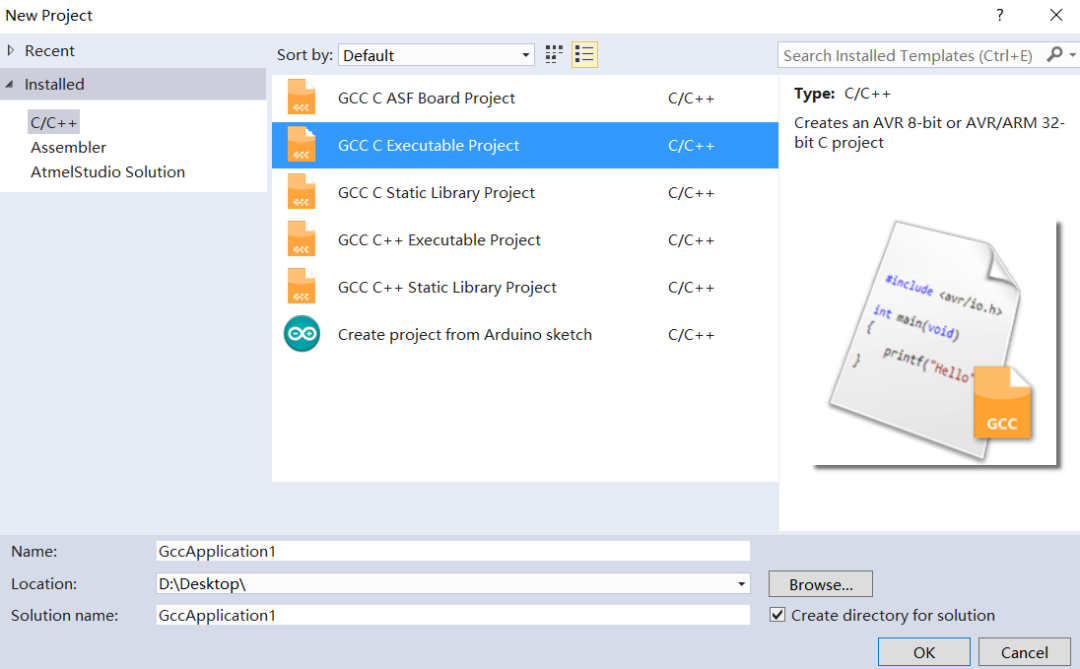
3.1 Creating a New Project

/*
 * GccApplication1.c
 *
 * Created: 2023/5/18/Wednesday 14:48:19
 * Author : LiuYao
 * Board  : Arduino Nano
 */
#ifndef F_CPU
#define F_CPU 10000000UL
#endif

#include <avr/io.h>
#include <util/delay.h>

int main(void)
{
 DDRB =(1<<DDB5);
 /* Replace with your application code */
 while (1)
 {
  PORTB |=(1<<PORTB5);
  _delay_ms(1000);
  PORTB &= !(1<<PORTB5);
  _delay_ms(1000);
 }
 return 0;
}
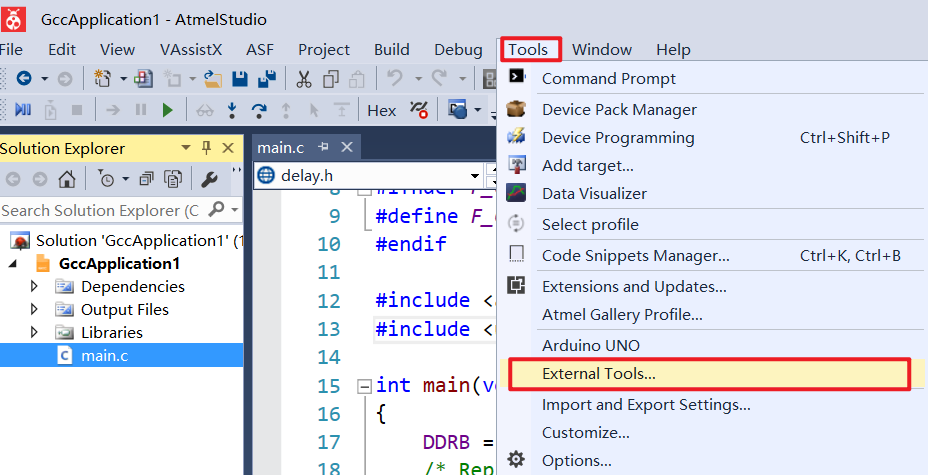
3.2 Tool Configuration
Atmel Studio does not natively support Arduino development and requires configuration. The board used in this article is Arduino UNO, and the microcontroller model is ATmega328P. Be sure to select the correct model when creating a new project.
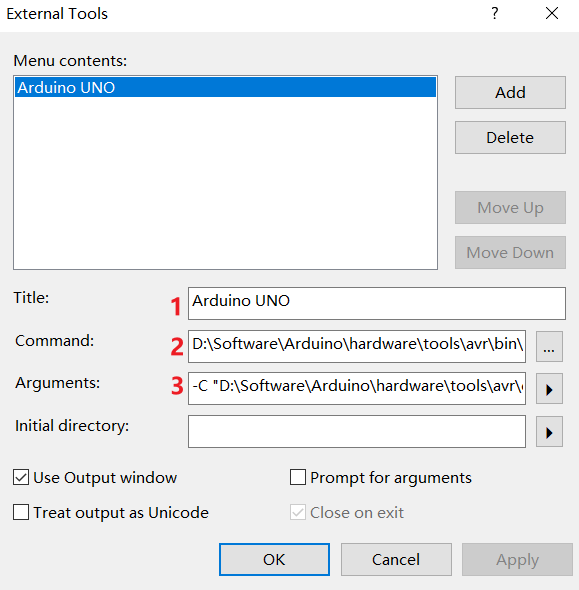
The key points after opening are to fill in the following three options and check <span>Use Output window</span>.
-
Title: Arduino UNO (fill in as desired) -
Command: D:\Software\Arduino\hardware\tools\avr\bin\avrdude.exe, this path is for the path of avrdude.exe in Arduino IDE, fill in according to your own path. -
Arguments: Pay attention to the serial port number here; mine is COM7, fill in the correct COM number according to your board recognition.
-C "D:\Software\Arduino\hardware\tools\avr\etc\avrdude.conf" -v -p atmega328p -c arduino -P COM7 -b 115200 -D -U flash:w:"$(ProjectDir)Debug\$(TargetName).hex":i
The explanation of the Arguments parameters is as follows:
Usage: avrdude.exe [options]
Options:
  -p <partno>                Required. Specify AVR device.
  -b <baudrate>              Override RS-232 baud rate.
  -B <bitclock>              Specify JTAG/STK500v2 bit clock period (us).
  -C <config-file>           Specify location of configuration file.
  -c <programmer>            Specify programmer type.
  -D                         Disable auto erase for flash memory
  -i <delay>                 ISP Clock Delay [in microseconds]
  -P <port>                  Specify connection port.
  -F                         Override invalid signature check.
  -e                         Perform a chip erase.
  -O                         Perform RC oscillator calibration (see AVR053).
  -U <memtype>:r|w|v:<filename>[:format]
                             Memory operation specification.
                             Multiple -U options are allowed, each request
                             is performed in the order specified.
  -n                         Do not write anything to the device.
  -V                         Do not verify.
  -u                         Disable safemode, default when running from a script.
  -s                         Silent safemode operation, will not ask you if
                             fuses should be changed back.
  -t                         Enter terminal mode.
  -E <exitspec>[,<exitspec>] List programmer exit specifications.
  -x <extended_param>        Pass <extended_param> to programmer.
  -y                         Count # erase cycles in EEPROM.
  -Y <number>                Initialize erase cycle # in EEPROM.
  -v                         Verbose output. -v -v for more.
  -q                         Quell progress output. -q -q for less.
  -l logfile                 Use logfile rather than stderr for diagnostics.
  -?                         Display this usage.
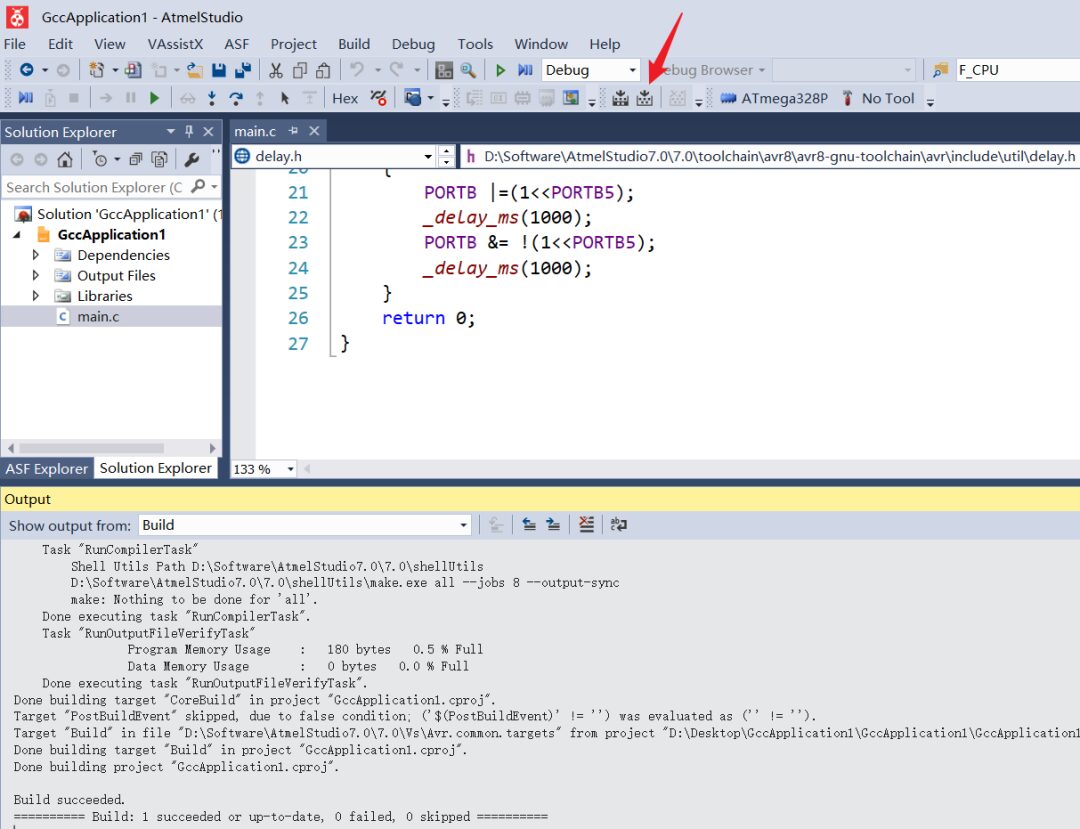
3.3 Compiling and Burning the Program
First, compile the project.
Connect the Arduino UNO to the computer, go to Tools and click on the configuration just set up <span>Arduino UNO</span>.
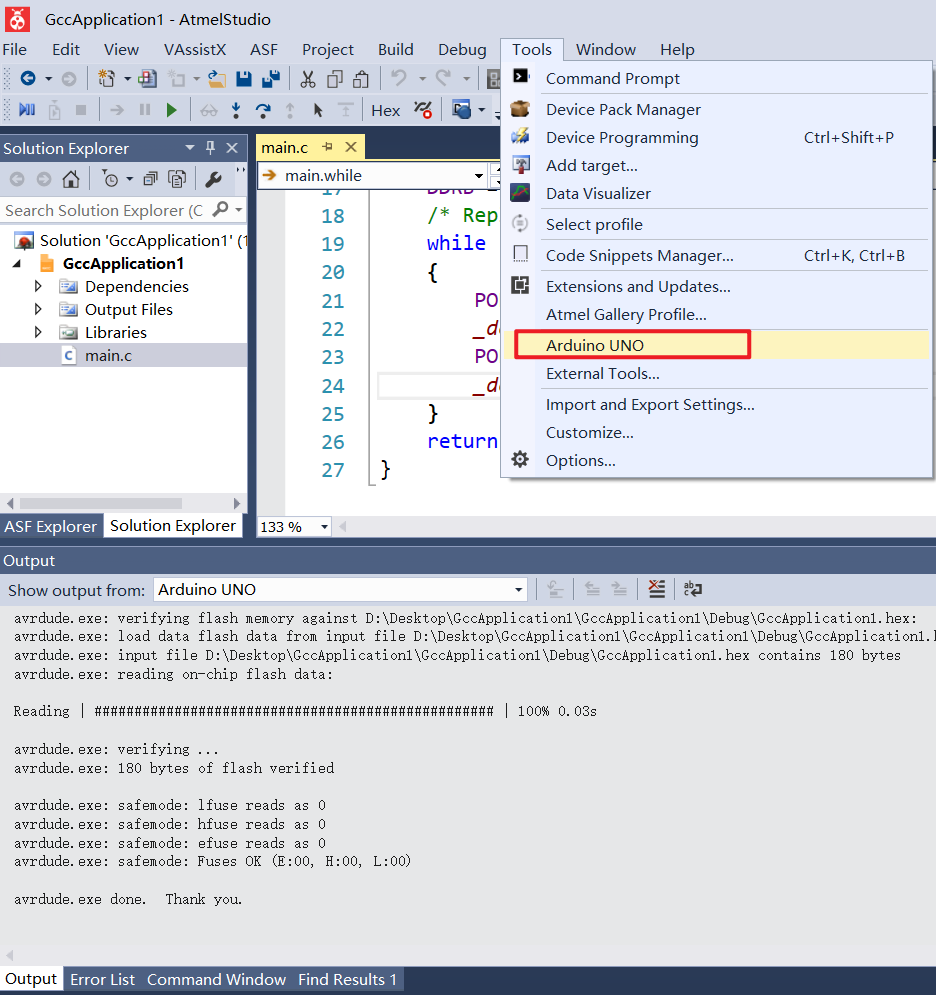
At this point, you can burn the program onto the Arduino, and the output window will display the following content.
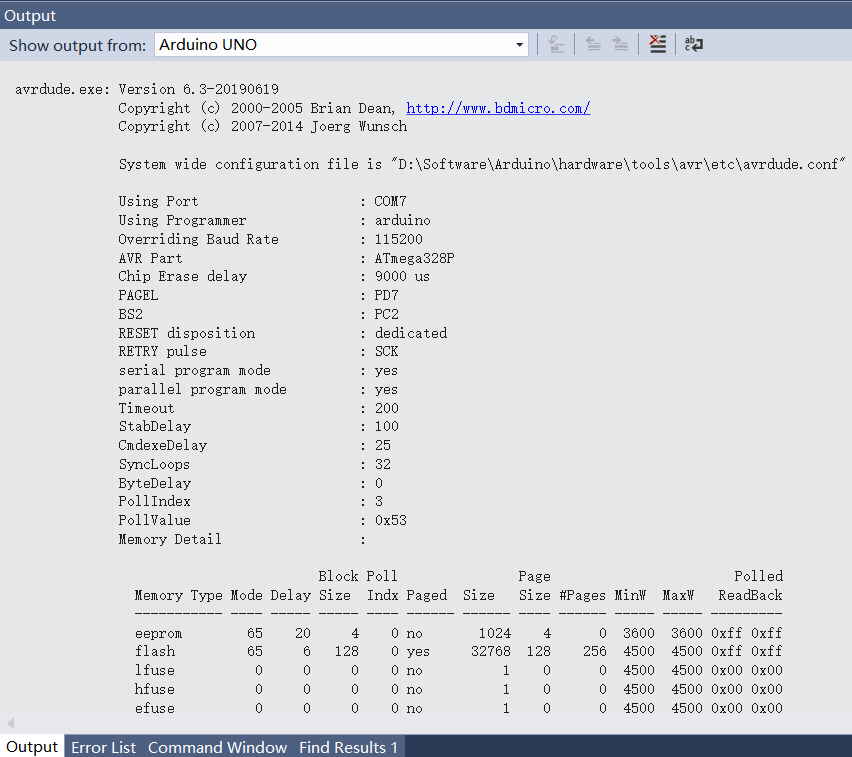
If there is an error, consider whether the path mentioned above is correct and check the COM port number.
Note: This method using Atmel Studio cannot download programs for the Arduino Nano board because most Arduino Nano boards use the Old Bootloader, and using this method will result in download failure.
Experiment Phenomenon
Next time someone asks you what microcontroller you are playing with, you should say: I don’t play with Arduino, I play with AVR, just like your ARM.
end
Fruit Little Master
Collection of Wonderful Articles
Article Recommendations
If you think it looks good, please click here↓↓↓