After setting up the C language development environment, the next step is to create a project for development.
For convenience, it is generally recommended to use an IDE (Integrated Development Environment) for development.
There are many development tools for C language, with the mainstream ones being Clion, Visual Studio, and VSCode.
This article will demonstrate using VSCode.
Creating a Project
-
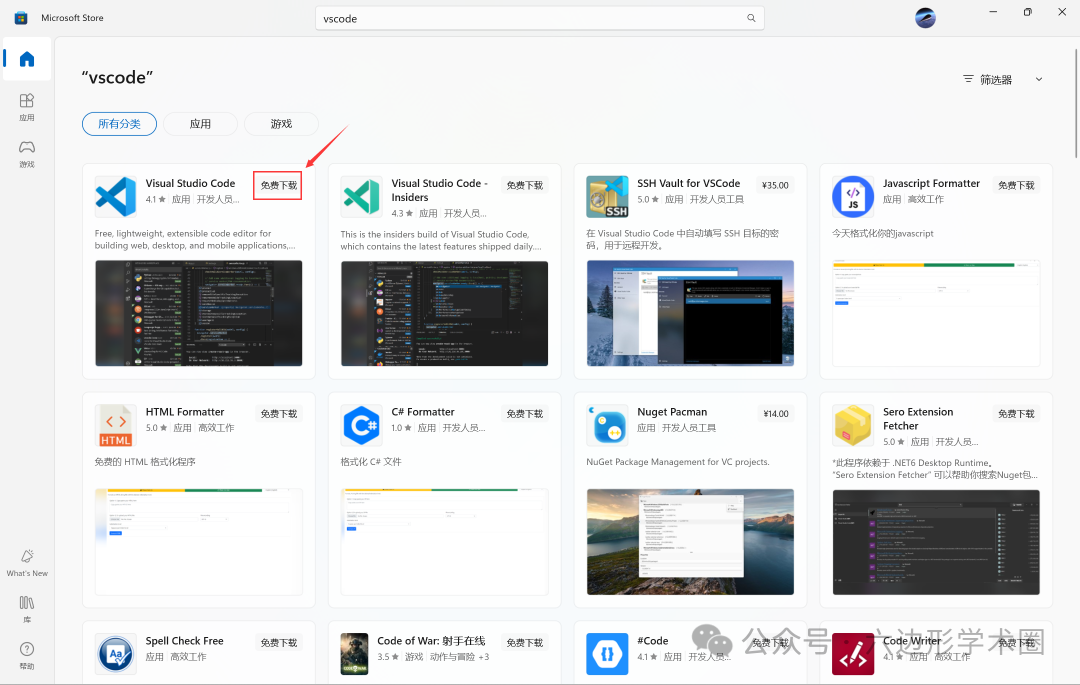
Install VSCode.
It is recommended to install it directly from the Microsoft application store:
-
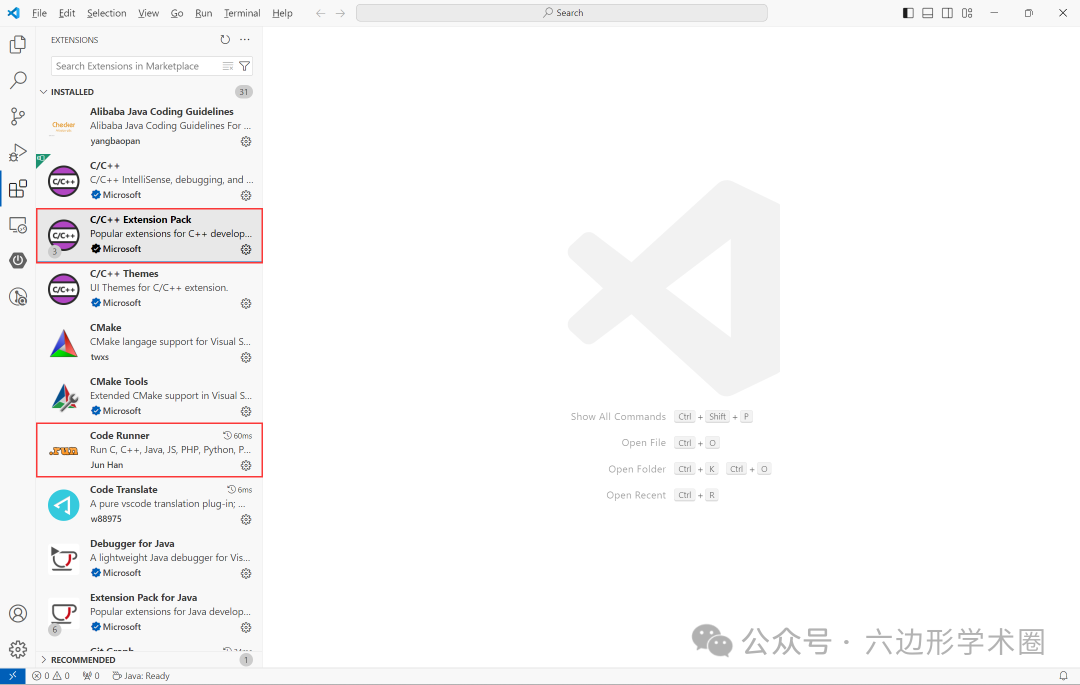
Install extensions.
After installing VSCode, go to its extension marketplace to install the C/C++ Extension Pack and Code Runner:
-
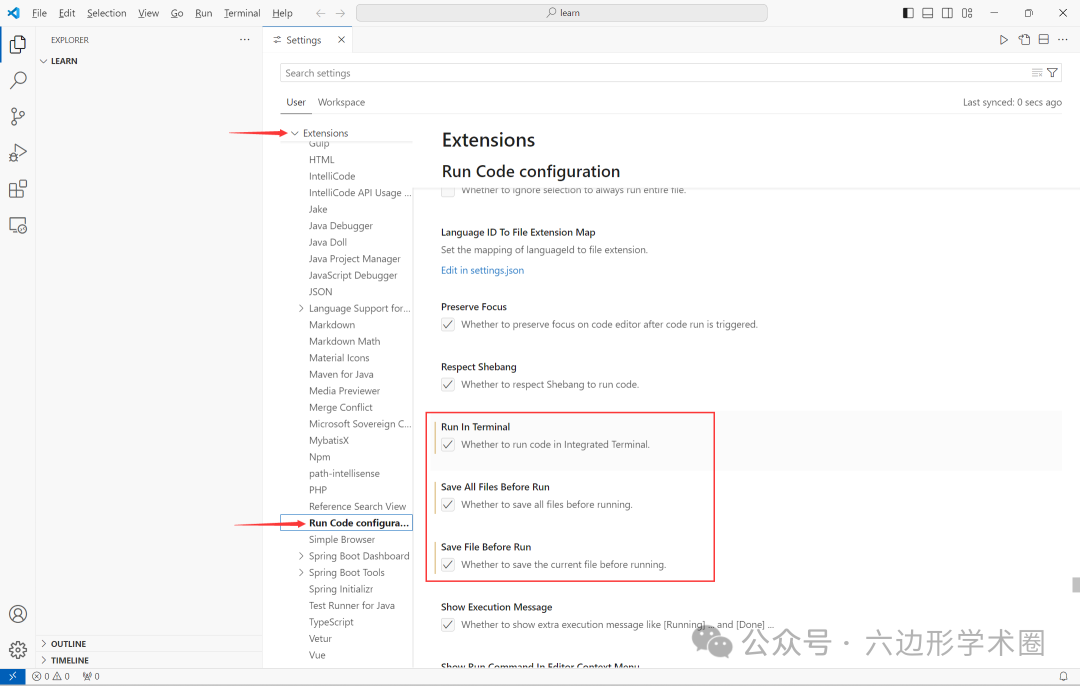
Check these three options in the settings.
-
Create a project.
Create a folder (it is recommended to use a name with pure English characters), such as learn; then open VSCode, and under File, select **Open Folder…**, choose the created folder and open it:
Writing Code
-
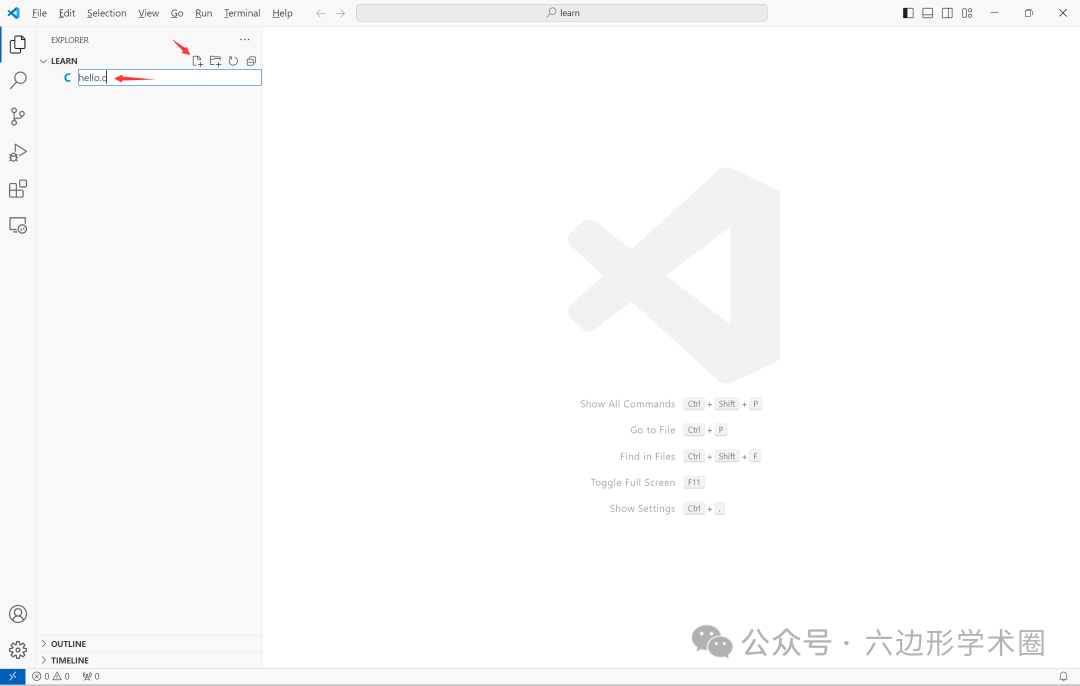
Hovering over the opened folder will reveal 4 shortcut buttons; clicking the first one on the left allows you to create a new file in the folder, name it hello.c:
-
Enter simple code in hello.c.
#include<stdio.h>

int main()
{
    printf("Hello World\n");
    return 0;
}
Running Code
-
In the Terminal, click **Configure Tasks…**:
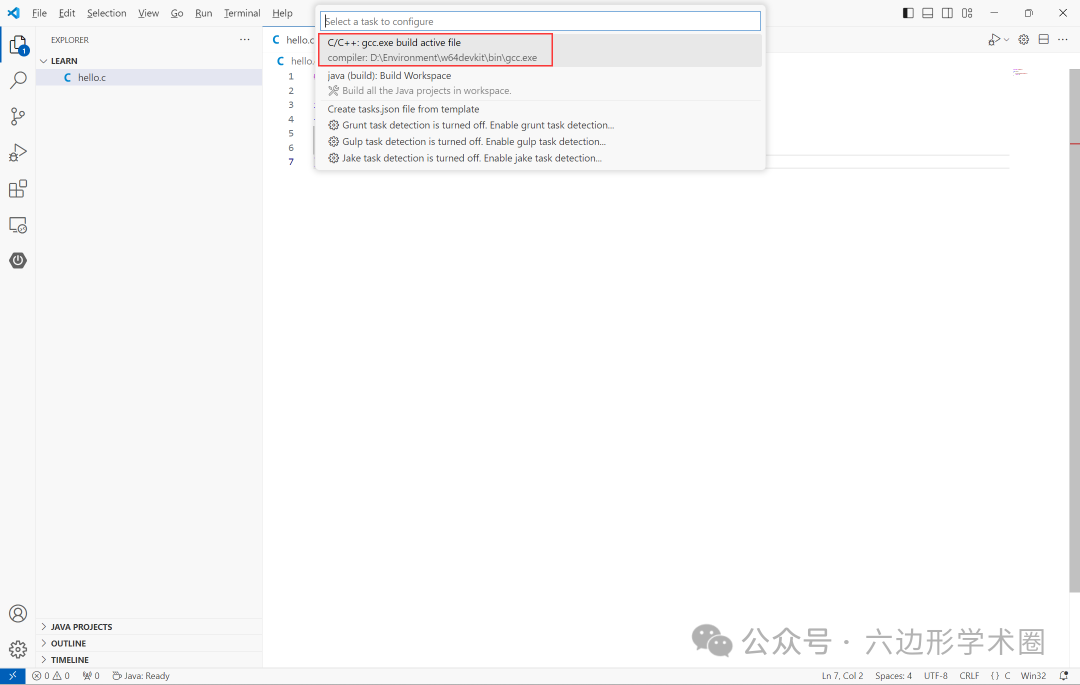
Then, a subfolder named .vscode will be automatically created in the folder, and a file named tasks.json will be automatically created in this subfolder, which does not require any modifications.
-
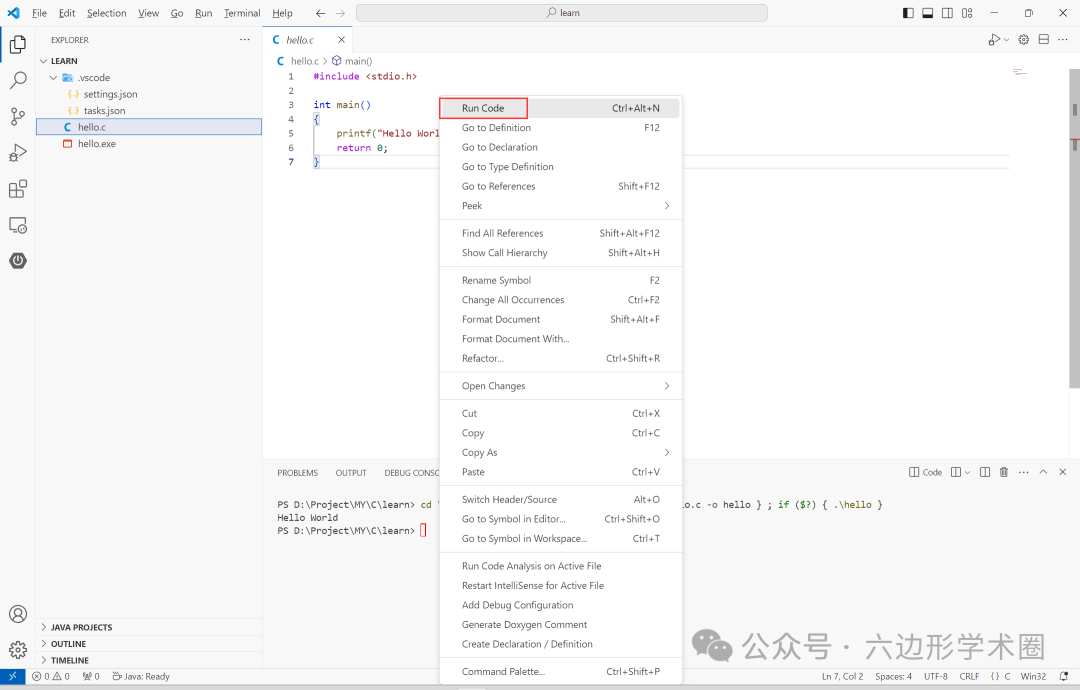
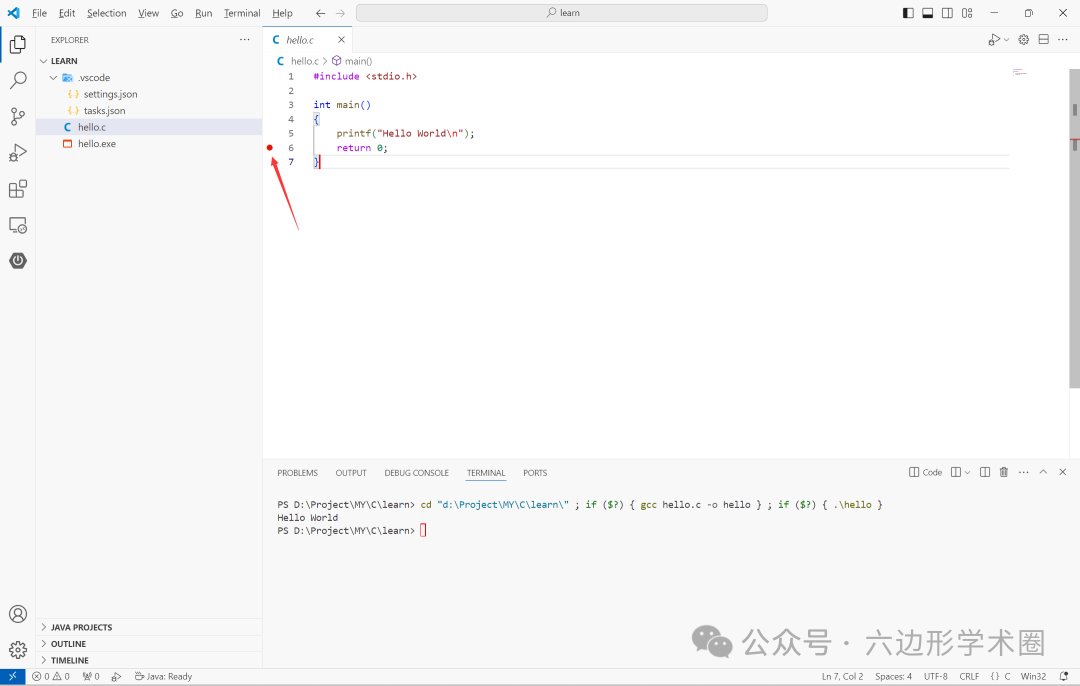
Finally, return to the hello.c file, right-click and select Run Code to run the code.
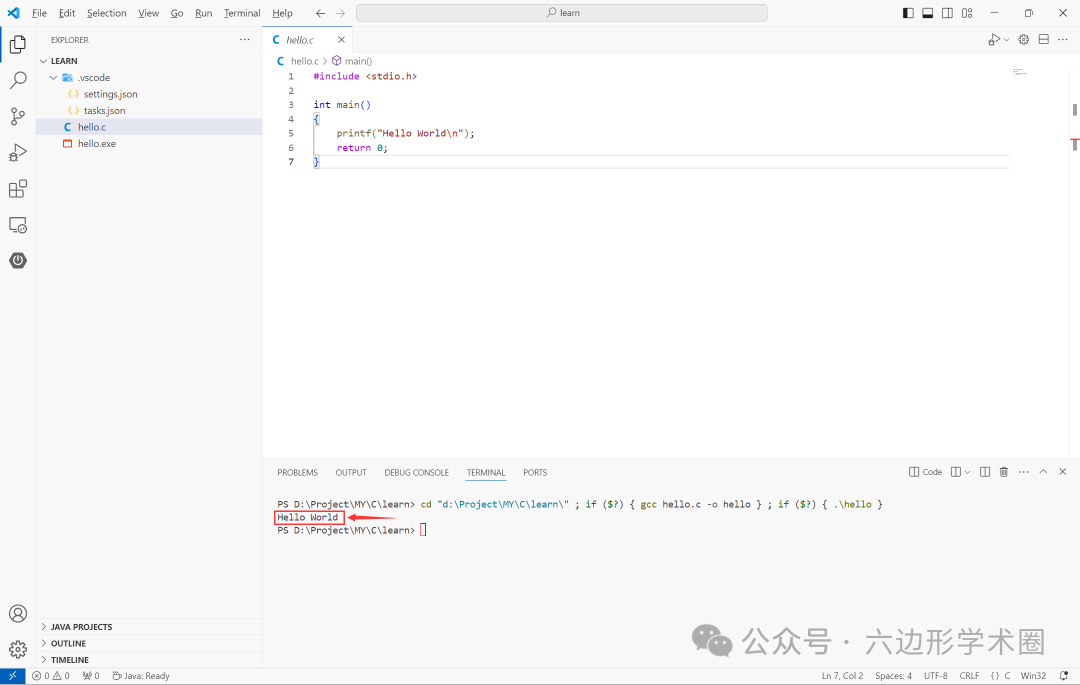
The output will be displayed in the Terminal below:
Debugging Code
-
Set a breakpoint in the code line:
-
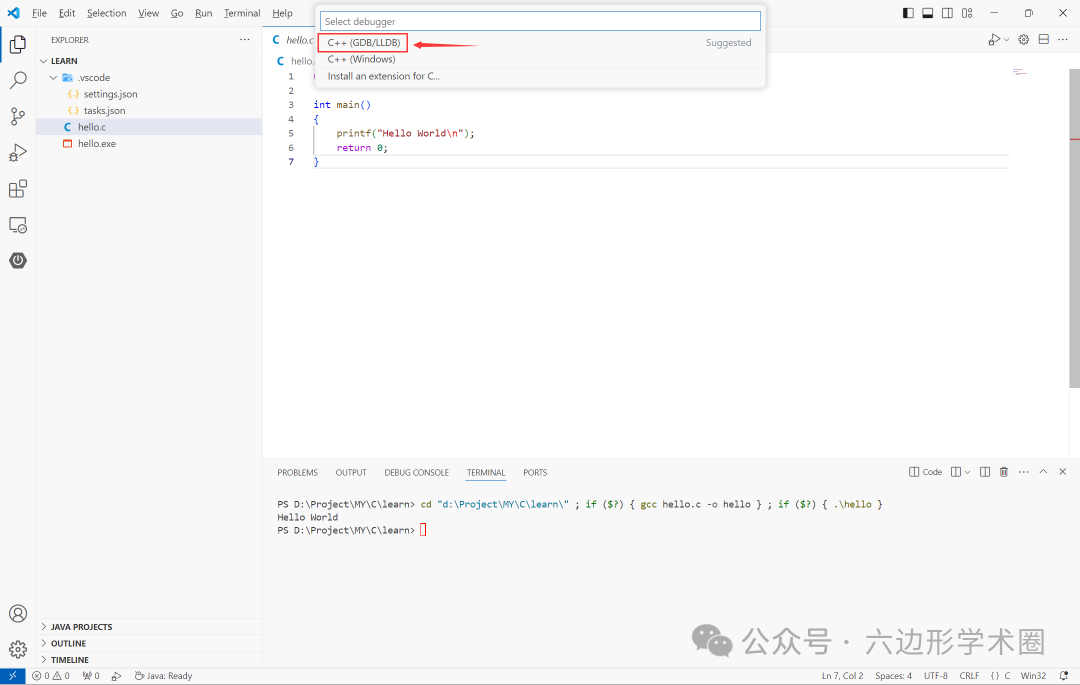
Click Run and then Start Debugging:
In the subsequent pop-up window, select **C++(GDB/LLDB)**:
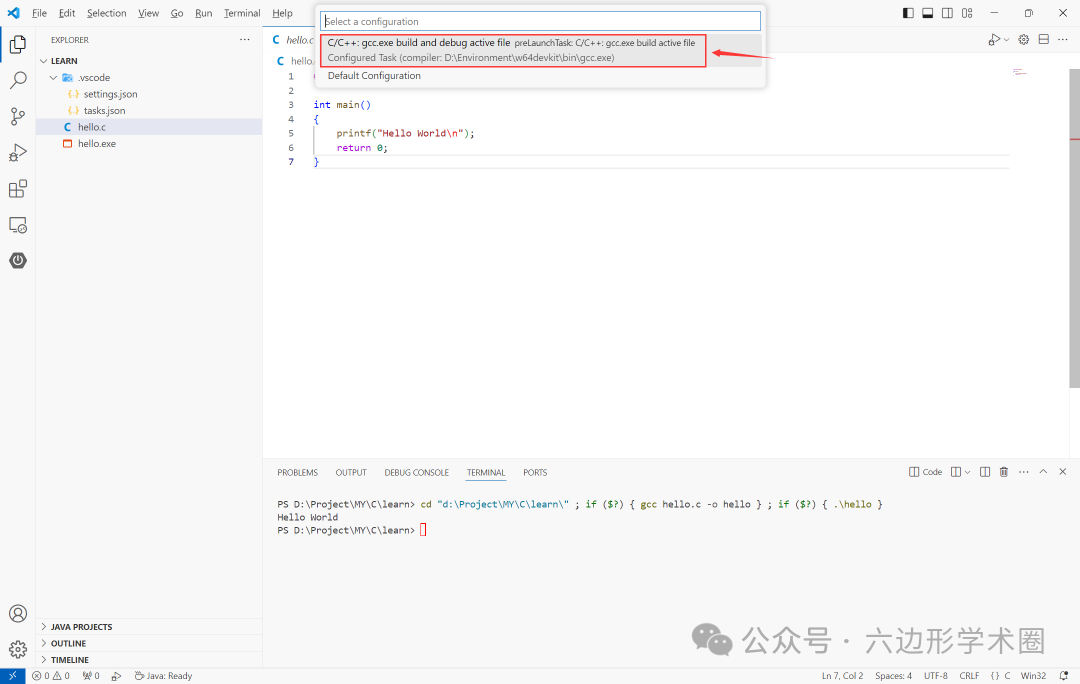
Then select gcc.exe:
-
The code will run to the breakpoint, and debugging can begin.
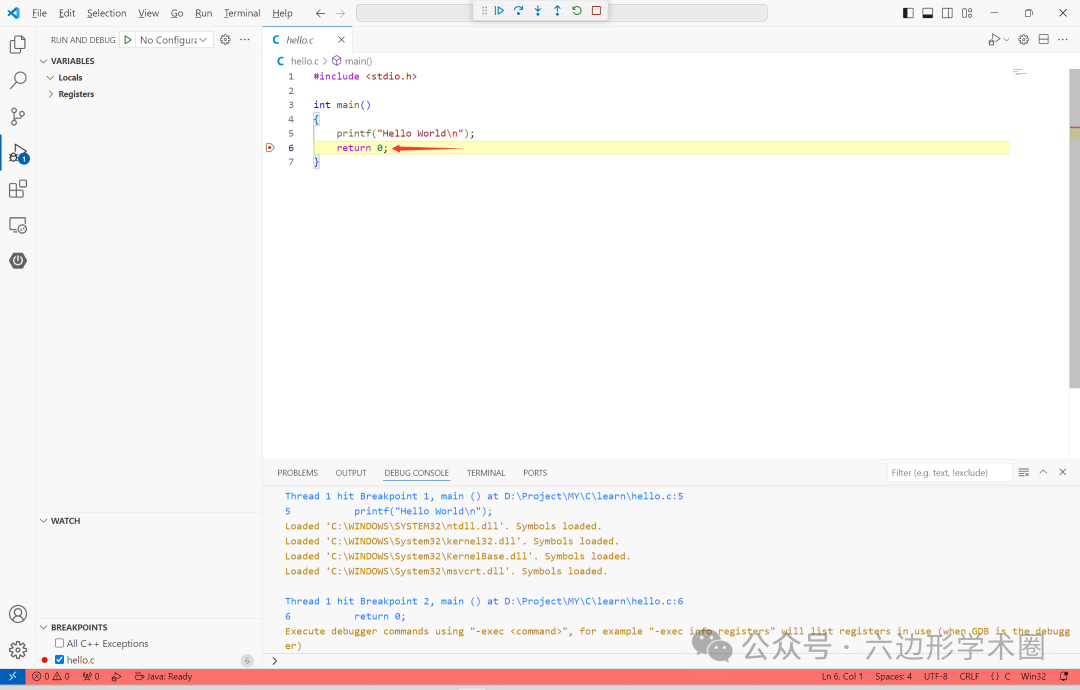
-
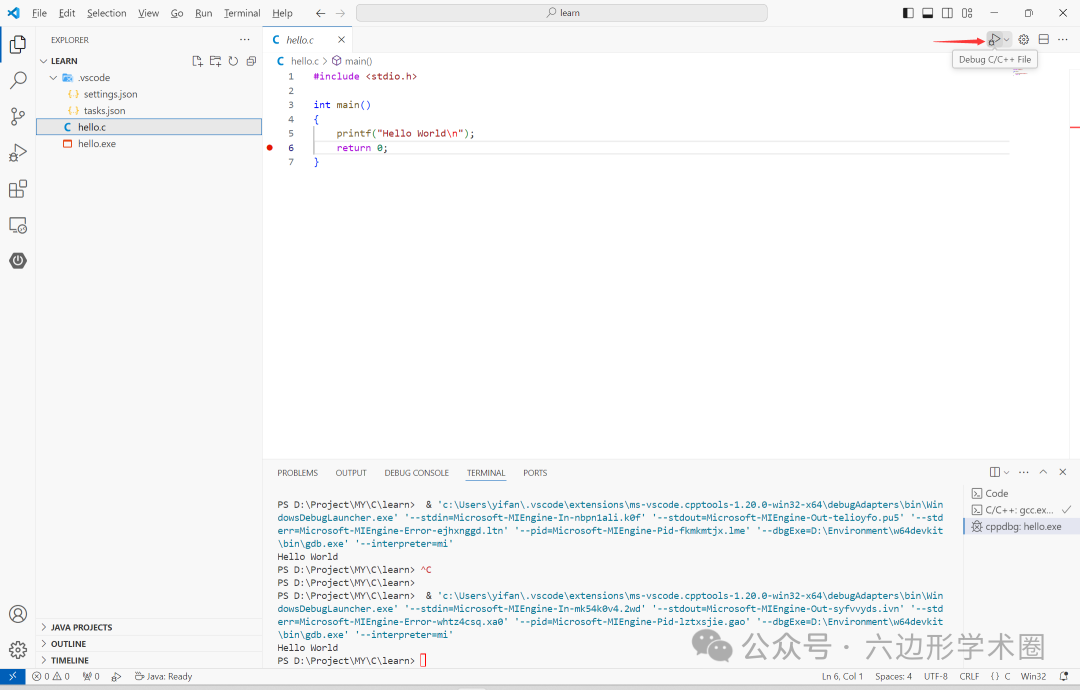
After the first configuration, you can also click the Debug button in the upper right corner for debugging:
Thus, you can use VSCode for C language development.