Follow “Embedded Mixed Bag“, star the public account, and let’s improve together!

Source: Internet
1. Software Introduction
2. Project Address
https://magicmirror.builders/
3. Features
-
Open source
-
Modules: The core of MagicMirror² includes a powerful API that allows third-party developers to build additional modules, using existing modules or developing other modules themselves
-
Wide community
4. Installation
Thanks to @MichMich’s excellent open-source code, installing MagicMirror is so convenient and simple.
Step 1
After setting up the Raspberry Pi, upgrading the system, and rebooting, open the terminal and enter:
bash -c “$(curl -sL https://raw.githubusercontent.com/MichMich/MagicMirror/master/installers/raspberry.sh)”
Then you will see the interface below and start the installation.

Step 2
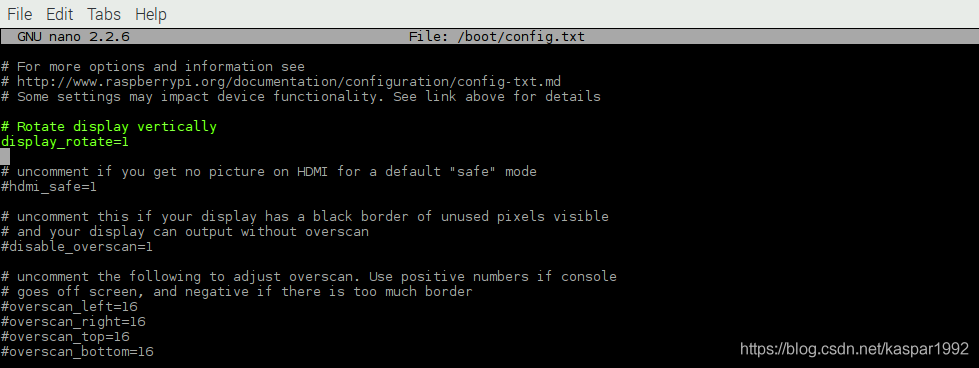
For MagicMirror, some additional settings are required. First, set the screen to display vertically. You need to edit a boot file (Note: Vertical display is not mandatory; if you want wide display or as a landscape display, it is unnecessary) enter<span>sudo nano /boot/config.txt</span>, add the following content, and where to add it doesn’t matter:
# Rotate display vertically
display_rotate=1
<span>CTRL-X</span>, YES to confirm save.
Step 3
sudo nano /etc/xdg/lxsession/LXDE-pi/autostart Add the following at the end of the file, and save:@xset s noblank
@xset s off
@xset -dpms
 Then, enter in the terminal
<span>sudo nano /etc/lightdm/lightdm.conf</span> Scroll down to find<span>[SeatDefaults]</span> section, find<span>xserver-command</span>, modify it to<span>xserver-command=X -s 0 -dpms</span> After writing, press<span>CTRL-X</span>, YES to confirm save. (Tip: If your system is ubuntu-mate, the above settings are incorrect. You need to set both operations and display to Never in the control center – Power Preferences)
Step 4
The Raspberry Pi system will disable inactive modules by default, including the WIFI module, which may occasionally cause MagicMirror to not receive updates such as news or weather. We can disable power-saving mode in the interface file:<span>sudo nano /etc/network/interfaces</span> Find<span>wlan0</span>, add below<span>wireless-power off</span>, after adding save and reboot the system<span>sudo reboot</span>. After rebooting, open the terminal, enter
<span>iwconfig</span>, you will find that power-saving mode has been disabled. (Tip: The above settings are not applicable to ubuntu-mate system. The specific solution is shown in the figure below.)
At this point, you have completed the basic setup of MagicMirror.
Next, create a usable configuration file for testing. Inside the MagicMirror<span>config</span> folder:
pi@magicpi:~ $ cd MagicMirror/config
pi@magicpi:~/MagicMirror/config $ cp config.js.sample config.js
pi@magicpi:~/MagicMirror/config $ cd $HOME/MagicMirror
pi@magicpi:~/MagicMirror $ npm start
If all goes well, your display will show the MagicMirror interface. The weather module may prompt you that there is no valid APPID, but after simple setup it will look like the picture below: Finally, complete your smart mirror according to the above steps, as shown in the picture below.
 Perfect! Your Raspberry Pi smart mirror has been successfully created! Congratulations~
References:
https://my.oschina.net/u/4518087/blog/4758744
This article is sourced from the internet, copyright belongs to the original author. If there are copyright issues, please contact me for deletion.
You may also like:
C Language printf() Detailed Explanation Ultimate Guide
2021-06-22

Basics | Starting with these knowledge points makes learning microcontrollers much easier
2021-06-19

Reply with 1024 in the WeChat public account chat interface to get embedded resources; reply with m to view the article summary.