Enable the multi-core functionality of the ESP32 to execute tasks in parallel while setting the chip’s clock frequency and the FreeRTOS real-time system.
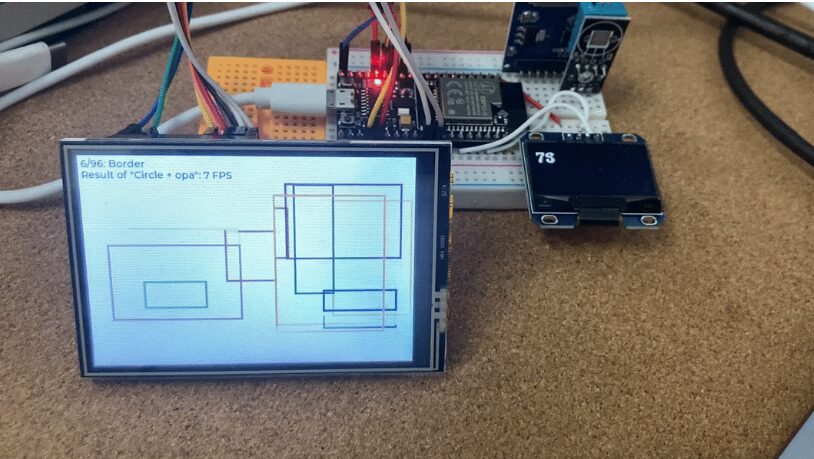
The effect achieved in this article is shown in the GIF, where two displays execute in parallel, each using one of the ESP32’s two cores.
1. Set the Clock Frequency
Set the ESP32 to its maximum supported frequency of 240 MHz. The ESP32 also supports frequencies of 160 MHz and 80 MHz.
#include "esp32-hal-cpu.h"void setup() { Serial.begin(115200); setCpuFrequencyMhz(240); Serial.println(getCpuFrequencyMhz());}2. Enable Multi-Core
The enabling of multi-core functionality is achieved using FreeRTOS. The ESP32’s Xtensa chip has two cores, with the Arduino IDE defaulting to core 1, while core 0 remains idle. By directly specifying the core in FreeRTOS, tasks can be assigned to either core 0 or core 1.
Use xPortGetCoreID() to get the current core ID, which defaults to 1, meaning the code written in the loop() function runs on core 1 by default.
The Arduino IDE supports FreeRTOS by default, so no additional libraries need to be imported.
To use FreeRTOS, first create task handles. Below, two task handles are created: one for the 3.5-inch LCD display and the other for the 1.3-inch OLED display.
TaskHandle_t Task_Display;TaskHandle_t Task_OLED;Then, in the setup() function, use the xTaskCreatePinnedToCore function to create tasks pinned to the specified cores. The parameters of the function are explained as follows:
xTaskCreatePinnedToCore( Task1code, /* Function to implement the task */ "Task1", /* Name of the task */ 10000, /* Stack size in words */ NULL, /* Task input parameter */ 0, /* Priority of the task */ &Task1, /* Task handle. */ 0); /* Core where the task should run */In the setup(), add the specific task assignments for the two task handles.
xTaskCreatePinnedToCore(task_display, "Task_Display", 10000, NULL, 1, &Task_Display, 0);delay(500);xTaskCreatePinnedToCore(task_oled, "Task_OLED", 10000, NULL, 1, &Task_OLED, 1);delay(500);Next, write the function code for each task. For the 3.5-inch LCD screen, the LVGL GUI library is used. For the 1.3-inch 128×64 OLED screen, the u8g2 GUI library is used. Therefore, first install the u8g2 library in the Arduino IDE library manager, and then initialize u8g2 in the main file.
The code to initialize u8g2 is as follows:
#include <Arduino.h>#include <U8g2lib.h>#include <SPI.h>#include <Wire.h>U8G2_SH1106_128X64_NONAME_2_SW_I2C u8g2(U8G2_R0, 22, 21);void setup() { u8g2.begin();}Here, U8G2_SH1106_128X64_NONAME_2_SW_I2C represents the constructor for different displays and drivers. The OLED display used by the author is driven by SH1106 with I2C communication. A list of all constructors for different displays and drivers can be found in the u8g2setupcpp documentation:
https://github.com/olikraus/u8g2/wiki/u8g2setupcpp#st7920-128×64
After completing the initialization of u8g2, the task assignment function of FreeRTOS is written as follows:
void task_display(void *pvParameters){ for (;;) { lv_task_handler(); delay(5); }}void task_oled(void *pvParameters){ for (;;) { u8g2.firstPage(); do { u8g2.setFont(u8g2_font_ncenB14_tr); std::string s = std::to_string(count); const char *ss = s.c_str(); u8g2.drawStr(50, 24, ss); count++; if (count % 100 == 0) { count = 0; } delay(5); } while (u8g2.nextPage()); }}Here, lv_task_handler() is part of the previous article on using the LVGL GUI library with the ESP32:
https://borninfreedom.github.io/posts/2022/03/blog-post-5/
The final main file (main.ino) code is as follows:
#include <Arduino.h>//#include "./includes/oled.h"#include <lvgl.h>#include <TFT_eSPI.h>#include <lv_examples.h>#include "esp32-hal-cpu.h"//#include <U8g2lib.h>#include <SPI.h>#include <Wire.h>#include <string>TFT_eSPI tft = TFT_eSPI(); /* TFT instance */static lv_disp_buf_t disp_buf;static lv_color_t buf[LV_HOR_RES_MAX * 10];U8G2_SH1106_128X64_NONAME_2_SW_I2C u8g2(U8G2_R0, 22, 21);#if USE_LV_LOG != 0/* Serial debugging */void my_print(lv_log_level_t level, const char *file, uint32_t line, const char *dsc){ Serial.printf("%s@%d->%s\r\n", file, line, dsc); Serial.flush();}#endif/* Display flushing */void my_disp_flush(lv_disp_drv_t *disp, const lv_area_t *area, lv_color_t *color_p){ uint32_t w = (area->x2 - area->x1 + 1); uint32_t h = (area->y2 - area->y1 + 1); tft.startWrite(); tft.setAddrWindow(area->x1, area->y1, w, h); tft.pushColors(&color_p->full, w * h, true); tft.endWrite(); lv_disp_flush_ready(disp);}/*Read the touchpad*/bool my_touchpad_read(lv_indev_drv_t *indev_driver, lv_indev_data_t *data){ uint16_t touchX, touchY; bool touched = tft.getTouch(&touchX, &touchY, 600); if (!touched) { data->state = LV_INDEV_STATE_REL; } else { data->state = LV_INDEV_STATE_PR; /*Set the coordinates*/ data->point.x = touchX; data->point.y = touchY; Serial.print("Data x"); Serial.println(touchX); Serial.print("Data y"); Serial.println(touchY); } return false; /*Return `false` because we are not buffering and no more data to read*/}TaskHandle_t Task_Display;TaskHandle_t Task_OLED;char count = 0;void setup() { // put your setup code here, to run once: // Serial.begin(9600); // //testdrawcircle(); // display.begin(i2c_Address,true); // testdrawbitmap(logo16_glcd_bmp, LOGO16_GLCD_HEIGHT, LOGO16_GLCD_WIDTH); Serial.begin(115200); /* prepare for possible serial debug */ setCpuFrequencyMhz(240); lv_init();#if USE_LV_LOG != 0 lv_log_register_print_cb(my_print); /* register print function for debugging */#endif tft.begin(); /* TFT init */ tft.setRotation(1); /* Landscape orientation */ uint16_t calData[5] = {275, 3620, 264, 3532, 1}; tft.setTouch(calData); lv_disp_buf_init(&disp_buf, buf, NULL, LV_HOR_RES_MAX * 10); /*Initialize the display*/ lv_disp_drv_t disp_drv; lv_disp_drv_init(&disp_drv); disp_drv.hor_res = 480; disp_drv.ver_res = 320; disp_drv.flush_cb = my_disp_flush; disp_drv.buffer = &disp_buf; lv_disp_drv_register(&disp_drv); /*Initialize the (dummy) input device driver*/ lv_indev_drv_t indev_drv; lv_indev_drv_init(&indev_drv); indev_drv.type = LV_INDEV_TYPE_POINTER; indev_drv.read_cb = my_touchpad_read; lv_indev_drv_register(&indev_drv); u8g2.begin(); lv_demo_benchmark(); // lv_demo_music(); // lv_example_get_started_1(); xTaskCreatePinnedToCore(task_display, "Task_Display", 10000, NULL, 1, &Task_Display, 0); delay(500); // xTaskCreatePinnedToCore(task_oled, "Task_OLED", 10000, NULL, 1, &Task_OLED, 1); // delay(500);}void task_display(void *pvParameters){ for (;;) { lv_task_handler(); delay(5); }}void task_oled(void *pvParameters){ for (;;) { u8g2.firstPage(); do { u8g2.setFont(u8g2_font_ncenB14_tr); std::string s = std::to_string(count); const char *ss = s.c_str(); u8g2.drawStr(50, 24, ss); count++; if (count % 100 == 0) { count = 0; } delay(5); } while (u8g2.nextPage()); }}void loop() { // put your main code here, to run repeatedly: // testdrawcircle(); // Serial.println("hello"); // delay(1000); // Serial.println(getCpuFrequencyMhz()); // delay(1000); // lv_task_handler(); // delay(5); // Serial.println(getCpuFrequencyMhz()); // Serial.println(xPortGetCoreID()); // In the loop, the refresh rate of the OLED screen is slightly faster // u8g2.firstPage(); // do // { // u8g2.setFont(u8g2_font_ncenB14_tr); // std::string s = std::to_string(count); // const char *ss = s.c_str(); // u8g2.drawStr(50, 24, ss); // count++; // if (count % 100 == 0) // { // count = 0; // } // delay(5); // } while (u8g2.nextPage());}3. Improve VSCode Compilation Speed for Arduino Projects
Although I have been mentioning the Arduino IDE, I have actually been using VSCode with the Arduino extension for development. The downside is that compilation is significantly slower than the Arduino IDE. The solution is:
Add a line in the arduino.json file located in the .vscode folder of the project directory: “output”: “./Build”.
{ "configuration": "PartitionScheme=default,FlashMode=qio,FlashFreq=80,UploadSpeed=921600,DebugLevel=none", "board": "esp32:esp32:esp32wrover", "port": "COM6", "sketch": "main.ino", "output": "./Build"}The reason for the slow compilation in VSCode may be that it recompiles everything from scratch every time. By adding a build folder, only the modified parts will be recompiled, thus improving compilation speed, although the speed increase may not be very noticeable.

“PID Parameter Tuning and Fuzzy Adaptive PID“
This course introduces the working principles of PID and parameter tuning principles, and builds a hardware platform to explain system parameter identification, PID self-tuning, online parameter fine-tuning, and fuzzy adaptive PID. The goal is to provide a comprehensive understanding of PID and enable quick adjustment of suitable PID parameters.

(Scan the QR code to view course details)