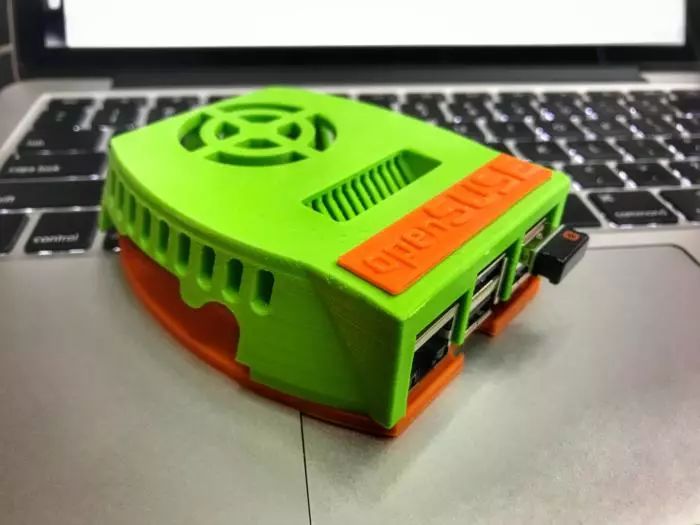
This tutorial will help you get started with Raspberry Pi 3.
This article is part of my weekly series on creating new projects with Raspberry Pi 3. This first article in the series focuses on getting started, primarily covering the installation of Raspbian and the PIXEL desktop, as well as setting up the network and other basic components.
You will need:
There are many Linux-based operating systems available for Raspberry Pi, and you can install them directly, but if you are new to Raspberry Pi, I recommend using NOOBS, which is the official operating system installer for Raspberry Pi. It makes the process of installing the operating system onto the device very simple.
Download NOOBS from this link[1]. It is a zip compressed file. If you are using MacOS, you can double-click it, and MacOS will automatically unzip the file. If you are using Windows, right-click it and select “Extract Here”.
If you are running a Linux desktop, how to unzip the zip file depends on your desktop environment, as different desktop environments have different methods for unzipping files, but you can easily complete the unzipping task using the command line.
$ unzip NOOBS.zip
Regardless of the operating system, when you open the unzipped file, it should look like the following image:

content
Now, insert the Micro SD card into your PC and format it to FAT32 file system. On MacOS, use Disk Utility to format the Micro SD card:

format
On Windows, simply right-click the card and select the “Format” option. On Linux, different desktop environments use different tools, so I won’t go into detail here. I wrote a tutorial on formatting an SD card to FAT32 file system using command line on Linux[2].
After your card is formatted to FAT32 file system, you can copy the contents of the downloaded NOOBS directory to the root directory of this card. If you are using MacOS or Linux, you can use rsync to transfer the contents of NOOBS to the root directory of the SD card. Open the terminal application in MacOS or Linux and run the following rsync command:
rsync -avzP /path_of_NOOBS /path_of_sdcard
Make sure to select the root directory of the SD card; in my case (on MacOS), it is:
rsync -avzP /Users/swapnil/Downloads/NOOBS_v2_2_0/ /Volumes/U/
Alternatively, you can copy and paste the contents of the NOOBS directory. Make sure to copy all the contents of the NOOBS directory to the root directory of the Micro SD card, and do not place them in any subdirectory.
Now you can insert this MicroSD card into the Raspberry Pi 3, connect the monitor, keyboard, mouse, and power adapter. If you have a wired network, I recommend using it, as a wired network downloads and installs the operating system faster. The Raspberry Pi will boot into NOOBS, which will provide a list of distributions for you to choose from to install. Select Raspbian from the first option, and the following screen will appear.

raspi config
After your installation is complete, the Raspberry Pi will reboot, and you will see a welcome screen for Raspberry Pi. Now you can configure it and run system updates. Most of the time, we use Raspberry Pi without peripherals, managing it remotely over the network using SSH. This means you do not need to connect a mouse, keyboard, and monitor to manage the Raspberry Pi.
The first step to start using it is to configure the network (if you are using Wi-Fi). Click the network icon on the top panel, then select the network you want to configure from the list that appears and enter the correct password.

wired
Congratulations, the wireless network connection configuration is complete. Before moving on to the next configuration step, you need to find the IP address assigned to the Raspberry Pi by your network, as it will be used for remote management.
Open a terminal and run the following command:
ifconfig
Now, note down the IP address from the wlan0 section of this device. It usually shows as “inet addr”.
Now, you can enable SSH by opening a terminal on the Raspberry Pi and running the raspi-config tool.
sudo raspi-config
The default username and password for the Raspberry Pi are “pi” and “raspberry” respectively. In the command above, you will be prompted to enter the password. The first option in the Raspberry Pi configuration tool is to change the default password, and I strongly recommend that you change the default password, especially if you are using it over the network.
The second option is to change the hostname, which is used to distinguish multiple Raspberry Pis on your network. A meaningful hostname can easily identify each device on the network.
Then go to the interface options to enable the camera, SSH, and VNC. If you are using a multimedia application on the Raspberry Pi, such as a home theater system or PC, you can also change the audio output options. By default, it outputs to the HDMI interface, but if you are using external speakers, you will need to change the audio output settings. Go to the advanced configuration options in the Raspberry Pi configuration tool, select audio, and choose “3.5mm” as the default output.
[Tip: Use the arrow keys to navigate and the enter key to select]
Once you have applied all the changes, the Raspberry Pi will prompt you to reboot. You can unplug the monitor, mouse, and keyboard from the Raspberry Pi, and later manage it over the network. Now, you can open a terminal on your local computer. If you are using Windows, you can use Putty or read my article – How to install Ubuntu Bash on Windows 10.
On your local computer, enter the following SSH command:
ssh pi@IP_ADDRESS_OF_Pi
On my computer, this command looks like this:
ssh [email protected]
Enter its password, and you are logged into the Raspberry Pi! Now you can manage your Raspberry Pi from a remote computer. If you want to manage the Raspberry Pi over the internet, you can read my article – How to enable RealVNC on your computer[3].
In the next article in this series, I will explain how to use your Raspberry Pi to remotely manage your 3D printer.
via: https://www.infoworld.com/article/3176488/linux/a-beginner-s-guide-to-raspberry-pi-3.html
Author: Swapnil Bhartiya[5] Translator: qhwdw Proofreader: wxy
This article is originally compiled by LCTT and presented by Linux China

Recommended Articles
< Swipe left and right to view related articles >




Click the image, enter the article ID, or scan the QR code to go directly