Click on the top“Uncle Wheat”, select“Top/Star Official Account”
Hello everyone, I am Uncle Wheat.
The Raspberry Pi, I believe many of you have heard of it, can be used for many interesting projects. Today, I will introduce a gesture recognition project based on the Raspberry Pi.
We will be giving away five books at the end.
About Gestures
Perceiving the shape of the hand and the ability to move is an important part of improving user experience across various technical fields and platforms;
For example, specific operations can be executed based on hand movements, the number of fingers extended, and the dynamics of finger changes.
On the Raspberry Pi, external devices can be controlled via GPIO to respond to these specific operations, achieving gesture interaction, which is a very cool application.
MediaPipe Hands is a high-resolution hand and finger tracking solution.
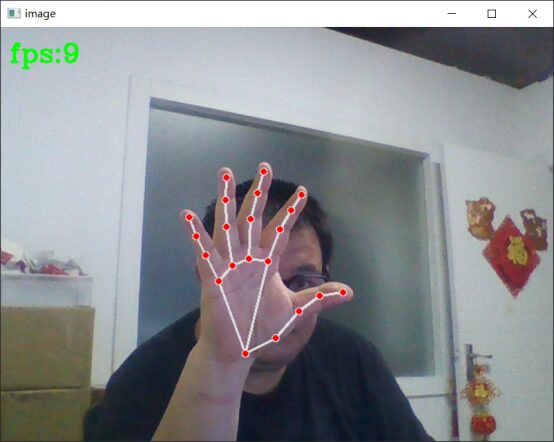
It uses machine learning (ML) to infer 21 3D landmarks of a hand from a single frame (Landmarks).
MediaPipe Hands utilizes an ML pipeline consisting of multiple models: a hand detection model that operates on the complete image and returns an oriented bounding box for the hand.
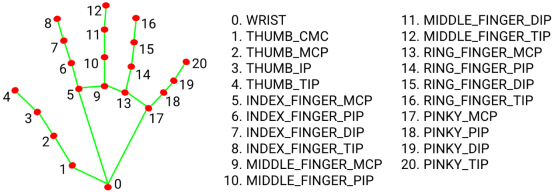
The 21 points can represent each key point of the hand.
For example, if I want to determine the X and Y coordinate information of the fingertip of the index finger on the screen, we need to obtain the location information when landmark 8 appears on the screen.
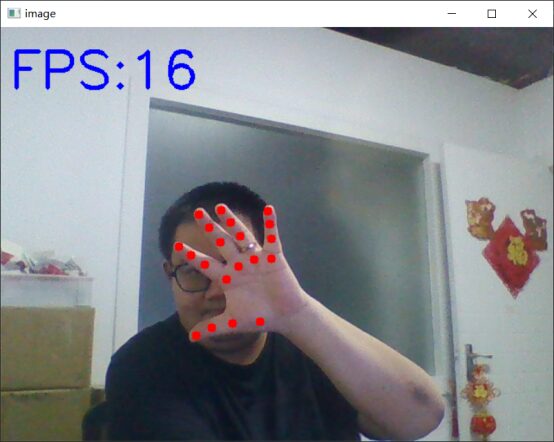
Then, using the circle method from openCV, we can draw a circle to determine the position of the finger on the screen, triggering some magical events.
For instance, when the finger slides to the coordinate range of: (10, 20) to (20, 40), we trigger an operation to overlay an image or text on the screen.
This can create a very fun application; everyone can brainstorm ideas, such as applications that can be used in escape rooms. Haha!
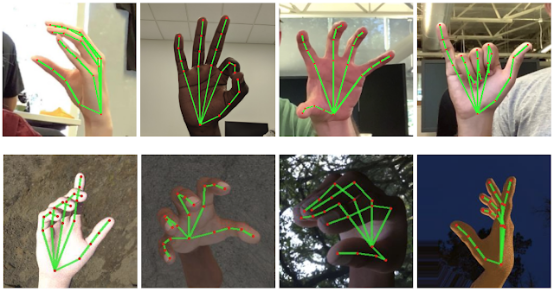
Doesn’t the rendered composite hand image look very clear?
How to Install on Raspberry Pi?
1 Download and Flash the System and Connect the Camera
It is recommended to download the etcher tool and the official image file for flashing.
Flashing Software: https://etcher.io/
Official Image: https://www.raspberrypi.com/software/operating-systems/#raspberry-pi-os-legacy
It is recommended to use 32bit because the 64bit version has poor mmal support, making the Raspberry Pi libcamera-lib difficult to use.
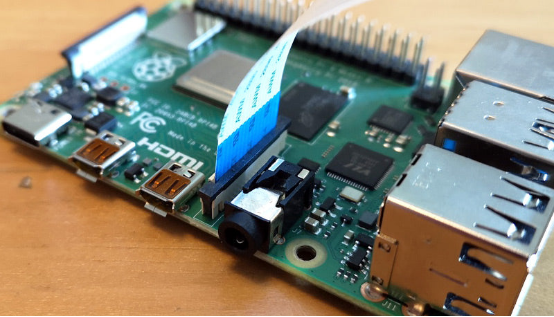
Installing the camera is very simple; refer to the diagram below for installation. Pull up the card locks on both sides, insert the FPC cable, and then press down the card locks, making sure to keep it level and pay attention to the direction.
2 Install Virtual Environment
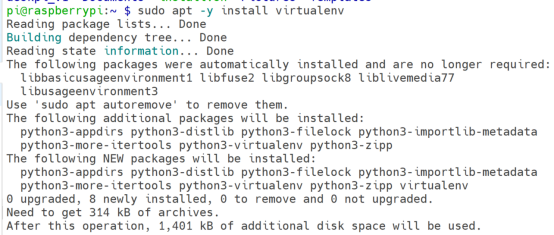
Execute the command:
sudo apt update
sudo apt –y install vim virtualenv
3 Configure the Virtual Environment and Install OpenCV Library
Execute:
virtualenv –p python3 venv

4 Final Experiment Effect
Due to space constraints, some implementation processes and example codes are omitted in the middle. Reply with 【Gesture Recognition】 to obtain the document for constructing the instance;
This article is selected from Teacher Li Weibin’s new book “Raspberry Pi 4 and AI Practical Projects”.
It takes you deep into the world of Raspberry Pi and artificial intelligence.

To thank everyone for their continued support, we will be giving away five copies of this book in this event.
As usual, leave a message at the bottom, and the five friends who get the most likes 👍👍👍 can win this book.

Deadline: August 20th, 18:18