Table of Contents
- Direct Ethernet Connection: Flashing DietPi System to NanoPi NEO2 via Windows Network Sharing and Configuring RTL8188GU WiFi
- Download System Image
- Flash System Image
- Initial Setup of DietPi System
- Connect to NanoPi NEO2
- Connect to NanoPi via Shell Tool
- Connect to WiFi
- Table of Contents
- Introduction
- Materials and Software Preparation
- Flashing System Image
Introduction
Recently, I have been experimenting with the NanoPi NEO2, a small board that offers a lot of possibilities. I wanted to find a lightweight and user-friendly system to run services, and I ultimately chose DietPi — it is lightweight, easy to configure, and very friendly to ARM boards. After flashing the system, I wanted to connect to WiFi using a USB wireless network card like the RTL8188GU, which led to this documentation of my process.
Materials and Software Preparation
NanoPi NEO 2 (Official Wiki:
https://wiki.friendlyelec.com/wiki/index.php/NanoPi_NEO2/en
)
Ethernet Cable
Router or Windows PC with Ethernet Port
RTL8188GU Network Card (or other USB network cards)
Win32DiskImager (Official Link: https://win32diskimager.org/ Baidu Cloud Download Link (Extraction Code: 2d2u): https://pan.baidu.com/s/13ZOY9q1f2uNmy2FeSQ8rsQ?pwd=2d2u)
DietPi Image (Official Link: https://dietpi.com/ Baidu Cloud Non-Latest Download Link (Extraction Code: 89d1): https://pan.baidu.com/s/17TYS_Jv29194Jng4Jn9DaA?pwd=89d1)
SSH Tool (Using Xshell Home/School Free Version Official Link: https://www.xshell.com/en/free-for-home-school/ Baidu Cloud Download Link (Extraction Code: 8yq6): https://pan.baidu.com/s/1zl_lULkFZ9-Wj54htnM8Eg?pwd=8yq6)
Flashing System Image
Download System Image
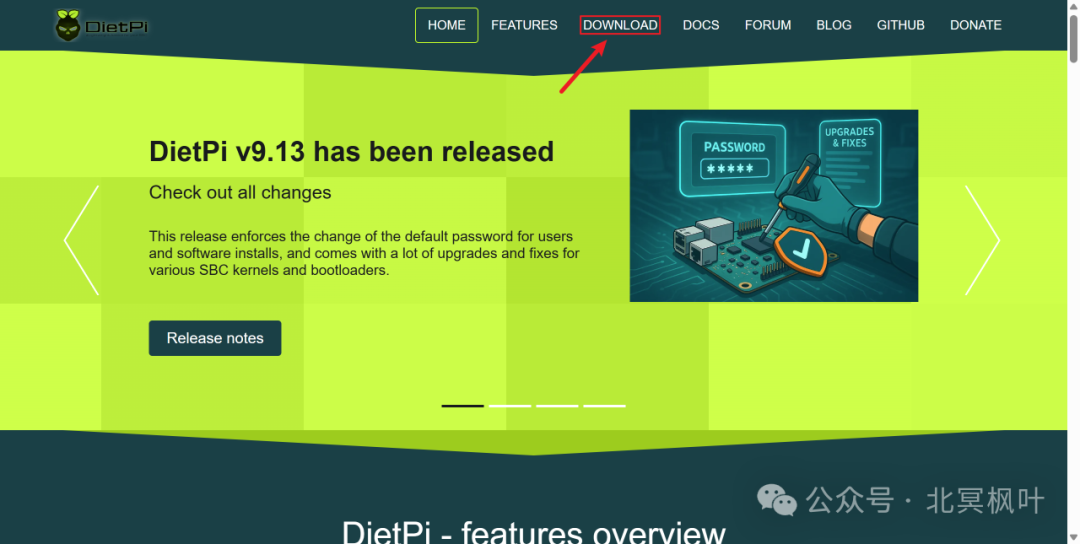
Open the DietPi official website (https://dietpi.com/), click on the DOWNLOAD tab at the top of the page to enter the image download page.
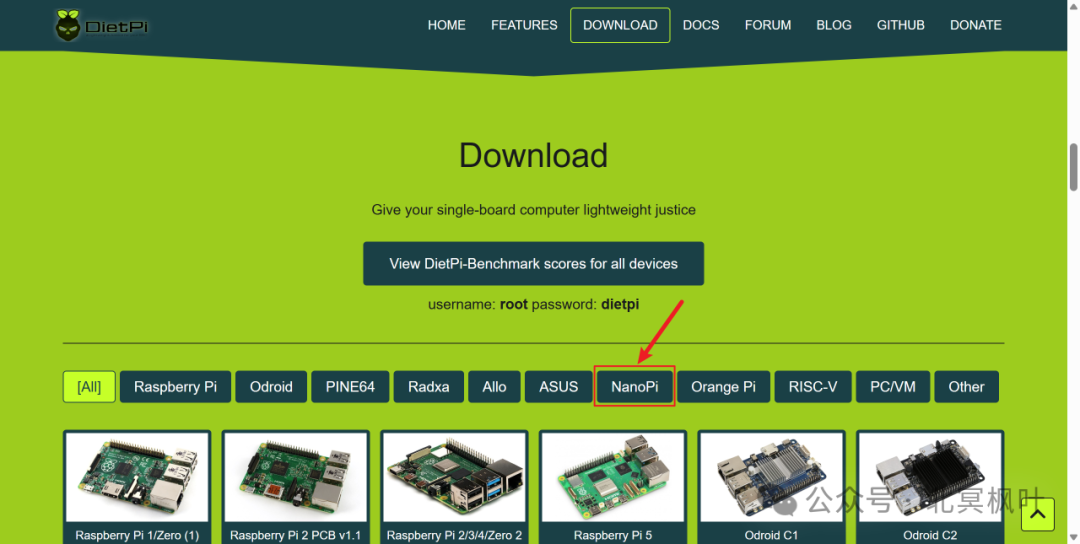
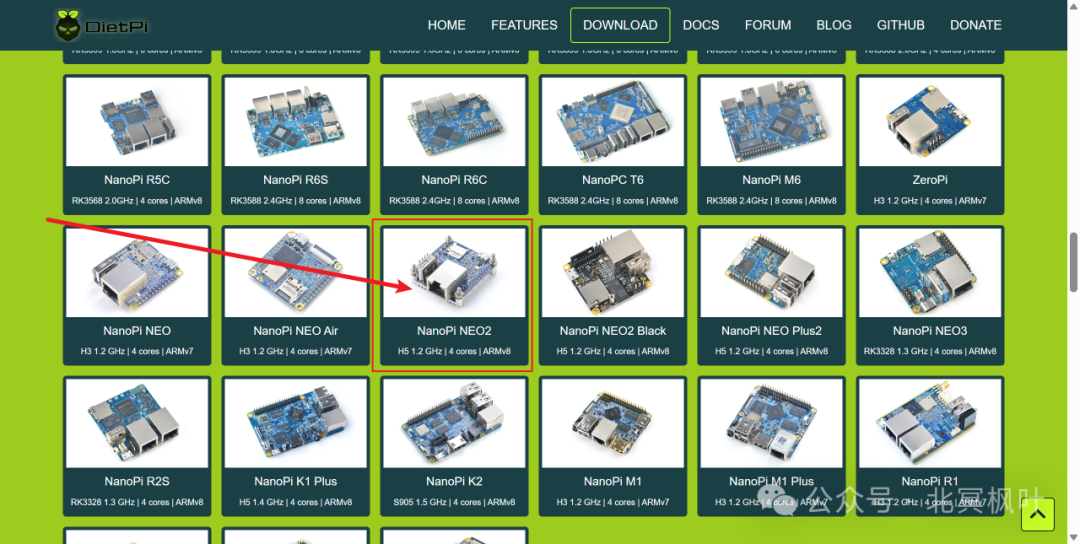
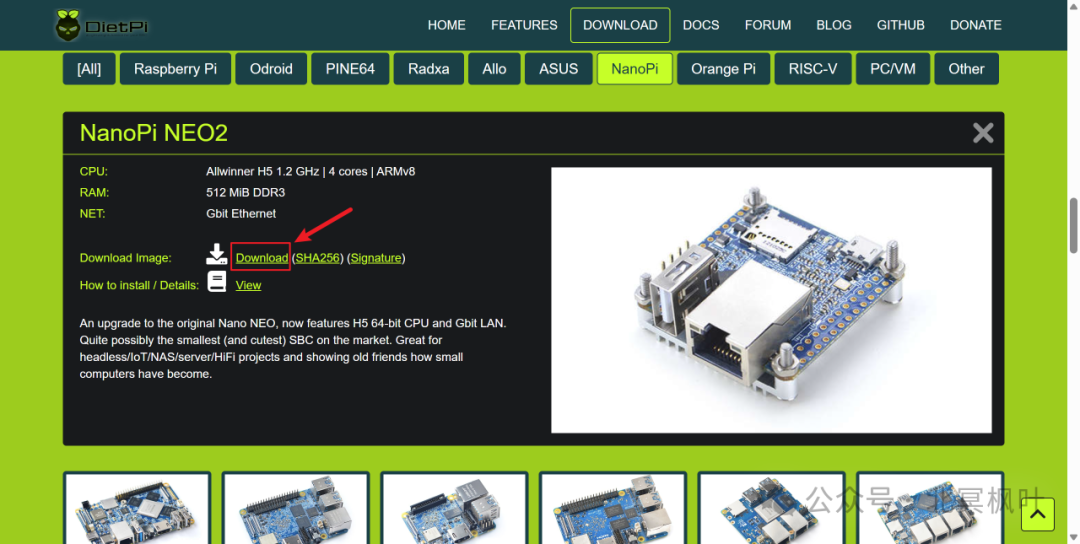
After entering the DOWNLOAD page, we need to find the system image for NanoPi, and then select the corresponding image based on your NanoPi board version. Here we find the system image for NanoPi NEO2, and clicking on it will lead us to the download link.
Flash System Image
After downloading, we will get a file with the .xz extension, which is a compressed image file. Unzip this file to obtain the actual .img file. Insert the memory card, open Win32DiskImager, select the just unzipped .img file and the corresponding drive letter of the memory card, and click “Write” to start flashing the system image.
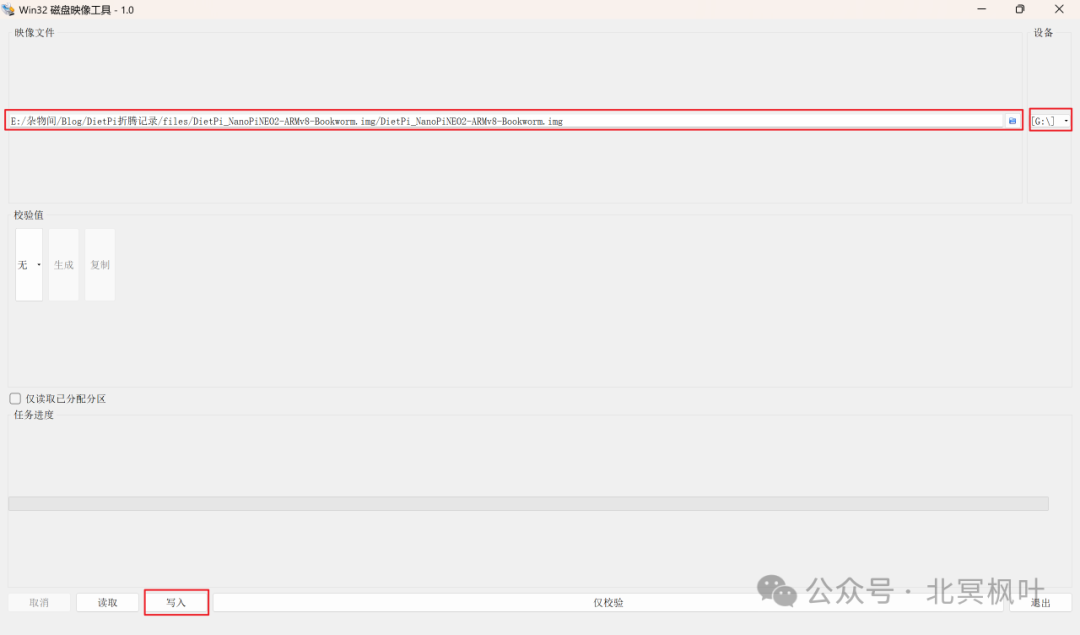
After waiting for the write to succeed, do not insert the memory card into the NanoPi NEO2 yet, because the DietPi system can modify the configuration files for better initialization before the first boot.
Initial Setup of DietPi System
After flashing the system, access the partition of the memory card that has DietPi flashed from “My Computer” in Windows. Here are some files used for the initialization of DietPi, which can be modified in Windows before entering the system for the first time.
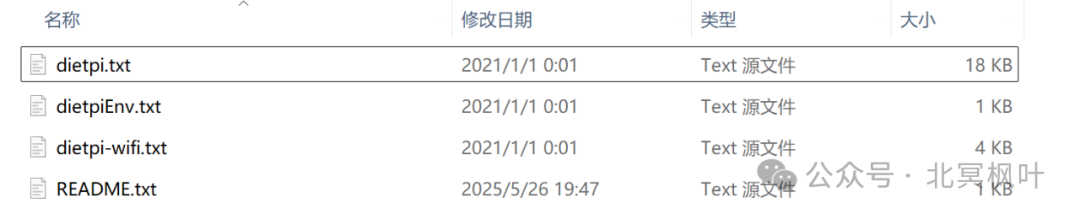
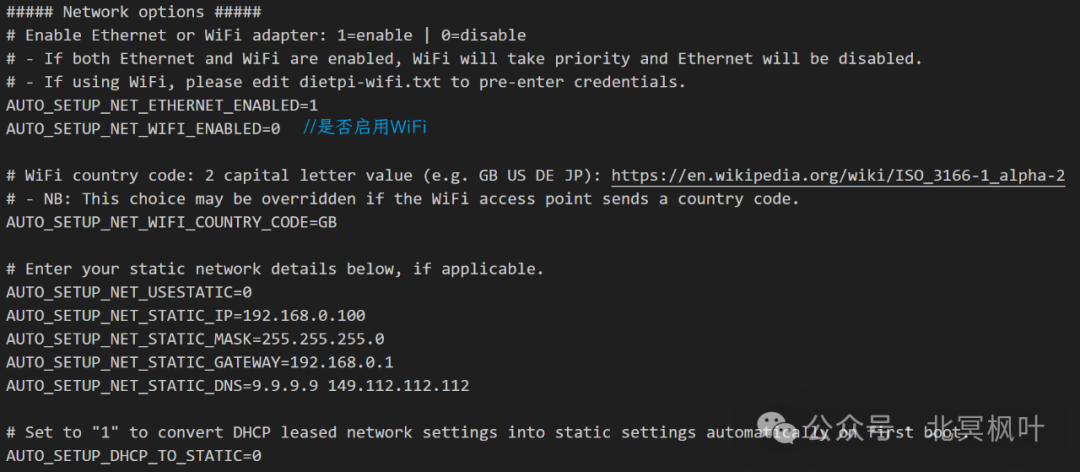
The files dietpi.txt and dietpi-wifi.txt are the ones we need to modify. The dietpi.txt file contains many parameters, and here we only modify the network-related parts. More parameter modifications and explanations can be found on the FriendlyElec official website (https://wiki.friendlyelec.com/wiki/index.php/DietPi/en#.E9.85.8D.E7.BD.AE.E6.96.96.E4.BB.B6dietpi.txt). Open the dietpi.txt file, find the Network options section, locate AUTO_SETUP_NET_WIFI_ENABLE=0, and change it to AUTO_SETUP_NET_WIFI_ENABLE=1. This option is used to enable WiFi functionality, as shown in the image below.
Connect to NanoPi NEO2
Since my router is in bridge mode, directly connecting the NanoPi to the LAN port of the router does not allow it to obtain an IP address. Therefore, I chose to connect the NanoPi NEO2 to the computer via Ethernet and share the network from the computer to the NanoPi.
After connecting the NanoPi to the computer via Ethernet, press win+r keys together, type <span>ncpa.cpl</span>, and enter the Windows network management interface. Right-click on WLAN, select Properties -> Sharing, check Allow other network users to connect through this computer’s Internet connection, and in the Home networking connection below, select the Ethernet connection for the NanoPi (this is Ethernet 4, but it may vary, usually the last one).
Note: If you are using a VPN software with virtual network card mode enabled, you need to disable it; otherwise, it may cause the computer to lose network connectivity after sharing the network.

After completing this, double-click on the Ethernet connection for the NanoPi, click on Details, and you can see the IP address assigned to that Ethernet connection after sharing the network.
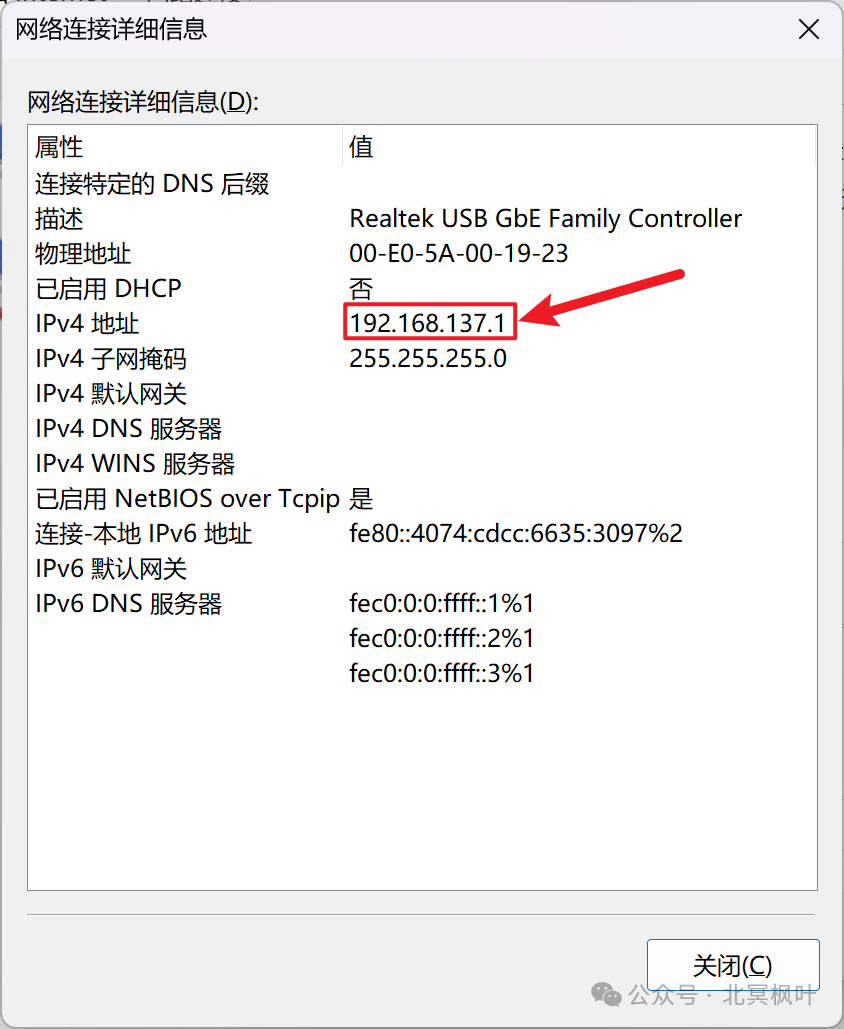
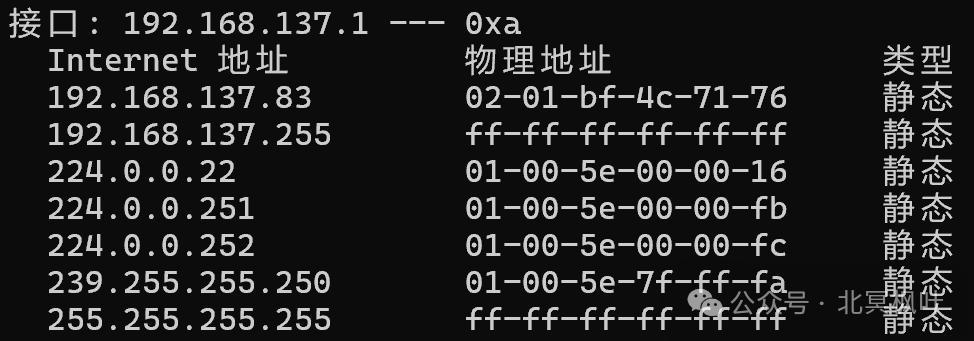
After confirming the assigned IP address, we also need to check the specific IP address of the NanoPi. Press win+r keys together, type <span>cmd</span>, enter the command line interface, and then type <span>arp -a</span>. Find the IP address we confirmed above; the first one is the IP address obtained by the NanoPi (note that it should not end with 255; if it does, it indicates that the NanoPi failed to obtain an IP address. You can try unplugging and re-plugging the Ethernet cable, restarting the power supply, or re-sharing the network to resolve this issue. Reconnecting may cause the IP address to change).
After obtaining the IP address, we can connect via the shell tool.
Connect to NanoPi via Shell Tool
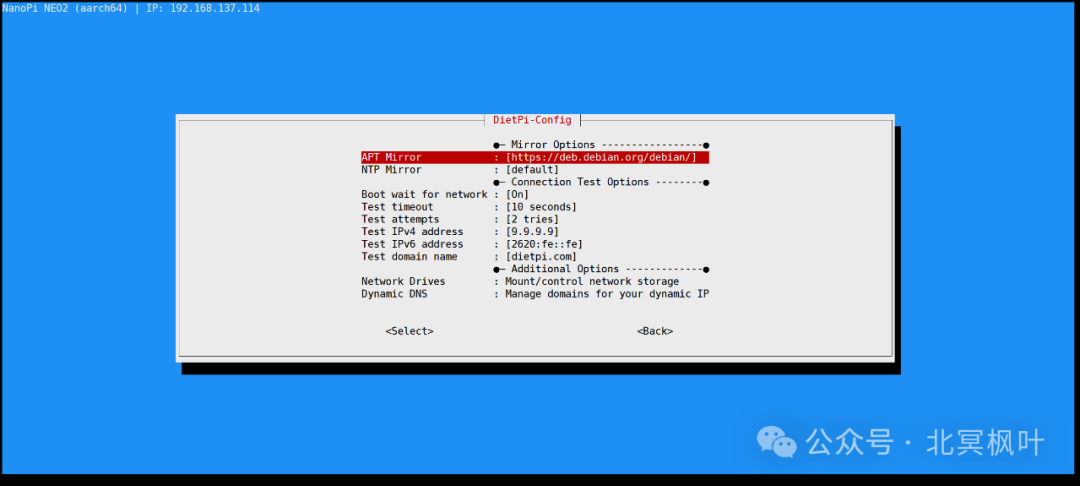
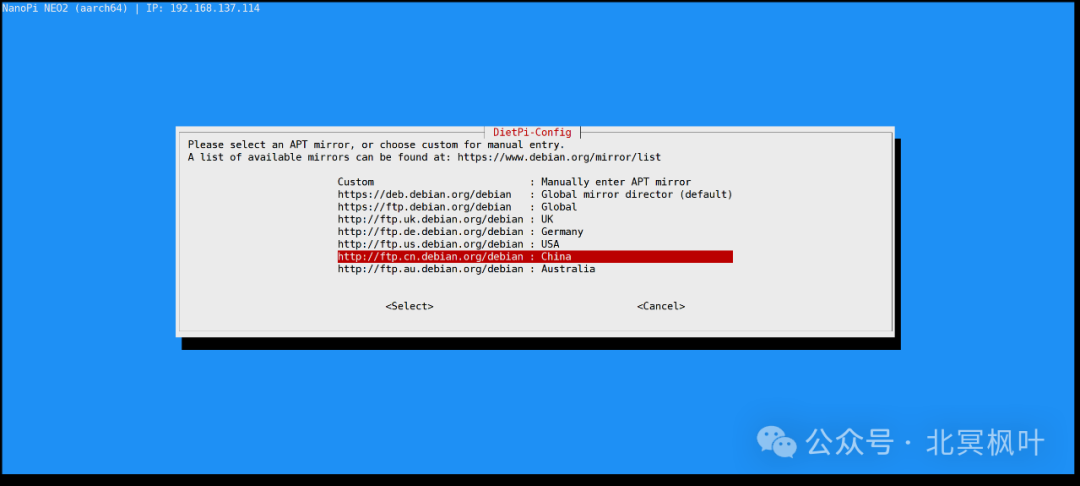
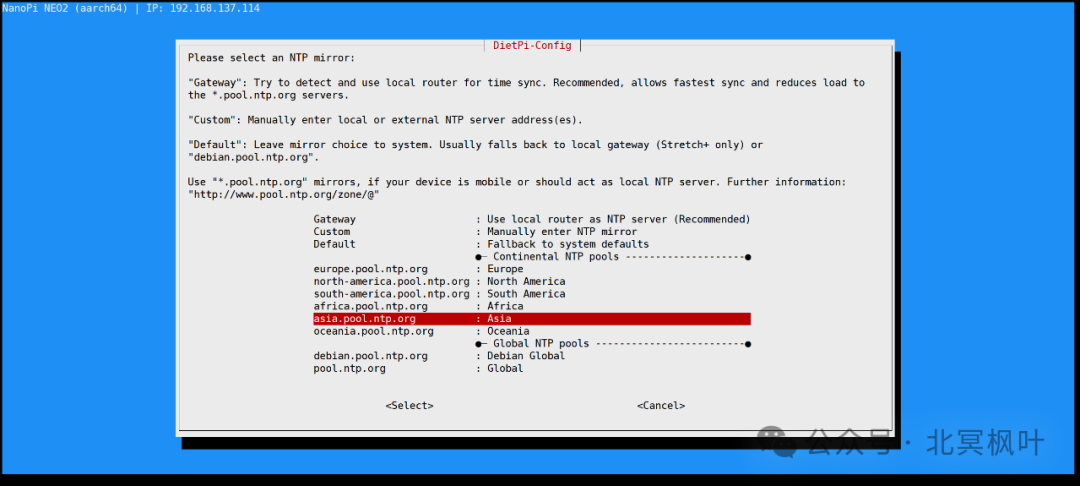
Open Xshell, enter the IP address obtained in the previous step, with the username as root and the login password as dietpi. After a successful connection, the system will automatically enter the update state. However, since the DietPi update source is defaulted to overseas, it may fail to update in China. It is recommended to press ctrl+c to pause the update, then type <span>dietpi-config</span>. Use the arrow keys to navigate and select the eighth item Network Adaptor: Misc to modify APT Mirror and NPT Mirror.
At this point, we have successfully entered the system. To make it more convenient for future use, we will use the wireless network card to connect the NanoPi to WiFi.
Connect to WiFi
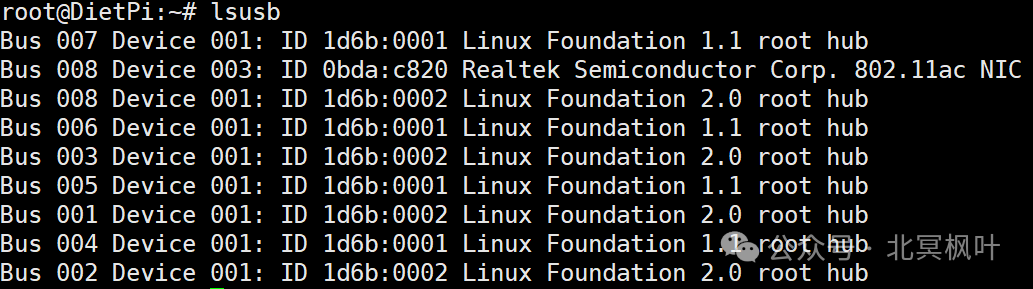
In the shell interface, type <span>lsusb</span> to view the connected hardware devices and find the RTL8188GU entry (determine based on your network card model).

Here, DietPi has defaulted the USB network card to be connected as a virtual CD-ROM drive. We need to switch it from CDROM mode to WiFi mode. This step requires a tool called usb_modeswitch. Enter the following commands:<span>apt update</span><span>apt install usb-modeswitch -y</span>. After the installation is complete, enter <span>usb_modeswitch -KW -v 0bda -p 1a2b</span>, where -K is used to attempt to eject the device, -W is used to execute the automatic switch command, -V 0bda indicates the vendor ID of the device, where 0bda needs to be replaced with your own vendor ID, which can be viewed by entering lsusb after the command, and -P 1a2b indicates the product ID of the device, where 1a2b indicates that the device is in CD-ROM mode. After executing, enter <span>lsusb</span> again to check the device status; you should see that the network card has successfully switched to wireless mode.
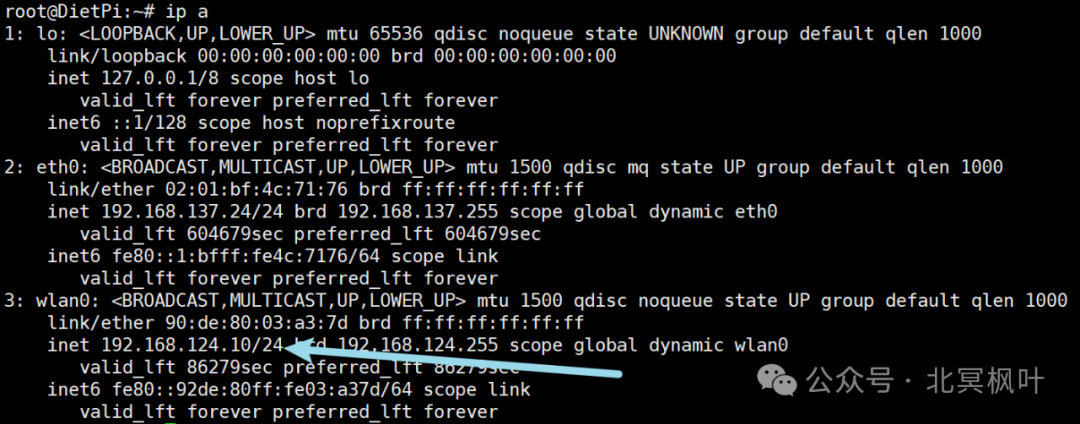
If you have already configured WiFi in the pre-configuration file, you can enter <span>ip a</span> to check if the wireless network card has successfully connected to WiFi. If you can successfully query the IP address, it indicates that WiFi has been successfully connected.
At this point, we can try to connect to the NanoPi via WiFi using the shell tool. If we can successfully enter the system, it indicates that the configuration has been successful!
If WiFi was not pre-configured, you can also enter <span>dietpi-config</span>, select 7 : Network Options: Adapters, then select WLAN Interface, choose Scan, find your WiFi, enter the password, save, return to the main menu, and select Apply to complete the setup.